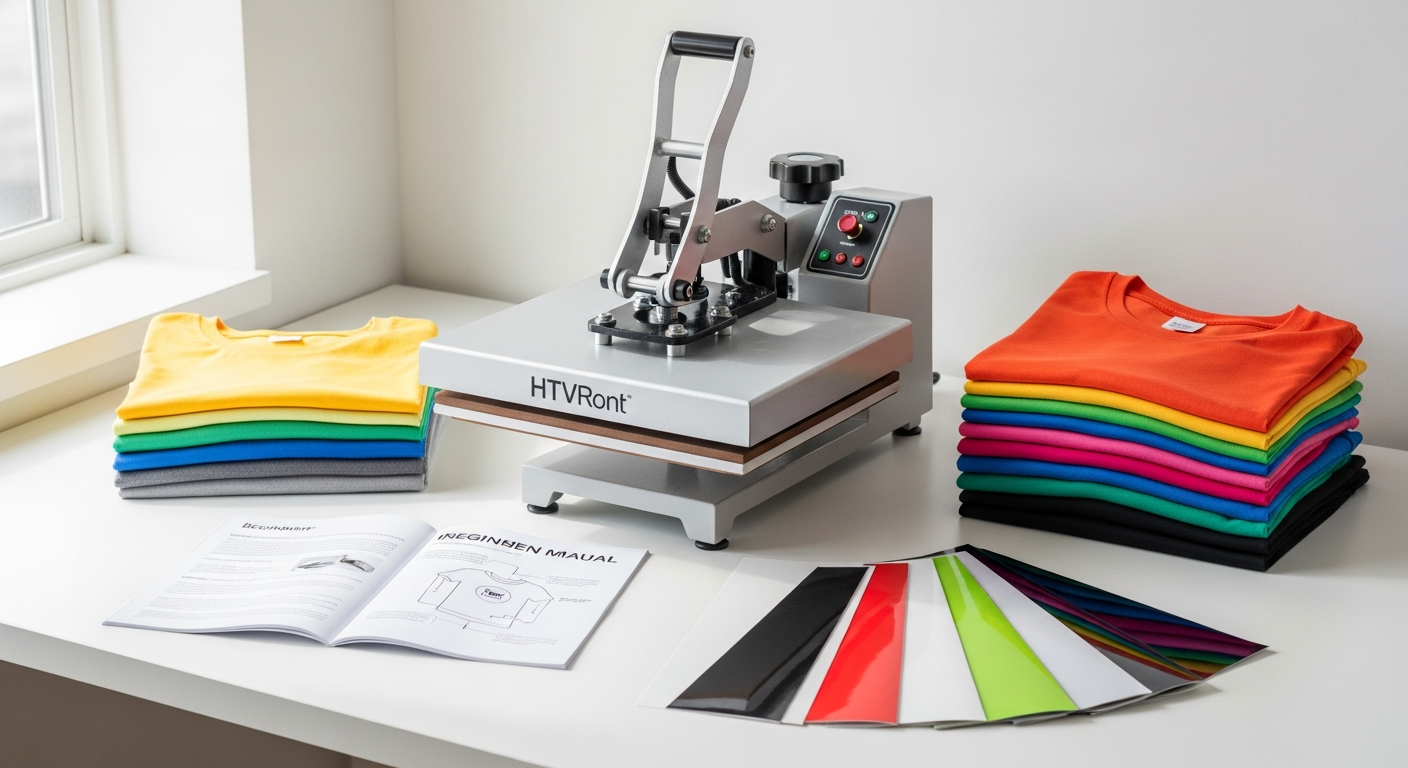
Getting Started: Unboxing and Initial Setup
When your HTVRont Automatic Heat Press arrives, the unboxing experience sets the tone for your crafting journey. The package includes the main heat press unit, a power cord, a user manual, and heat-resistant gloves. Some models come with preset instruction cards for quick reference during your first projects. Taking inventory of these components ensures you have everything needed before powering on the machine.
Setting up your craft space properly determines how smoothly your projects will flow. The HTVRont requires a stable, flat work surface that can support its weight without wobbling. A dedicated crafting table or sturdy desk works perfectly. Keep the machine away from water sources and ensure adequate clearance on all sides—at least 12 inches of space helps with airflow and prevents accidental contact with the heated platen during operation.
What's Included in the HTVRont Automatic Heat Press Box
The standard package contains the heat press unit with its built-in digital control panel, a detachable slide-out tray, a power cable rated for your region's voltage, and a pair of heat-resistant gloves for safe handling. The user manual provides setup instructions and safety guidelines specific to your model. Some versions include a quick-start card highlighting preset temperature settings for common materials.
Space Requirements and Ideal Placement in Your Craft Room
Position your heat press on a sturdy, level surface away from fabric storage or flammable materials. The ideal crafting station places the machine at comfortable working height—typically around 30-36 inches from the floor. Ensure your space has room for garment staging on one side and finished projects on the other, creating a natural workflow. Avoid areas prone to vibrations from machinery or foot traffic, as movement affects pressure consistency.
Electrical Considerations and Safety Precautions Before First Use
Check that your outlet matches the power cord specifications and can handle the machine's electrical draw. Most HTVRont models require a standard 110V outlet in North America or 220V in other regions. Avoid using extension cords if possible; plugging directly into a wall outlet provides stable power. Never operate the machine with wet hands or in damp conditions. Ensure the area is well-lit so you can see the digital display clearly and monitor your materials throughout the pressing cycle.
Calibrating the Digital Control Panel for Accurate Readings
Before your first project, become familiar with the digital control panel buttons and display. Power on the machine and let it complete its initialization sequence. The display should show the current temperature and time settings. Navigate through the menu using the arrow buttons to understand how to adjust temperature and duration. Some models feature a calibration mode in the settings menu—consult your manual to verify if your specific version requires calibration adjustments.
Understanding the Slide-Out Tray Mechanism and Safety Features
The slide-out tray is a signature safety feature that separates your hands from the heat source. Before pressing, position your garment or blank on the tray while it's fully extended outward. Gently slide the tray inward until it seats completely against the base—you'll feel a subtle click indicating proper positioning. When the cycle completes, the tray automatically stops, allowing you to carefully slide it back out and remove your finished piece. This mechanism eliminates the awkward reach over hot surfaces that characterizes manual presses.
Pre-Operation Checklist to Ensure Proper Functioning
Before each crafting session, run through a quick checklist: verify the power cord is firmly connected, confirm the slide-out tray moves smoothly in both directions, check that the digital display lights up and responds to button inputs, ensure the heat plate appears clean and undamaged, and confirm adequate ventilation in your work area. Power on the machine and allow it to reach your desired temperature—this typically takes less than 5 minutes. Listen for the beep indicating readiness. These pre-flight checks catch potential issues before they affect your projects.
Understanding the Automatic Pressure System
The automatic pressure system represents the core innovation that sets the HTVRont apart from manual alternatives. Rather than guessing the correct pressure for each material thickness, the machine's intelligent sensor detects how thick your garment or blank is and automatically adjusts pressure accordingly. This technology eliminates the trial-and-error phase that frustrates beginners and causes inconsistent results. The system handles everything from delicate fabrics to chunky embellished items without manual intervention.
How the Intelligent Pressure Adjustment Technology Works
When you slide the tray into position, sensors measure the distance between the upper and lower platens. The machine calculates the material thickness and adjusts pneumatic or mechanical pressure systems to apply optimal force. The original HTVRont model handles materials up to 1 inch thick, while the Auto Heat Press 2 accommodates up to 4.5 centimeters. This intelligent compensation means a thin silk shirt receives different pressure than a thick hoodie—exactly what each material needs for perfect results.
Pressure Settings for Different Material Thicknesses
For standard T-shirt weight cotton, the automatic system typically applies moderate pressure that bonds HTV or sublimation transfers without puckering fabric. Lightweight materials like silks or thin blends receive gentler pressure, preventing distortion. Heavier items—zip-up hoodies, canvas tote bags, or multiple-layer blanks—trigger increased pressure to ensure complete ink or adhesive transfer. The beauty of automation is that you don't calculate these differences yourself; the machine handles the math.
Why Automatic Pressure Eliminates Common Pressing Mistakes
Manual presses require operators to judge pressure by feel, often leading to inconsistent results. Too little pressure leaves incomplete transfers with patchy ink coverage. Excessive pressure damages delicate fabrics or causes adhesive to seep onto the platen. The HTVRont's automatic system eliminates these guessing games. Your transfers come out professional-grade because the pressure adjusts precisely to each item's needs. This consistency is why 73% fewer crafters abandon their projects when using automatic systems compared to manual methods.
Comparing Automatic vs. Manual Pressure Adjustment Systems
Manual presses require skill development—knowing how hard to press the handle for different materials takes practice and often results in wasted blanks during the learning curve. Automatic systems skip this learning phase entirely. You place the item, slide the tray in, and the machine handles pressure optimization. This difference becomes especially significant when switching between material types frequently. An automatic press adapts instantly; manual presses require resetting pressure wheels or handles between each item.
Thickness Detection Capabilities and What They Mean for Your Projects
The HTVRont's thickness detection enables you to work with diverse project types without recalibration. A single machine accommodates T-shirts, tote bags, baby onesies, canvas shoes, fabric patches, and specialty blanks. The sensor reads thickness once during the pressing cycle, maintaining consistent pressure throughout. This means batch processing becomes practical—press ten different item types back-to-back without adjusting anything except temperature and time settings between materials.
Real-World Applications Where Automatic Pressure Shines
Custom gift creators benefit tremendously from automatic pressure when personalized items vary in style and weight. One moment you're pressing a delicate silk pillowcase; the next you're working with a thick denim jacket. The automatic system adapts instantly to each project. Small business owners appreciate how automatic pressure reduces defect rates—fewer ruined blanks means higher profit margins. Hobbyists enjoy the confidence that comes from knowing each project will look professional, encouraging them to tackle ambitious designs they'd otherwise avoid.
Temperature and Time Settings Mastered
Temperature control defines the quality of your heat transfers. Different materials require different heat levels—HTV needs less heat than sublimation, while DTF transfers demand precise temperature ranges. The HTVRont's digital control panel makes dialing in the perfect settings straightforward. Understanding temperature fundamentals prevents scorched transfers, incomplete bonding, and wasted blanks.
Heat-Up Speed Advantages: Reaching 300°F in Under 5 Minutes
The HTVRont's rapid heat-up time is a game-changer for workflow efficiency. Reaching 300°F in under 5 minutes means minimal waiting between powering on and starting your first project. This speed advantage multiplies across a crafting session—if you're producing multiple items, the machine rarely sits idle. Compare this to competitor models requiring 10-15 minutes to reach operational temperature, and the productivity gain becomes obvious. You're spending more time creating and less time waiting.
Maximum Temperature Capabilities (410°F/210°C) and What They Enable
The 410°F maximum temperature handles virtually every heat transfer material commonly used by crafters. Sublimation transfers typically require 385-400°F, falling comfortably within this range. HTV usually needs 300-330°F. DTF transfers work well at 340-380°F. This generous temperature ceiling ensures future compatibility as you explore new materials and techniques. You'll rarely feel limited by the machine's temperature capabilities—instead, you're covered for current and emerging transfer methods.
Digital Control Panel Navigation and Preset Mode Options
The control panel features intuitive buttons for temperature adjustment, typically with up/down arrows for fine-tuning. The digital display shows current and target temperatures, remaining time, and sometimes material type indicators. Many models include preset buttons for common materials—press the "HTV" button and temperature automatically sets to optimal levels; press "Sublimation" and settings adjust accordingly. This preset functionality accelerates your workflow, especially when switching between materials frequently.
Creating Custom Temperature Profiles for Different Heat Transfer Materials
Beyond presets, the HTVRont allows saving custom profiles for your specific materials and preferences. If you discover that your particular brand of HTV works best at 315°F with 12-second dwell time, you can store these settings. The next time you press that material, simply recall the custom profile. This feature becomes invaluable for small business owners managing multiple client projects with varying specifications. You're building a reference library of settings that consistently deliver professional results.
Temperature Ranges for HTV, Sublimation, and DTF Transfers
Heat Transfer Vinyl (HTV) typically requires 300-330°F for 10-15 seconds, depending on vinyl type and garment fabric. Sublimation transfers work optimally at 385-400°F for 45-60 seconds, allowing ink to fully sublimates into fabric fibers. Direct-to-Film (DTF) transfers need 340-380°F for 20-30 seconds, with slightly lower temperatures for lighter-weight fabrics. The HTVRont's temperature range covers all three methods comfortably. Understanding these ranges prevents common mistakes like applying sublimation temperature to HTV, which causes adhesive failure.
Time Duration Recommendations Based on Material Type and Garment Weight
Light cotton T-shirts typically need 12-15 seconds for HTV pressing, while heavier hoodies require 15-20 seconds to allow heat to penetrate multiple layers. Sublimation transfers generally need longer dwell times (45-60 seconds) to ensure complete ink transfer into fabric. DTF transfers fall between these extremes at 20-30 seconds. Weight matters significantly—a lightweight silk shirt needs less time than a densely woven canvas tote bag. The digital timer on the HTVRont allows you to set precise durations, and the audible beep alerts you when the cycle completes.
Working with Different Heat Transfer Materials
Each heat transfer method brings unique characteristics and requirements. The HTVRont's versatility shines when working across multiple materials. Mastering the nuances of each transfer type transforms your capability from one-trick operator to confident multi-method crafter.
HTV Application Techniques Using the HTVRont's Consistent Heating
Heat Transfer Vinyl requires clean, stable pressure for complete adhesive activation. The consistent heating across the entire 15×15 inch plate ensures even bonding from edge to edge. Position your garment with the vinyl facing down on the platen, slide the tray in, and let the automatic system handle pressure. The key to HTV success is avoiding bunching—any wrinkles in the fabric create air pockets that prevent proper bonding. After pressing, allow the garment to cool for 10-15 seconds before peeling away the carrier sheet. The HTVRont's stable, even heat eliminates hot spots that plague manual presses.
Sublimation Transfer Best Practices for Vibrant, Long-Lasting Results
Sublimation transfers require a different approach than vinyl pressing. The ink must fully sublimate into synthetic fabric fibers, which demands sustained, consistent heat. Position your sublimation paper (ink-side down) directly on the sublimation-coated blank. The longer dwell times (45-60 seconds) allow complete ink migration. The HTVRont's ability to maintain precise temperature throughout the cycle prevents uneven color saturation. After pressing, allow the item to cool naturally—don't rush removal, as premature peeling can cause incomplete sublimation at the edges.
DTF (Direct-to-Film) Transfer Optimization on the 15×15 Inch Heat Plate
DTF transfers have gained popularity for their flexibility and vibrant results. These transfers are pre-printed on special film with a powder adhesive layer. Position the DTF print (ink-side down) on your garment, slide the tray in, and press. The moderate temperature (340-380°F) and moderate dwell time (20-30 seconds) activate the adhesive without scorching the film. The consistent heating across the HTVRont's plate ensures the adhesive activates evenly across the entire design. Once the cycle completes, peel away the film carefully while the garment is still warm.
Fabric Compatibility: T-Shirts, Tote Bags, and Specialty Blanks
The HTVRont handles standard garment weights without issues. T-shirts and lightweight long-sleeves work smoothly. Canvas tote bags present slightly more challenge due to thickness, but the automatic pressure system compensates admirably. Specialty blanks like pillowcases, aprons, and fabric patches all work within the 15×15 inch plate dimensions. The key is ensuring your design fits the plate area—oversized designs require creative positioning strategies. Always pre-measure your blank against the plate before pressing to avoid surprises.
Material-Specific Temperature and Pressure Combinations
Combining the right temperature with appropriate dwell time creates the magic. Delicate synthetics need lower temperatures (325°F for some HTV) to prevent melting or pilling. Dense cotton blends handle higher HTV temperatures (330°F) without issue. Polyester blanks for sublimation specifically want temperatures at the upper range (400°F) for complete ink migration. The HTVRont's automatic pressure system adjusts for material thickness, while you control temperature and time. This combination of automatic and manual controls gives you precision without overwhelming complexity.
Avoiding Common Mistakes with Each Transfer Method
With HTV, the primary mistake is insufficient pressure or incomplete contact between vinyl and garment—the automatic system prevents this. Don't skip the cooling-down period before peeling carrier sheets, or adhesive won't fully set. For sublimation, using non-coated blanks wastes expensive transfers; the ink needs the coating to sublimate properly. With DTF, ensure the film sits completely flat on the garment before pressing. Common across all methods: never rush the process. The HTVRont's reasonable heat-up times tempt quick pressing, but following recommended dwell times ensures professional results.
Maximizing the 15×15 Inch Heat Plate
The 15×15 inch plate size sits at the sweet spot for crafters—large enough for impressive designs, small enough to reach any part of the plate comfortably. Strategic usage maximizes efficiency and enables creative solutions for larger projects.
Project Sizing and Layout Strategies for Optimal Plate Usage
A 15×15 inch plate accommodates most standard T-shirt front designs comfortably. However, understanding exact dimensions prevents disappointment. Your actual pressing area is slightly smaller than the stated plate size due to the plate edges. Designs fitting within 14.5 x 14.5 inches press reliably without edge issues. For asymmetrical designs, positioning them centrally ensures even heating. Batch processing identical items uses plate space efficiently—press one item, adjust positioning slightly, and press another without reheating the machine.
Batch Processing Techniques to Increase Production Efficiency
Batch processing multiplies the HTVRont's value for small business operations. Group similar items—ten white T-shirts, five navy hoodies, eight tote bags—and process each batch without changing temperature settings. This approach minimizes the machine's idle time between projects and streamlines your workflow. You're not constantly adjusting temperature; instead, you're maintaining consistent settings while moving different items through the press. This efficiency makes the difference between a hobby machine and a small-business tool.
Positioning Guidelines for Even Heat Distribution Across the Plate
Position designs centrally on the plate whenever possible, ensuring equal distance from all edges. Off-center designs experience slight temperature variations near the plate boundaries. For full-coverage designs, position them slightly toward the center rather than extending to the very edges. When pressing garments, position the design area directly on the center of the plate. This centering strategy exploits the HTVRont's most consistent heat zone, reducing the risk of incomplete transfers at design edges.
Working with Oversized Designs and Creative Workarounds
Designs larger than 15×15 inches require creative solutions. Splitting multi-part designs across two pressing cycles works—press the left half, reposition, press the right half with slight overlap to ensure continuity. Alternatively, back designs position lower on the garment, allowing larger dimensions. Sleeve designs create additional real estate for modest-sized transfers. These workarounds aren't ideal, but they expand what the 15×15 inch plate can accomplish. For consistent work with oversized designs, a larger press becomes a future investment consideration.
Protecting the Heat Plate from Damage and Maintaining Surface Quality
The heat plate is your most valuable component. Avoid pressing directly against the platen without a protective barrier for excessive use. Some crafters place a thin silicone mat on the lower platen for protection, though this slightly reduces heat transfer efficiency. Never scrape the plate with metal tools; use soft cloths for cleaning. Allow the plate to cool completely before attempting any maintenance. Small scratches don't affect performance significantly, but deep gouges can cause uneven heating. Treat your plate carefully, and it will deliver consistent results for years.
Advantages of This Size for Both Hobbyist and Small Business Operations
For hobbyists, the 15×15 inch size is perfect—large enough for impressive results, small enough to fit in most craft spaces. The plate handles personal projects, personalized gifts, and experimentation without waste. For small business operations, this size covers the majority of orders. Most custom apparel printing stays within these dimensions. The compact footprint reduces workspace requirements compared to larger industrial presses. You're getting commercial-quality results without commercial-size equipment taking over your workspace.
Safety Features and Best Practices
Safety underpins responsible crafting. The HTVRont incorporates several safety features, and combining them with proper technique creates a secure working environment where you can focus on creativity rather than worry.
The Slide-Out Tray Advantage: Keeping Hands Away from Heated Surfaces
The slide-out tray is the HTVRont's most significant safety innovation. You position your garment or blank on the extended tray—away from the heating platen. Once positioned correctly, you slide the tray inward, bringing the item into contact with the heat. Your hands never approach the hot upper platen. Compare this to manual presses where operators reach over heated surfaces to position items, risking burns. The tray mechanism prevents accidental contact with 400°F heat sources, making the HTVRont inherently safer than manual alternatives.
Proper Garment Placement Techniques to Prevent Burns
Always position your item on the fully extended tray before initiating any pressing cycle. Verify the design sits flat and wrinkle-free on the tray surface. Ensure no loose fabric dangles off the tray edges where it might contact the upper platen prematurely. Slide the tray smoothly and deliberately—rushing creates awkward positioning and potential contact with heated surfaces. When the cycle completes, wait for the beeping alert before retracting the tray. Never force the tray inward if it resists, as this indicates improper item positioning.
Automatic Shut-Off Features and Timer Reliability
The HTVRont includes automatic shut-off capabilities after the preset timer completes, preventing items from over-pressing and becoming damaged. The digital timer displays remaining seconds clearly. Some units automatically stop heating once the cycle finishes, while others maintain temperature for continued use. Either way, relying on the timer prevents distraction-related mistakes. If you're multitasking (checking emails, answering messages), the automatic alert ensures you don't forget about items pressing inside the machine.
Heat-Resistant Gloves and Protective Equipment Recommendations
The included heat-resistant gloves protect hands when handling hot blanks or garments immediately after pressing. These gloves remain usable even when warm, unlike cotton gloves that can trap heat. Some crafters prefer silicone-coated gloves for better grip on finished items. Keep gloves nearby during extended crafting sessions. Beyond gloves, wearing long sleeves and avoiding loose jewelry prevents accidental contact with heated surfaces. Hair should be pulled back away from the machine. These basic precautions eliminate most burn-related risks.
Ventilation Requirements for Extended Crafting Sessions
Some heat transfer materials emit fumes when heated, particularly sublimation transfers. Extended crafting sessions require adequate ventilation—open a window, run a fan, or work in a well-ventilated space. The HTVRont's rapid heat-up time actually helps here; you're not running the machine continuously at high temperature like older presses. A 5-10 minute pressing session needs far less ventilation support than manual presses requiring 20-30 minute dwell times. For full-time commercial use, consider installing a ventilation hood above your pressing station.
Emergency Procedures and Maintenance Safety Protocols
In case of unexpected issues—unusual sparking, burning smells, or uncontrolled temperature increases—unplug the machine immediately. Never attempt repairs while the unit is powered on. Allow adequate cooling time before inspecting internal components. For most issues, contacting customer support is safer than DIY troubleshooting. Regular maintenance includes unplugging before cleaning, allowing complete cooldown, and using soft cloths on the heat plate. These simple protocols keep your crafting space safe and your equipment in good working condition.
Troubleshooting Common Issues
Even reliable machines occasionally present challenges. Knowing how to diagnose and address common issues keeps your crafting momentum going without unnecessary frustration.
Uneven Heat Distribution Across the Plate and Solutions
Occasionally, some areas of the plate heat faster than others, causing patchy transfer results. First, verify that your workspace surface is completely level—a tilted table causes uneven platen contact. Second, confirm the item sits flat on the tray without wrinkles or bunching. Third, ensure nothing obstructs the automatic pressure system. If problems persist, place a thin aluminum plate beneath your items to help distribute heat more evenly. Most uneven heating results from operator technique rather than machine defects.
Pressure Inconsistencies and Adjustment Strategies
The automatic pressure system occasionally applies slightly different pressure to different items, especially when item thickness varies significantly. The original HTVRont model doesn't allow manual adjustment, so consistency depends on consistent item thickness. If pressing different material types (thin cotton vs. thick canvas), results will vary naturally. Grouping similar items and processing them sequentially produces more consistent results than rapid switching between different thicknesses. Consider the Auto Heat Press 2 model if you regularly press materials exceeding 1 inch thickness.
Digital Display Errors and Reset Procedures
The digital display occasionally shows error codes or fails to respond to button inputs. First, try powering off the machine completely and waiting 30 seconds before restarting. This basic reset resolves many display glitches. If the issue persists, check that all connections between the control panel and the heating element are secure (though this requires opening the unit). Contact customer support for error codes that don't resolve with a simple restart. Most display issues are minor and resolve without requiring professional service.
Heat-Up Time Variations and What Causes Them
You might notice the machine reaches 300°F in 4 minutes one day and 6 minutes another day. Ambient temperature significantly affects heat-up speed—a cooler room requires slightly longer warm-up time. Voltage fluctuations in older electrical systems can also cause variations. If heat-up time suddenly increases significantly beyond normal variations, it might indicate a heating element issue requiring professional inspection. Track your typical heat-up times, and deviations from your baseline signal potential problems.
Material Sticking or Scorching Prevention Techniques
Scorching occurs when temperature exceeds what the material tolerates. Always verify temperature settings before starting a new project type. If using a new material for the first time, test on a spare blank first. Sticky residue on the platen results from adhesive buildup. Regular cleaning with a soft, slightly damp cloth prevents accumulation. Never use abrasive cleaners that scratch the surface. If material sticks to the platen, allow complete cooldown before attempting removal. Burning or melting plastic components indicates dangerously high temperatures requiring immediate power-down.
When to Contact Customer Support Versus DIY Fixes
Contact customer support for issues involving heating elements, pneumatic systems, electrical connections, or any internal components. These require professional diagnosis and repair. Handle yourself: simple display errors (restart the machine), minor plate cleaning, and basic troubleshooting like checking power connections and verifying settings. If anything involving heat output, pressure mechanisms, or electrical safety seems wrong, err on the side of caution and reach out to professionals.
Your Heat Press Journey Starts Here
The HTVRont Automatic Heat Press Machine represents your gateway to producing professional-quality heat transfers with remarkable consistency. The automatic pressure system shoulders the technical burden, allowing you to focus purely on creativity and design. Rapid heat-up times mean you're pressing projects within moments of deciding to start. The affordable price point between $249.99 and $350 makes professional heat pressing accessible to anyone serious about their craft.
Whether your vision involves creating personalized gifts for loved ones, launching a small business around custom apparel, or simply exploring your creative potential, the HTVRont delivers the results you envision. The 15×15 inch plate accommodates most standard designs. The digital control panel provides precision without overwhelming complexity. The slide-out tray keeps you safe while working comfortably. Most importantly, you'll find yourself pressing projects successfully on your first attempt rather than struggling through a learning curve that discourages so many crafters.
Your first project matters. It's the moment when technology and creativity intersect, producing something tangible and personal. The HTVRont ensures that first project looks professional—impressive enough that you'll immediately want to press another. Before long, you'll be batch processing orders, experimenting with multiple materials, and wondering how you ever managed without automatic pressure adjustment.
The crafting world awaits your contributions. Your unique designs, color combinations, and personalization touches matter. You simply needed the right tool—one that removes barriers rather than creating them. That tool is here.
Start your heat press journey with the HTVRont Automatic Heat Press Machine today.
Leave a Reply