Cloudy or yellowed headlights are more than a cosmetic issue. They reduce visibility, affect safety, and can even cause inspection failures.
The Norauto Headlight Restoration Kit offers a practical solution by restoring headlight clarity without the cost of full replacement.
With the right process, most headlights can be restored in under an hour.
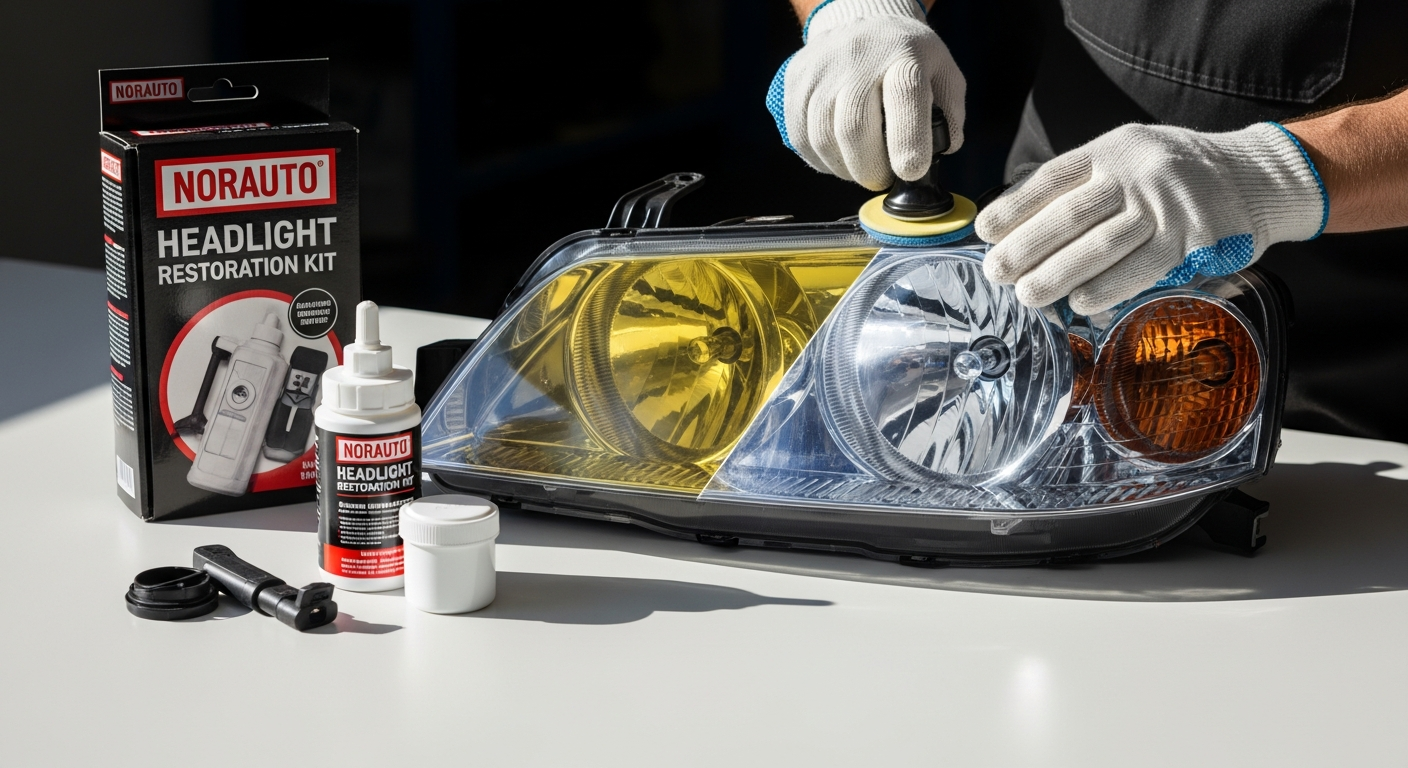
What Comes Inside the Kit
The kit includes everything needed for a full restoration process.
Key components:
- Drill adapter for faster sanding and polishing
- Sanding discs (800, 1000, 1500 grit)
- Polishing pad for finishing
- Liquid renovator compound
- Protective sealant spray
- Microfiber cloths
This setup allows both manual and power-assisted use depending on preference.
Why Headlights Become Cloudy
Headlight damage is caused by environmental exposure over time.
- UV rays break down protective coatings
- Micro-scratches scatter light
- Moisture and temperature changes accelerate wear
- Dirt and debris worsen surface damage
These factors reduce brightness and clarity, especially at night.
How the Restoration Process Works
The kit follows a step-by-step approach to remove damage and restore transparency.
- Sanding removes the oxidized outer layer
- Polishing smooths the surface
- Compound restores clarity
- Sealant protects against future damage
This process improves light output and overall visibility.
Cost Savings Compared to Replacement
Replacing headlights can be expensive, especially for modern vehicles.
- Kit price: approximately €19.99–€29.99
- Replacement cost: €200–€600+ per headlight
- Potential savings: up to €1,000 per vehicle
This makes restoration a more practical option for most users.
Real Benefits Beyond Appearance
Restoring headlights improves more than just how your car looks.
- Increases nighttime visibility by up to 80%
- Helps pass vehicle inspections
- Improves overall vehicle appearance
- Enhances resale value
These benefits make it a functional upgrade, not just cosmetic.
When DIY Restoration Works Best
The kit is most effective for certain types of damage.
- Light to moderate yellowing
- Surface oxidation
- Minor scratches
Severe damage, such as cracks or internal fogging, may require replacement instead.
Limitations to Consider
While effective, the kit has some limitations.
- Takes 45–60 minutes per headlight
- Results are temporary (2–4 years)
- Requires patience and proper technique
- Additional tools like a drill may be needed
Understanding these helps set realistic expectations.
Tips for Best Results
Proper technique improves the final outcome and durability.
- Work in a shaded area
- Follow sanding steps in order
- Apply even pressure during polishing
- Allow sealant to cure fully before exposure
These steps help achieve a cleaner and longer-lasting finish.
Who Should Use This Kit
The Norauto Headlight Restoration Kit is ideal for drivers who want a cost-effective fix.
- Car owners with aging headlights
- Drivers preparing for inspections
- DIY users looking to save on repairs
- Anyone wanting improved nighttime visibility
It may not suit users with severely damaged headlight lenses.
A Simple Way to Restore Safety and Clarity
The Norauto Headlight Restoration Kit provides a practical and affordable way to restore headlight performance. It improves visibility, enhances appearance, and extends the life of your headlights.
With proper use, it delivers results that rival professional services at a fraction of the cost.
Restore your headlights today with the Norauto kit and drive with clearer vision, better safety, and renewed confidence.
Leave a Reply