Push-fit models represent a fundamental shift in how Games Workshop approaches beginner accessibility. Unlike traditional plastic kits that require plastic cement to bond components together, push-fit models use precisely engineered connection points that allow pieces to snap together through friction alone. Each component features carefully designed tabs and sockets that create a secure bond without adhesives. This engineering breakthrough means you can assemble an entire army of miniatures using nothing more than your hands and perhaps a hobby knife to remove components from sprues.
The difference becomes immediately apparent when you compare assembly methods. Traditional plastic kits demand careful application of glue, waiting times for adhesive to cure, and the constant risk of accidentally bonding your fingers together. Push-fit components eliminate these hassles entirely. The models in the Recruit Edition are designed so that even a first-time builder can confidently snap pieces together without worrying about permanent mistakes or cleanup.
The Advantages of Snap-Together Components for New Hobbyists
No glue means no mess, and that’s perhaps the single greatest advantage for newcomers. Your workspace stays clean, your fingers remain glue-free, and there’s no acrid chemical smell filling your hobby area. Assembly becomes faster too—you can complete a Space Marine or Necron Warrior in fifteen to twenty minutes, compared to forty-five minutes or longer for traditional kits that require curing time between steps.
The speed advantage translates directly into motivation. New hobbyists see tangible progress quickly, which builds confidence and enthusiasm. Rather than spending an hour waiting for adhesive to set, you’ll have multiple models assembled and ready for painting within a single evening.
Common Misconceptions About Push-Fit Quality and Durability
Some veterans of traditional plastic kits worry that push-fit models sacrifice durability for convenience. This misconception doesn’t hold water. The connection points are engineered to withstand regular handling, transportation, and tabletop gaming. I’ve seen Recruit Edition models played with dozens of times without a single component failing. The friction-fit joints are genuinely robust, and the plastic used maintains the same quality standards as any other Games Workshop product.
Why the Recruit Edition’s 20 Miniatures Are Beginner-Friendly Without Sacrificing Detail
The Recruit Edition includes 20 miniatures carefully selected to balance variety with manageability. You get six Assault Intercessors for the Space Marines, providing a cohesive unit that teaches fundamental assembly principles. The Necrons side features ten Warriors plus three Scarab Swarms, offering different construction techniques without overwhelming complexity. Each model maintains the intricate detail Games Workshop is known for—you’re not getting simplified, dumbed-down sculpts. Instead, Games Workshop engineered these kits to be visually impressive while remaining accessible.
The Primaris Lieutenant and Royal Warden serve as centerpiece models, featuring enough detail to stay engaging without requiring advanced modeling skills. These characters motivate builders because they’re genuinely impressive once completed.
How Push-Fit Design Reduces Intimidation Factor for First-Time Model Builders
Intimidation kills hobbies before they start. Many prospective players avoid tabletop gaming specifically because they fear they’ll damage expensive models or “mess up” the assembly process. Push-fit design directly addresses this psychological barrier. Since components snap together without permanent adhesion, a new builder can actually disassemble models if they’re unhappy with the result. This safety valve eliminates the paralyzing fear of permanent mistakes.
Comparison of Assembly Time: Push-Fit Versus Traditional Plastic Kits
A traditional plastic Space Marine Intercessor requires approximately forty-five minutes to assemble when accounting for glue application, curing time, and cleanup. The push-fit version takes roughly fifteen minutes from sprue to completed model. That 200% speed increase means you can assemble your entire Recruit Edition collection in four to five hours, start to finish. Traditional kits would consume twenty to twenty-five hours for equivalent content.
Storage and Transport Considerations for Push-Fit Models
Push-fit models handle transport exceptionally well because their joints are robust enough to survive jostling in carrying cases. You don’t need special foam inserts or delicate handling protocols. Assembled miniatures can be transported in simple plastic boxes with minimal risk of damage. The paper gaming mat rolls up compactly, and all accessories fit neatly back into the original box for safekeeping.
Start your Warhammer 40,000 journey with the Recruit Edition from Minyarts today.
Unboxing and Organizing Your Recruit Edition Components
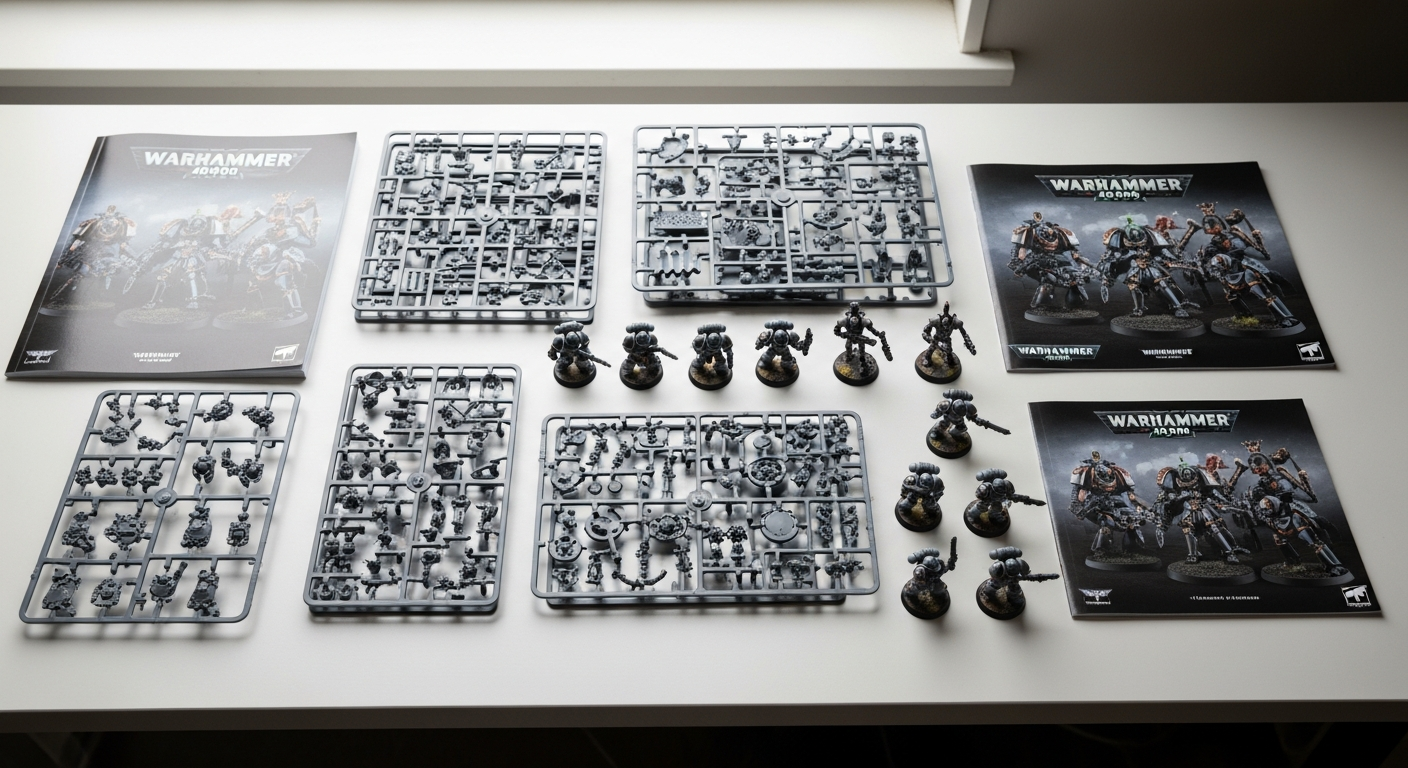
Complete Inventory Checklist of What’s Included in the Box
Your Recruit Edition contains everything needed for complete gameplay. Twenty plastic miniatures arrive on sprues, ready for assembly. One Primaris Lieutenant commands the Space Marines force, with five Assault Intercessors forming the core unit. The Necrons are led by a Royal Warden, supported by ten Necron Warriors and three Canoptek Scarab Swarms that provide mobility and support.
Beyond miniatures, the box includes a 64-page Recruit Manual that walks you through hobby fundamentals, lore, assembly, and basic gameplay rules. You’ll find datasheets for every unit, essential for understanding how models perform in combat. The Space Marines Transfer Sheet provides water-slide decals for adding chapter insignias and other details to your marines, offering customization options without complex freehand painting.
A heavyweight paper gaming mat serves as your battlefield, sized appropriately for beginner-level games. Plastic range rulers help measure movement and weapon ranges during gameplay. Dice in Space Marine and Necron colors facilitate combat resolution. These accessories represent genuine value—purchasing them separately would cost considerably more.
Overview of the Two Factions: Space Marines and Necrons
The Space Marines represent humanity’s finest warriors—genetically enhanced, armor-clad soldiers who’ve defended the Imperium for ten thousand years. In the Recruit Edition, your Space Marines force centers on a Primaris Lieutenant, a relatively young advancement in marine evolution featuring enhanced physiology. Five Assault Intercessors provide your striking force, equipped with storm rifles and melee weapons for versatile combat.
The Necrons embody an ancient alien threat awakening from a sixty-million-year slumber. These are undead machines, soulless entities that were once a biological species before uploading their consciousness into metallic bodies. Your Necron force begins with a Royal Warden commanding ten Necron Warriors—the backbone unit featuring reliable firepower and decent armor. Three Canoptek Scarab Swarms serve as fast-moving distractions and objective holders, adding tactical flexibility to your army.
These factions represent genuinely different playstyles. Space Marines favor durability and melee prowess, while Necrons lean toward consistent firepower and the ability to regenerate fallen warriors.
How to Organize Sprues and Small Components Before Assembly Begins
Successful assembly starts with organization. Before removing a single component from its sprue, lay out all your sprues and identify what you have. The Recruit Edition typically arrives on four to five sprues per faction. Photograph the sprues before disassembly—this reference image helps you identify components if pieces accidentally separate.
Create a small container system for organizing removed components by model type. Use small plastic boxes or even egg cartons to keep Assault Intercessor parts separate from Warriors, preventing confusion during assembly. Small components like weapons and heads are easy to lose, so dedicated storage prevents frustration.
Understanding the 64-Page Recruit Manual and Its Layout
The Recruit Manual is structured to guide you progressively from complete novice through your first game. Early sections explain tabletop gaming concepts and Warhammer 40,000 lore, providing context for why these factions fight. Middle sections feature assembly guides with photographic step-by-step instructions for each model type. Later sections cover painting fundamentals, including basic color schemes for both factions.
The final sections introduce gaming mechanics gradually, starting with core concepts and building toward complete game scenarios. Rather than throwing all rules at you simultaneously, the manual teaches through progressively complex examples.
Identifying Datasheets for Each Model Type
Datasheets represent the statistical backbone of Warhammer 40,000. These cards detail everything a unit can do: weapon damage, armor saves, special abilities, and point costs. Your Recruit Edition includes datasheets for the Primaris Lieutenant, Assault Intercessors, Royal Warden, Necron Warriors, and Canoptek Scarab Swarms. Each datasheet features identical information whether you’re reading a physical card or consulting the digital version.
Learning to read datasheets early accelerates your development as a player. You’ll quickly understand the difference between a marine’s storm rifle and a necron warrior’s gauss flayer—one excels at range while the other performs reliably at any distance.
What the Space Marines Transfer Sheet Offers for Customization
The included transfer sheet contains water-slide decals featuring Space Marine chapter insignias, purity seals, and tactical markings. These transfers allow you to add authentic chapter details to your marines without requiring freehand painting skills. Applying transfers is straightforward—cut out individual decals, soak them in water, slide them onto the model, and secure with a final decal sealant.
Transfers transform painted marines from serviceable to genuinely impressive. The small details they add create an authentic military appearance that even basic paint jobs benefit from significantly.
Setting Up a Dedicated Workspace for Assembly and Painting
Your assembly and painting success hinges partly on having proper workspace setup. Ideally, you want a flat table with good lighting, preferably natural daylight supplemented by a desk lamp. Organize your tools within arm’s reach: hobby knife, sprue cutters, files for smoothing mold lines, and glue (even though you won’t need it for assembly, you might use it for other components).
For painting, you’ll need water cups for rinsing brushes, a palette for mixing paints, and organized storage for your miniatures in progress. Keep completed models separated from works in progress to prevent accidental damage. Good workspace organization prevents lost components and reduces frustration when you can’t find that specific tool at the crucial moment.
Step-by-Step Assembly Process for Space Marines and Necrons
Pre-Assembly Preparation: Inspecting Sprues for Defects or Mold Lines
Before cutting anything from its sprue, examine each component carefully. Warhammer miniatures occasionally feature mold lines—slight ridges where the two halves of the injection mold meet. These lines are normal and easily removed, but identifying them early means you won’t miss them during finishing.
Look for any bent components, particularly on thin pieces like weapon barrels or antenna. Bent plastic can sometimes be carefully straightened with warm water, but severely warped pieces should be documented and photographed for potential replacement from Games Workshop’s customer service.
Removing Components from Sprues Without Damaging Delicate Parts
Quality sprue cutters are worth the investment. Standard scissors or hobby knives damage plastic and leave rough edges. A proper cutter makes a clean separation between component and sprue. Cut from the thicker sprue toward the model, leaving a small tab of plastic attached. Once removed, carefully file this remaining tab smooth using a hobby file.
Delicate components like weapon barrels, antennae, or cloth-like details require extra care. Approach these parts from the side rather than head-on, and cut with the cutter oriented to minimize stress on thin sections.
Assembly Sequence for Primaris Lieutenant and Assault Intercessors
Space Marine assembly follows a logical progression. Begin with the body, the largest component. For Assault Intercessors, the torso forms your base, with legs snapping into connection points on the lower body. The two leg pieces snap together, then into the torso.
Next, attach arms. Each Assault Intercessor features two arms with weapons molded as part of each limb. Arms snap into shoulder sockets with satisfying precision. Head components come next, simply pressing onto the neck connection point with gentle but firm pressure.
Weapons integration varies by specific loadout, but typically your assembled marine is complete after the head attachment. For the Primaris Lieutenant, similar principles apply, though this character features more options for weapons and customization through minor head and weapon variants.
Building Necron Warriors and Understanding Their Modular Construction
Necron Warriors feature fascinating modular design that teaches assembly fundamentals through engaging complexity. Begin with the torso, the largest central piece. Legs snap into sockets on the lower torso—Necron Warriors feature distinctively skeletal legs that differ substantially from marine anatomy.
Necron Warriors feature swappable weapon options—some models carry gauss flayers (rifles), while others wield gauss reapers (close combat weapons). Your Recruit Edition provides a specific load-out, but understanding this modularity helps you visualize how armies develop.
Arms attach next, then heads. Necron heads are notably different from organic species, featuring skeletal appearances that perfectly capture the “undead machine” aesthetic. The final assembly step involves attaching any ornamental details—Necron warriors sometimes feature small technological appendages that snap into designated slots.
Attaching Canoptek Scarab Swarms and Their Unique Assembly Quirks
Scarab Swarms represent perhaps the trickiest assembly in the Recruit Edition, but remain entirely manageable. Each swarm consists of multiple individual scarab components that snap together into a cohesive unit. Rather than individual scarabs, they’re represented as a single base-mounted cluster.
The assembly sequence involves stacking scarab pieces on a designated base, creating a three-dimensional swarm appearance. Connection points are generous, but the relatively thin components require careful handling to avoid bending. Assemble these during calm moments when you’re not rushed—they reward patience with genuinely striking visual results.
Handling the Royal Warden’s Intricate Details During Assembly
The Royal Warden serves as the Necron army leader, featuring substantially more detail than standard warriors. This character piece includes ornamental elements, a distinctive staff of office, and elaborate armor details. Assembly follows familiar progression: torso, legs, arms, head, and then specialized components.
The Royal Warden’s staff requires particularly careful attachment—it’s a relatively thin component connecting to the model’s hand. Use steady, gentle pressure rather than forcing the connection. The satisfaction of completing this centerpiece model provides genuine motivation for continuing your hobby journey.
Quality Control Checks Before Moving to Painting
Once assembly completes, examine your finished models for fit and alignment. All connections should be snug and secure. Joints should sit flush without gaps. If a connection feels loose, gently remove and reattach with slightly more pressure—push-fit connections can sometimes require repositioning to achieve optimal fit.
Check that all components are attached correctly according to instructions. It’s easier to correct assembly mistakes now than after priming. Stand each model upright and confirm that bases sit flat without wobbling.
Troubleshooting Common Assembly Issues
Occasionally, push-fit connections refuse to seat properly. If you encounter stuck pieces, resist the temptation to force them—you’ll crack the plastic. Instead, gently rock the component side to side while applying steady pressure. Gradual persuasion works better than brute force.
If a connection feels permanently tight even after proper assembly, slightly roughing up the connection points with fine sandpaper can improve fit. Never apply glue to push-fit connections unless a component genuinely fails—the beauty of push-fit design is its non-permanent nature.
Preparing Models for Painting and Base Coating Fundamentals
Why Primer Is Essential Before Painting
Primer serves a crucial function that beginners often overlook. Paint adheres poorly to bare plastic, resulting in flaking and chipping during handling. Primer creates a microscopically textured surface that paint clings to effectively. Additionally, primer provides consistent color foundation—white primer makes lighter colors easier to achieve, while black primer works better for darker schemes.
Skipping primer saves minimal time but creates exponentially more frustration when your carefully applied paint chips off during your first game. Invest the hour required for proper priming.
Choosing Between Spray Primer and Brush-On Primer for Your First Models
Spray primer offers speed and smooth, even coverage. A can of quality spray primer coats an entire Recruit Edition set in twenty minutes. Brush-on primer requires considerably longer application and can leave visible brush strokes unless applied with substantial skill.
Spray primer’s primary disadvantages are environmental—fumes require ventilation, and overspray can coat surrounding surfaces. If you lack outdoor space for spray priming, brush-on primer works perfectly adequately, simply requiring more patience and careful technique.
Quality matters significantly. Budget spray primers produce uneven coverage or clog detail. Investing in premium primer—Games Workshop’s specialty spray primers are excellent—prevents frustration.
Best Primer Colors for Space Marines Versus Necrons
Space Marines benefit from black or dark gray primer. Their predominantly blue armor shows excellently over dark primer, and metallic details pop against dark foundations. Black primer also helps define recesses and creates natural shadowing.
Necrons work better with silver or light gray primer. Their metallic color scheme emerges naturally over bright primer, requiring fewer paint layers for convincing results. Light primer also makes bright accent colors like green glow effects more vibrant.
Assembling and Preparing Bases Before Painting
Bases deserve attention from the start. Most Warhammer miniatures arrive on simple plastic bases that benefit from customization. Even basic texture adds visual interest—Games Workshop produces specialty bases, or you can create custom bases using sand, gravel, and modeling paste.
Priming your models on their bases simplifies painting and prevents base attachment issues later. If you’ve used modeling paste for base texture, ensure it’s completely dry before priming. Apply primer to bases with the same care as miniatures—textured bases need thorough coverage in recesses.
Undercoating Techniques That Ensure Smooth, Even Coverage
Spray primer application requires a light touch and multiple thin coats rather than single heavy application. Hold the spray can twelve to eighteen inches from your models. Apply primer in short bursts, moving the can continuously to avoid paint pooling. Rotate your models between coats to ensure complete coverage, including undercuts and internal spaces.
If using brush-on primer, thin it slightly with water or primer thinner. Apply in thin layers, allowing each layer to dry before additional coats. Focus on even coverage rather than full opacity in single applications—thin layers dry faster and look better than thick applications.
Drying Times and Environmental Factors Affecting Primer Application
Temperature and humidity dramatically affect primer drying. Spray primers dry fastest in warm, dry conditions—sixty to eighty degrees Fahrenheit with low humidity produces ideal results. Cold or humid conditions extend drying times substantially and can cause primer to dry unevenly or with a chalky appearance.
Plan your priming during favorable weather conditions. If you must prime in suboptimal conditions, allow extended drying time—sometimes double the manufacturer’s recommendation—before applying paint.
Budget-Friendly Primer Options Without Compromising Quality
Games Workshop primers are excellent but premium-priced. Alternative spray primers from hardware stores work reasonably well at fraction of the cost. Generic black or white spray primer from paint suppliers produces adequate results for beginner projects, though specialty hobby primers offer superior finish and detail preservation.
For brush-on primer, diluted acrylic craft paint serves as functional (if not ideal) primer. Mix water until the paint flows smoothly without becoming too thin, then apply as described above. This approach saves money while maintaining acceptable results.
Find quality primers and all your Warhammer 40,000 supplies at Minyarts.
Painting Techniques Tailored to the Recruit Edition Miniatures
Identifying the Core Colors for Space Marines
Space Marines typically feature primary blue armor, though specific chapter paint schemes vary significantly. For your Recruit Edition, a medium blue forms the foundation—not too bright, not too dark. Games Workshop’s Macragge Blue serves this role perfectly, though comparable blues from other manufacturers work equally well.
Gold or brass metallics accent armor details—shoulder pads, belt buckles, and ornamental trim. A deep red commonly appears on weapon grips, robes, and insignia. Metallic silver highlights metallurgical components like ribbing and weapon casings. Bone or cream color represents undersuit cloth and parchment details that most Space Marines carry.
Necron Color Schemes: Silvers, Greens, Golds, and Energy Effects
Necrons center on metallic colors—brushed metallic silver or aluminum represents their primary armor. Unlike organic materials that absorb light, Necron armor reflects it, so metallic paints prove essential for capturing their aesthetic.
Green represents active energy—weapons glow with emerald light, and various technological components feature green highlights. Gold metallics accent royal-bearing models like your Royal Warden, adding distinction and authority. Black washes create definition between metallic panels, making individual armor segments read distinctly.
Energy effects—the glowing green that makes Necrons look active and dangerous—benefit from layered transparent colors built up gradually over lighter bases.
Layering and Dry-Brushing Methods Suitable for Beginners
Layering involves applying progressively lighter colors to create depth. Paint your base color across entire surfaces, then apply a lighter version to upper surfaces, leaving base color visible in recesses. This technique requires minimal skill but produces impressive three-dimensional appearance.
Dry-brushing applies paint with minimal water, dragging stiff brushes across textured surfaces. This technique catches raised details with lighter colors while leaving recesses dark. Dry-brushing accelerates painting substantially and creates convincing metallic effects with minimal effort.
Both techniques significantly elevate beginner-level paint jobs with relatively simple execution.
Using the Included Transfer Sheet for Space Marine Insignias and Details
Your transfer sheet includes chapter insignias and purity seals that transform painted marines into authentic-looking soldiers. Apply transfers once your base colors and washes are complete but before final highlights—this sequence allows paint to adhere over transfers naturally.
Cut individual transfers from the sheet with a hobby knife. Soak the backing paper in clean water for several seconds, then slide the decal onto the model’s surface. Smooth out air bubbles with a soft brush, then apply decal sealant (or even thin diluted paint) to permanently secure the transfer. This single step dramatically increases visual impact.
Highlighting Techniques That Create Depth Without Complexity
Highlights involve applying lighter colors to raised surfaces, creating the impression of light reflecting off three-dimensional forms. Load your brush with diluted light paint, then apply along edges and prominent details. This technique sounds complex but boils down to painting lighter colors onto the natural high points of model details.
For Space Marines, highlight blue armor with a lighter blue on sharp edges. Highlight gold trim with light gold or yellow. Even two-layer highlight schemes (one intermediate shade plus one bright highlight) create convincing depth.
Wash Application for Shadowing and Definition
Washes are heavily diluted dark paint that flows into recesses and settles in crevices, creating natural shadowing. Apply wash across entire model sections—washes dry darker in recesses and lighter on raised surfaces, creating automatic shading.
Black or dark brown washes work universally. Apply generously without worrying about drips—washes are designed to pool in details. Drying takes several hours but dramatically improves model appearance by defining individual armor plates and fabric folds that otherwise blend together.
Common Beginner Painting Mistakes and How to Avoid Them
The most frequent beginner error involves applying paint too thick. Thick paint obscures detail, causing miniatures to look cartoonish rather than realistic. Thin your paints—they should flow like milk, not yogurt. Multiple thin layers produce far better results than single thick coats.
Avoid painting entire models in one color. Even simple two-color schemes—base color plus one highlight shade—transform models dramatically. Also, resist the temptation to paint every tiny detail perfectly. Strategic highlighting of prominent features creates more impact than attempting photorealism.
Finally, don’t skip washes. A model with sloppy highlights but good washes looks better than one with perfect highlights but no washes. Washes do significant visual heavy lifting.
Recommended Brush Sizes and Paint Types for Starter Hobbyists
Start with three brush sizes: a small round brush (size 0 or 1) for details, a medium round brush (size 2 or 3) for general coverage, and a larger flat brush (size 8 or larger) for base coating and washes. Quality brushes matter more than quantity—poor brushes shed bristles constantly and don’t hold paint effectively.
Acrylic paints designed for miniatures work best. Games Workshop paints are excellent but expensive; Vallejo, Army Painter, and Citadel produce comparable quality. Avoid craft paints intended for larger projects—they’re formulated for different applications and don’t adhere well to miniatures.
Gaming Mechanics and Your First Battle with the Recruit Manual
How the Recruit Manual Simplifies Warhammer 40,000 Rules for Newcomers
The Recruit Manual distills Warhammer 40,000’s complexity into a streamlined ruleset focusing on core concepts. Rather than presenting the game’s complete system, it teaches fundamental principles through progressively complex scenarios. This approach lets you grasp basic mechanics before encountering advanced subsystems.
The manual structures learning around actual gameplay. Rather than explaining all rules simultaneously, it introduces each rule when your first scenario requires it. This pedagogical approach prevents overwhelming new players while ensuring you understand necessary mechanics.
Understanding the Differences Between Recruit Edition Rules and Full Competitive Rules
Recruit Edition rules represent a simplified subset of Warhammer 40,000’s full ruleset. They cover movement, basic shooting, and melee combat, but omit psychic powers, stratagems (special tactical options), and advanced army-building mechanics. These omissions actually benefit beginners—you learn the fundamentals without becoming buried in exceptions and special cases.
Eventually, you’ll want the full rulebook, but don’t rush this upgrade. Invest a dozen games in Recruit Edition rules first. Mastering fundamentals makes advanced rules comprehensible rather than confusing.
Setting Up Your First Game: Using the Included Gaming Mat and Measuring Tools
Your heavyweight paper gaming mat provides enough space for introductory games. Unfold the mat and place terrain features—even simplified terrain makes games more interesting. Your included range rulers measure movement distances and weapon ranges. Set them out before beginning so you’re not fumbling during play.
Position your armies on opposite board edges, approximately twelve inches apart for Recruit Edition games. Check the manual for specific scenarios—some position armies differently. Ensure all players can see and reach their models comfortably.
Basic Turn Structure and Movement Mechanics
Warhammer 40,000 alternates between player turns. During your turn, move models, fire weapons, and engage in melee combat. Movement allows models to advance toward objectives or away from threats. Range rulers determine movement distances—each model can move the specific distance listed on its datasheet.
Once you’ve moved, you can shoot at enemy targets within weapon range. Finally, if you’re in close proximity to enemies, you can charge into melee combat. This straightforward sequence repeats for each turn until victory conditions are met.
Combat Resolution and How to Read Datasheets
Combat resolution involves comparing attack rolls against armor saves. When you shoot an enemy, you roll dice to determine hit and wound chances, then your opponent rolls to save damage. Datasheets list the specific statistics determining these outcomes.
Reading datasheets becomes intuitive quickly. Each model has weapon skill, ballistic skill, strength, toughness, and other statistics. Higher values make models better at their respective functions—high ballistic skill means better shooting accuracy.
Using Range Rulers and Dice Effectively During Gameplay
Range rulers measure movement distances and weapon ranges precisely. Align rulers with model positions and move models up to the specified distance. Weapons list their ranges on datasheets—if a model is further than maximum range, it can’t shoot that weapon.
Dice determine combat outcomes. Attacks require hit rolls, wound rolls, and save rolls. Your manual explains the specific dice totals needed for each action. Rolling dice fairly and accepting results gracefully represents fundamental gaming etiquette.
Recommended Game Length for Beginners
Your first Recruit Edition games should last thirty to forty-five minutes. This timeframe allows exploring mechanics without fatigue. As you become comfortable, games naturally extend to sixty or ninety minutes. Stopping when everyone’s still having fun beats continuing until enjoyment fades.
Transitioning from Recruit Rules to Advanced Gameplay When Ready
After ten to fifteen games with Recruit Edition rules, you’ll feel ready for the full rulebook. Transitioning involves learning stratagems (paid special actions), psychic powers, and advanced army construction. These additions add strategic depth without fundamentally changing core mechanics you’ve already mastered.
Consider joining a local gaming club or visiting a Games Workshop store once you’re comfortable with basics. Experienced players can guide your transition and help you understand how new rules interact with fundamentals you’ve learned.
Expanding Beyond the Starter Set: Next Steps for Growing Hobbyists
Identifying Which Faction Resonates More After Your First Games
Playing both factions in the Recruit Edition reveals which one genuinely excites you. Space Marines appeal to players favoring resilient, close-combat-oriented forces. Necrons attract players preferring reliable firepower and unique regeneration mechanics. After your initial games, you’ll know instinctively which faction you want to expand.
Base your expansion decision on gameplay feel, not aesthetic preferences alone. You’ll invest significant time and money expanding your chosen faction, so ensuring it matches your playstyle matters substantially.
Recommended Additional Purchases to Enhance Your Army
Once you’ve chosen your faction, purchase additional models from that army. Space Marine players might add another Assault Intercessor squad, a Dreadnought for close-combat support, or long-range firepower like Eradicators. Necron players could add more Warriors for increased firepower, Immortals for elite units, or specialized characters like Overlords.
Research recommended starter armies before purchasing. Games Workshop’s website and community forums provide guidance on solid early army compositions. Aim for roughly 500 points of models initially—this provides enough variety for interesting tactical gameplay without overwhelming hobby commitment.
Understanding the Full Warhammer 40,000 Rulebook and Competitive Play
The complete Warhammer 40,000 rulebook—commonly called the “Core Rules” book—introduces comprehensive army building, complex abilities, and competitive tournament formats. This book is substantially thicker than your Recruit Manual and intended for committed hobbyists, not beginners.
Purchase this book only after mastering Recruit Edition rules. The investment is substantial, but it opens competitive play possibilities and dramatically expands your army customization options.
Exploring Advanced Painting Techniques and Specialty Materials
Beyond basic layering and dry-brushing, advanced techniques include glazing (transparent paint layers creating smooth transitions), wet blending (mixing colors on the model itself), and advanced weathering (adding realistic wear and damage). These techniques require practice but elevate your painting significantly.
Specialty materials like metallic paints, texture pastes, and technical effects paints enable authentically impressive finishes. Professional painters spend decades mastering these techniques, but even amateur applications yield impressive results.
Joining Local Gaming Communities and Hobby Groups
Most communities feature Games Workshop stores or independent game shops hosting Warhammer 40,000 events. Joining these communities connects you with experienced players willing to mentor newcomers. Regular gaming partners help you develop skills and introduce advanced concepts gradually.
Online communities like Reddit’s r/Warhammer40k provide friendship, inspiration, and advice from thousands of hobbyists worldwide. These communities celebrate amateur projects, share painting techniques, and maintain supportive environments for players at all skill levels.
Investing in Upgraded Gaming Surfaces and Terrain
Your paper mat serves well initially, but neoprene gaming mats or printed boards dramatically improve the gaming experience. Terrain pieces transform your board from flat emptiness into strategically interesting landscape. Even basic terrain—hills, buildings, and ruins—makes games far more engaging.
Quality terrain is expensive but optional. Many communities provide shared terrain, eliminating personal investment. Alternatively, budget terrain from independent creators offers reasonable quality at moderate cost.
Building a Painting Station as Your Hobby Commitment Deepens
Serious hobbyists eventually establish dedicated painting spaces featuring proper lighting, organized paint storage, brush racks, and comfortable seating. This investment transforms painting from a tabletop activity into a genuine hobby space you’ll spend hours enjoying.
Start simply with a desk lamp and basic organization. As your hobby expands, gradually add shelving, paint racks, and specialized storage. Many hobbyists find their painting station becomes a meditative refuge providing mental health benefits beyond the gaming itself.
Exploring Narrative Campaigns and Campaign Play
Competitive matched play follows strict regulations ensuring balanced matchups. Narrative campaigns tell ongoing stories where results accumulate over multiple games, creating persistent consequences. Campaign play dramatically increases investment and emotional engagement with your army.
Local communities often create narrative campaigns inviting players of all skill levels. These campaigns provide context for individual games and create memorable shared experiences your gaming group will discuss for years.
Maximizing Value: Cost-Benefit Analysis of the Recruit Edition
Breaking Down the Cost Per Miniature Compared to Standalone Kits
Your Recruit Edition at approximately fifty dollars provides twenty miniatures, equaling roughly two dollars fifty cents per model. Purchasing equivalent models individually—a Space Marine Assault Intercessor costs around sixteen dollars for three models, roughly five dollars thirty cents each—demonstrates substantial savings in the starter set.
This cost advantage extends beyond just miniatures. The included manual, gaming mat, rulers, dice, and datasheets would cost forty to sixty dollars if purchased separately. The Recruit Edition pricing represents exceptional value specifically because Games Workshop subsidizes the included accessories.
Evaluating Included Accessories Against Retail Prices
Games Workshop sells rulers for fifteen to twenty dollars. A specialty gaming mat costs sixty to eighty dollars. Dice packs cost ten to fifteen dollars. The Recruit Manual, while specific to starter sets, represents significant knowledge value. Combined, these accessories easily total one hundred dollars if purchased standalone.
The Recruit Edition bundles these items into a single fifty-dollar package. This aggressive pricing reflects Games Workshop’s strategy to introduce new hobbyists at minimal barrier entry, betting that successful introductions convert into long-term customers spending thousands over years.
Long-Term Value Proposition for Hobbyists Who Continue Playing
If you continue beyond initial games, your Recruit Edition investment provides incredible long-term value. Models assembled from this set remain useful for years. Many competitive players still use Assault Intercessors and Necron Warriors from Recruit Editions purchased years ago, combined with newer models and more advanced paint jobs.
Your initial investment compounds as you expand—each subsequent purchase builds upon your Recruit Edition foundation. Models from the starter set remain relevant indefinitely, ensuring no wasted investment.
Leave a Reply