If you're chasing a cannabis strain that delivers crushing potency without the complexity of traditional photoperiod growing, Fat Bastard Autoflower might be the game-changer you've been searching for. With THC levels reaching a staggering 38%, this strain shatters expectations for what autoflowering genetics can achieve—and growers are taking notice.
Fat Bastard Autoflower represents a breakthrough in breeding innovation, born from the legendary Goldmember and Monkey Spunk genetics with Ruderalis DNA to trigger automatic flowering without manual light cycle manipulation. This combination creates something rare: a strain that doesn't sacrifice potency for convenience.
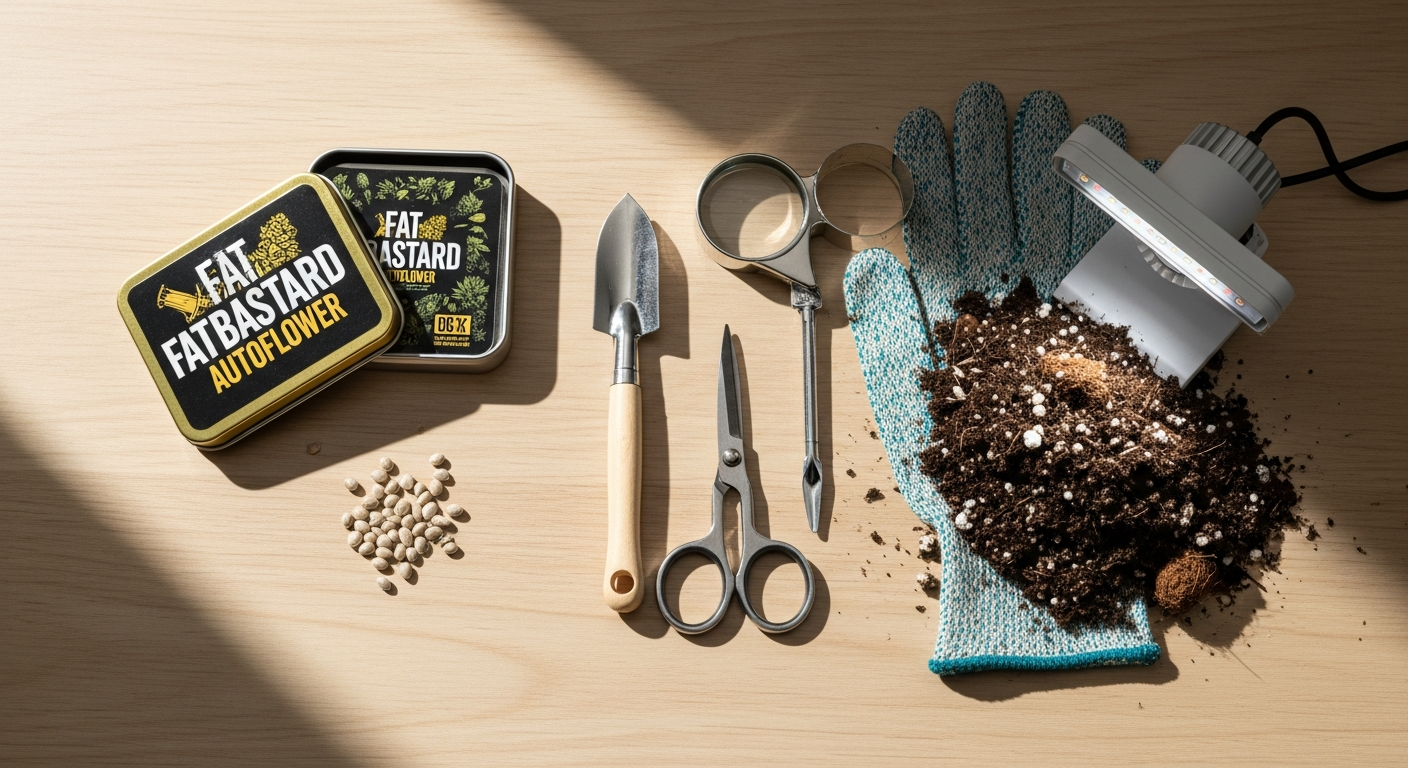
Discover Fat Bastard Autoflower seeds and transform your growing operation today.
Understanding Fat Bastard Autoflower's Genetic Foundation
Parentage Breakdown: Goldmember × Monkey Spunk Hybrid Genetics
Fat Bastard Autoflower emerges from a carefully engineered cross between two powerhouse strains. Goldmember brings its own legendary potency to the table, while Monkey Spunk contributes robust growth characteristics and resin production. This pairing wasn't accidental—Blimburn Seeds selected these genetics specifically for their complementary traits.
Hybrid Balance: 50% Sativa / 50% Indica Composition with Ruderalis Influence
The strain maintains a perfect equilibrium between Sativa and Indica genetics, creating a balanced profile that appeals to a broad range of users. The Sativa component delivers cerebral effects—mental clarity, creativity, and uplifting sensations—while the Indica side provides physical relaxation and body comfort. The addition of Ruderalis genetics serves a critical function: triggering automatic flowering based on plant age rather than light cycles.
Why Ruderalis Matters: Automatic Flowering Triggered by Age, Not Light Cycles
Ruderalis plants naturally flower after reaching a certain age, regardless of photoperiod. This genetic trait eliminates the need for growers to manage complex light schedules. Your plants transition from vegetative to flowering growth automatically, simplifying the entire cultivation process. For growers managing multiple plants or growing in unpredictable light conditions, this feature alone justifies choosing autoflowering strains.
Genetic Stability: What Blimburn Seeds' Breeding Standards Mean for Consistency
Blimburn Seeds maintains rigorous breeding protocols to ensure genetic stability across generations. When you purchase Fat Bastard Autoflower seeds, you're not rolling the dice on random phenotypes. The genetics are locked in, meaning plants from your seed batch will exhibit predictable characteristics in terms of growth rate, flowering time, and cannabinoid production. This consistency matters enormously for planning harvests and managing growing spaces.
Phenotype Variation: What to Expect Across Multiple Plants from the Same Batch
Despite genetic stability, some variation occurs naturally between individual plants. You might observe slight differences in final height, leaf shape, or flowering duration when growing multiple Fat Bastard plants simultaneously. These variations remain within reasonable bounds—no plants will deviate dramatically from the strain profile. This natural diversity actually provides value, allowing you to select your preferred phenotypes for future breeding or cloning purposes.
Lineage Reputation: How Parent Strains Contribute to Potency and Effects
The parent strains carry their own reputations within cannabis culture. Goldmember is recognized for high THC production and resinous buds, while Monkey Spunk brings vigor and resilience to the genetic line. These inherited traits manifest in Fat Bastard's exceptional potency and reliable growth characteristics. The lineage essentially guarantees you're working with proven genetics rather than experimental hybrids.
The THC Powerhouse: Potency Profile & Effects
Peak THC Concentration: Up to 38% Cannabinoid Content
Fat Bastard Autoflower stands among the most potent autoflowering strains available. At 38% THC, this strain approaches the cannabinoid levels typically found in premium photoperiod cultivars. This potency level doesn't happen by accident—it results from selective breeding, optimal growing conditions, and proper harvest timing. For consumers, this translates to powerful effects that require respect and careful dosing.
Comparison to Other Autoflowers: How Fat Bastard Ranks Against Competitors
Most autoflowering strains max out at 20-25% THC. Fat Bastard's 38% concentration places it in an elite category within the autoflower market. This performance advantage contributes directly to its best-seller status. When growers compare yields and potency across strains, Fat Bastard consistently delivers results that justify the investment in quality seeds.
Sativa-Dominant Effects: Cerebral Uplift, Focus, and Creative Stimulation
The Sativa portion of Fat Bastard's genetic makeup produces noticeable mental effects. Users commonly report enhanced focus, increased creativity, and an uplifting mental state. These effects suit daytime consumption for those seeking productivity or creative pursuits. The cerebral dimension distinguishes Fat Bastard from purely Indica-leaning autoflowers.
Indica-Dominant Effects: Physical Relaxation, Body Comfort, and Sedation
Simultaneously, the Indica genetics deliver physical effects—muscle relaxation, reduced tension, and a soothing body sensation. The combination means Fat Bastard doesn't pull users exclusively toward stimulation or sedation. Instead, it offers a middle ground where mental engagement coexists with physical comfort, making it versatile for various usage occasions.
Balanced Hybrid Experience: What Simultaneous Mental and Physical Effects Feel Like
The true power of a balanced hybrid lies in this simultaneous duality. Users experience both mental clarity and physical ease without either effect overpowering the other. This balance requires stronger cannabinoid production than single-spectrum strains, which is why Fat Bastard's 38% THC proves necessary to deliver the full hybrid experience convincingly.
Terpene Profile Implications: Flavor and Aroma Characteristics Tied to Potency
Terpenes—aromatic compounds in cannabis—contribute to both flavor and effects. Fat Bastard's potency likely correlates with a robust terpene profile. Growers often report complex flavor notes from this strain, ranging from earthy and pungent to sweet undertones. The terpene diversity enhances the overall experience beyond THC content alone.
Tolerance Considerations: Why High-THC Strains Demand Respect from Novice Users
Here's the reality: 38% THC isn't appropriate for everyone. Users with low tolerance or minimal cannabis experience may find Fat Bastard overwhelming. The strain demands responsible consumption and careful dosing. Experienced users, by contrast, appreciate the potency and powerful effects. Understanding your own tolerance level prevents negative experiences and ensures enjoyment.
Autoflowering Advantages: Why This Strain Simplifies Cultivation
No Light Cycle Management: Automatic Transition to Flowering Eliminates Photoperiod Concerns
Traditional photoperiod strains require precise light schedules—typically 18 hours on/6 hours off during vegetative growth, then 12/12 for flowering. Fat Bastard removes this requirement entirely. Your plants flower automatically based on age, not on your lighting schedule. This simplification alone reduces equipment complexity and eliminates timing mistakes that can accidentally trigger or delay flowering.
Faster Seed-to-Harvest Timeline: 8-10 Week Total Growth Cycle
From seed germination to harvest-ready buds takes only 8-10 weeks with Fat Bastard Autoflower. Photoperiod strains typically require 4-6 weeks vegetative time plus 8-12 weeks flowering, totaling 3-4 months minimum. The accelerated timeline lets growers complete multiple cycles annually, increasing total yield from the same growing space.
Multiple Harvests Per Season: Year-Round Growing Potential in Outdoor Settings
Outdoor growers benefit tremendously from the rapid cycle. In regions with warm climates, growers can plant Fat Bastard in early spring, harvest by late spring, replant, and harvest again by mid-summer. Some outdoor growers manage three harvests annually, while photoperiod growers in the same location complete only one or two cycles. The flexibility expands possibilities for maximizing annual production.
Reduced Equipment Costs: Minimal Lighting Infrastructure Needed for Success
Autoflowers' automatic flowering removes the necessity for high-powered grow lights with precise timers and light cycles. Novice indoor growers can succeed with modest LED panels, whereas photoperiod cultivation often demands more robust lighting investments. This cost reduction makes autoflowering cultivation accessible to budget-conscious growers.
Beginner-Friendly Cultivation: Simplified Nutrient Schedules and Environmental Controls
The shorter growth window and automatic flowering characteristics simplify environmental management. Beginners don't need to master complex light schedules or timing protocols. Nutrient regimens can follow straightforward progressions without the precise timing adjustments required by photoperiod strains. This accessibility explains why many first-time growers choose autoflowering varieties.
Compact Plant Structure: Smaller Stature Compared to Photoperiod Strains
Autoflowering plants typically grow 2-4 feet tall, compared to 4-8 feet for photoperiod strains. This compact size suits space-constrained growers—apartment dwellers, those with limited closet space, or anyone managing discrete growing setups. The smaller footprint doesn't sacrifice yield relative to plant size, making efficient use of available space.
Stealth and Discretion: Lower Profile Reduces Visibility in Sensitive Growing Environments
For growers concerned about visibility or operating in legally sensitive areas, the compact stature offers advantages. Shorter plants attract less attention through windows, over fences, or in shared spaces. This discretion matters in jurisdictions with complex regulations or for those prioritizing privacy.
Creating Optimal Growing Conditions for Maximum Yield
Temperature Range: Ideal Daytime (70-80°F) and Nighttime (60-70°F) Parameters
Fat Bastard Autoflower thrives within specific temperature ranges. During the day, maintain temperatures between 70-80°F to optimize metabolic processes and growth rates. Nighttime temperatures should drop to 60-70°F, which promotes healthy respiration and allows nutrient transport. Temperatures below 55°F or above 85°F stress plants and reduce growth velocity.
Humidity Levels: Vegetative Stage (60-70%) Versus Flowering Stage (40-50%)
Humidity management shifts across growing phases. In vegetative growth, maintain 60-70% relative humidity to support robust leaf development and photosynthesis. As flowering begins, gradually reduce humidity to 40-50% to minimize mold and mildew risk. This transition prevents stress while protecting developing buds from fungal pathogens.
Light Requirements: 18-24 Hour Photoperiod Recommendations for Autoflowers
Autoflowers respond positively to extended light exposure, even though they don't require specific photoperiods for flowering. Running lights 18-24 hours daily maximizes photosynthetic activity and accelerates growth. Many growers use 20-hour cycles as a compromise between growth optimization and electricity cost reduction. The extended light exposure compensates for the shorter total growing period.
LED Versus HPS: Spectrum Choices and Energy Efficiency Comparisons
LED grow lights dominate modern cultivation for good reason. They produce less heat, reduce electricity consumption by 30-50% compared to HPS, and allow spectrum customization. LED panels with adjustable blue and red spectrum capabilities optimize growth during specific phases. HPS bulbs still work effectively but consume more power and require additional cooling infrastructure, increasing operational costs.
Soil Composition: Nutrient-Rich Mediums and pH Balance (6.0-6.8)
Quality soil provides the foundation for healthy growth. Use nutrient-rich potting mixes containing perlite, coco coir, and organic matter. These components ensure proper drainage while retaining moisture and nutrients. Maintain soil pH between 6.0-6.8, the optimal range for nutrient availability to roots. Regular pH monitoring prevents lockout conditions that restrict nutrient uptake.
Hydroponic Alternatives: DWC, NFT, and Other Soilless Systems for Faster Growth
Soil-free growing using deep water culture (DWC), nutrient film technique (NFT), or other hydroponic systems accelerates growth compared to traditional soil. Roots access nutrients immediately through the water column rather than relying on microbial breakdown and diffusion. Hydroponic growers often achieve faster development cycles and slightly higher yields, though the systems require more technical knowledge and maintenance.
Air Circulation: Ventilation, Oscillating Fans, and CO₂ Supplementation Strategies
Stagnant air breeds problems—mold, weak stems, and poor gas exchange. Install intake and exhaust fans to maintain continuous air movement, plus oscillating fans to create gentle plant movement. Strong airflow strengthens stems, improves disease resistance, and optimizes CO₂ availability. For advanced growers, CO₂ supplementation pushes photosynthetic rates higher, though the investment typically suits larger operations.
Water Quality: Chlorine Removal, Mineral Content, and pH Stability
Water quality significantly impacts outcomes. Chlorinated tap water can stress roots—let it sit 24 hours or use a filter to remove chlorine before watering. Monitor mineral content; hard water may require pH adjustment or dilution. Maintain stable pH around 6.5 for soil, 5.5-6.5 for hydroponics. Water quality consistency prevents nutrient availability fluctuations that stress plants.
Nutrient Schedules & Feeding Protocols for Fat Bastard
Vegetative Stage Nutrition: Nitrogen-Heavy Formulations for Leaf Development
During vegetative growth, nitrogen drives leaf expansion and biomass accumulation. Use nutrient formulations with higher nitrogen ratios—typically labeled with higher first numbers like 5-2-2 or 7-3-3. Nitrogen promotes chlorophyll production and enzyme function essential for rapid growth. Feed according to manufacturer recommendations, adjusted for your medium and plant size.
Transition Feeding: Gradual Nutrient Shifts as Flowering Approaches
As buds initiate around week 4-5, gradually shift nutrient ratios. Reduce nitrogen slightly while increasing phosphorus and potassium. This transition mimics natural environmental changes and prepares plants for reproductive growth. Abrupt nutrient changes can shock plants; gradual shifts maintain stress-free development.
Flowering Stage Requirements: Phosphorus and Potassium Emphasis
Flowering demands different nutrient balance. Phosphorus supports flower development and bud density, while potassium strengthens cell walls and enhances cannabinoid production. Use flowering formulations with lower nitrogen and elevated phosphorus/potassium—approximately 2-5-4 or 3-7-5 ratios. This balance maximizes bud development and potency.
Micronutrient Balance: Calcium, Magnesium, and Trace Elements
Beyond the primary nutrients, micronutrients matter. Calcium prevents blossom-end rot and supports cell structure. Magnesium forms the center of chlorophyll molecules and participates in enzyme reactions. Trace elements like zinc, iron, and boron facilitate various metabolic processes. Quality nutrient solutions include these micronutrients, though some growers supplement with additional cal-mag products.
Feeding Frequency: Daily, Alternate-Day, or Weekly Schedules Depending on Medium
Feeding frequency depends on your growing medium. Hydroponic systems require constant nutrient availability—growers feed continuously through the water circulation. Soil growers typically water every 2-3 days when the top inch feels dry, applying nutrients weekly or bi-weekly depending on the medium's nutrient reserve capacity. Container size and environmental factors influence exact timing.
Nutrient Burn Prevention: Signs, Symptoms, and Correction Strategies
Overfeeding creates nutrient burn—brown leaf tips, burnt edges, and stunted growth. If burn appears, flush your medium with clean water to remove excess salts, then reduce feeding strength. Prevent burn through careful dosing, EC/PPM monitoring, and observation of plant response. Conservative feeding beats aggressive supplementation; you can always add more nutrients but removing excess proves difficult.
Organic Versus Synthetic: Comparing Nutrient Delivery Systems
Organic nutrients rely on microbial breakdown and slower release, creating more stable nutrient availability over time. Synthetic nutrients dissolve immediately, providing precise control but requiring closer monitoring. Organic methods suit soil growing and promote beneficial microbial ecosystems. Synthetic nutrients work excellently in hydroponics and allow rapid adjustment if problems arise. Choose based on your growing philosophy and system type.
EC and PPM Monitoring: Using Meters to Prevent Over or Underfeeding
Electrical conductivity (EC) meters measure dissolved nutrient concentration, while PPM (parts per million) provides similar information on different scales. Monitoring these values prevents guessing about nutrient strength. Different growth stages require different EC levels—vegetative typically 1.2-1.6 EC, flowering 1.4-1.8 EC. Regular monitoring with a quality meter ensures consistent feeding at optimal concentrations.
Timeline Expectations: From Germination to Harvest
Germination Phase: 3-7 Days to Sprouting
Fat Bastard seeds typically germinate within 3-7 days using standard techniques—paper towel moisture, seed starter cubes, or direct soil planting. Provide warmth (70-75°F) and moisture without waterlogging. Once the radicle emerges and develops a small taproot, plant the seed with the root pointing down into your growing medium.
Seedling Stage: Weeks 1-2 After Emergence
After sprouting, the seedling stage spans the first two weeks. Plants develop their first true leaves beyond the initial cotyledons. Keep humidity high (65-75%) and provide gentle light for 16-18 hours daily. Avoid heavy feeding at this stage; seedlings have limited nutrient requirements. Gentle air movement strengthens developing stems.
Early Vegetative Growth: Weeks 2-4 of Rapid Development
The second through fourth weeks show dramatic growth acceleration. Plants develop multiple leaf sets and establish robust stem structures. Increase light to 20-24 hours daily and begin light feeding with nitrogen-focused nutrients. Growth during this phase establishes the plant's overall structure and determines ultimate productivity.
Pre-Flowering Transition: Week 4-5 as Buds Initiate
Around week 4-5, Fat Bastard automatically begins flowering regardless of light cycles. You'll notice the growth pattern shift from upward expansion to bud site formation. During this transition, maintain stable conditions and begin adjusting nutrient ratios toward phosphorus and potassium emphasis.
Flowering Progression: Weeks 5-10 of Bud Maturation
The final five weeks feature explosive bud development. Flowers swell, trichomes form and mature, and the plant channels all energy toward cannabinoid and terpene production. Maintain consistent conditions during this critical period—temperature fluctuations, humidity swings, or nutrient inconsistencies stress plants and reduce final quality.
Trichome Development: Visual Indicators for Optimal Harvest Timing
Trichomes are crystal-like glands covering buds that produce cannabinoids and terpenes. Early in flowering, trichomes are clear. As maturation progresses, they turn milky white, then amber. For peak THC, harvest when approximately 10-20% of trichomes have turned amber. This timing balances THC potency with desirable effects; waiting longer increases CBD and creates more sedative experiences.
Yield Projections: Expected Grams Per Plant Under Ideal Conditions
Under optimal conditions, Fat Bastard Autoflower typically yields 40-80 grams per plant, sometimes higher. Variables affecting yield include light intensity, nutrient availability, plant training techniques, and genetic expression. Smaller plants grown in limited space produce proportionally less; larger plants in ideal conditions consistently hit the upper range.
Drying and Curing: Post-Harvest Timeline for Potency and Flavor Development
After harvest, drying takes 7-10 days in a dark, ventilated space at 60-65°F and 45-55% humidity. Once stems snap rather than bend, buds are dry. Cure in glass jars at 60% humidity for at least two weeks, opening jars daily to exchange air. Proper curing develops terpene profiles and smooths the smoking experience—rushing this stage diminishes quality.
Common Growing Challenges & Troubleshooting Solutions
Nutrient Deficiencies: Nitrogen, Phosphorus, and Potassium Deficiency Recognition
Nitrogen deficiency causes lower leaf yellowing while upper leaves remain green. Phosphorus deficiency creates purple or reddish coloration on stems and leaves. Potassium deficiency produces brown leaf tips and edges with yellowing between veins. Address deficiencies by adjusting feeding strength or switching to more appropriate nutrient formulations.
Pest Management: Spider Mites, Aphids, and Fungus Gnat Prevention
Spider mites cause stippling on leaves and fine webbing; aphids cluster on new growth and excrete sticky residue; fungus gnats appear as small black insects flying near soil. Prevent infestations through good sanitation, proper air circulation, and quarantine for new plants. If infestation occurs, treat with neem oil, insecticidal soap, or predatory insects depending on severity and your cultivation philosophy.
Mold and Mildew: Powdery Mildew and Bud Rot Prevention Strategies
Powdery mildew appears as white powder on leaves; bud rot emerges inside developing flowers as gray mold. Prevent both through humidity control (keeping flowering stage at 40-50%), air circulation, and spacing plants adequately. Reduce nighttime temperatures slightly to minimize condensation. If mildew appears, increase air movement and reduce humidity immediately; bud rot requires removing affected portions.
Stress Responses: Hermaphroditism Triggers and Prevention
Severe stress—temperature extremes, light interruptions during flowering, overfeeding, or sudden environmental changes—can trigger hermaphroditic traits where plants develop both male flowers and female buds. Prevent hermaphroditism through consistent, stable growing conditions. If hermaphroditism occurs, remove visible male flowers carefully or isolate affected plants to prevent self-pollination.
Stunted Growth: Diagnosing Root Problems, Light Issues, and Temperature Stress
Multiple factors cause stunted growth. Root problems from overwatering, poor drainage, or pathogenic disease restrict nutrient uptake. Insufficient light intensity limits photosynthesis and growth. Temperature stress outside optimal ranges reduces metabolic activity. Diagnose by examining roots for rot, checking light intensity at canopy level, and verifying temperature consistency. Address the underlying cause rather than forcing nutrient increases.
Yellowing Leaves: Distinguishing Between Natural Senescence and Nutrient Problems
During late flowering, leaves naturally yellow as plants redirect nutrients to buds—this is senescence and normal. Premature yellowing suggests nitrogen deficiency or root problems. Lower leaves yellow first during natural senescence; deficiency yellowing typically appears throughout the plant. Check feeding levels, ensure proper root function, and adjust if necessary. Late flowering yellowing requires no intervention.
Bud Density Optimization: Techniques to Maximize Flower Development
Bud density depends on genetics, light intensity, and plant training. Increase light intensity to maximize photosynthesis during flowering. Remove lower growth and non-productive branches through strategic pruning to direct energy toward main buds. Reduce nitrogen in flowering to prevent excessive leaf growth competing with bud development. Consistent, generous phosphorus and potassium feeding enhances bud density.
Recovery Protocols: Rehabilitation Strategies for Struggling Plants
When plants show stress, respond quickly. Fix environmental issues first—adjust temperature, humidity, light, or water practices. Reduce feeding temporarily to prevent additional stress from nutrient excess. Provide stable conditions and monitor closely. Most stressed plants recover within 1-2 weeks of corrected conditions. Remove severely damaged leaves but avoid aggressive defoliation during recovery.
Maximizing Potency: Advanced Growing Techniques
Stress Training Methods: Low-Stress Training (LST) Versus High-Stress Techniques (HST)
Low-stress training (LST) involves gently bending branches and tying them to redirect growth horizontally without breaking tissue. This increases lateral growth and light exposure to lower branches, improving overall bud production. High-stress techniques like topping or severe pruning cause temporary stress that triggers branching and bushier growth. LST suits all growers; HST requires experience to avoid excessive stress during short autoflower cycles.
Topping and Pruning: Strategic Removal for Branching and Yield Increase
Topping—removing the plant's main growing tip—forces it to develop two main branches instead of one. This creates bushier plants with multiple bud sites. Pruning removes lower branches that produce minimal bud due to limited light, redirecting plant energy toward productive areas. Perform these techniques early in vegetative growth to allow recovery time before flowering begins.
Defoliation Timing: Leaf Removal During Flowering for Light Penetration
Strategic defoliation removes lower leaves that shade developing buds, improving light penetration to internal flowers. Remove leaves gradually across multiple sessions rather than aggressively stripping the plant. Time defoliation for the first two weeks of flowering; later defoliation during heavy flower development causes unnecessary stress.
Nutrient Timing: Feeding Schedules That Enhance Cannabinoid Production
Cannabinoid production peaks during the final 2-3 weeks of flowering. Ensure nutrient availability remains consistent during this period—never allow deficiencies during this critical window. Some growers implement a nutrient reduction in the final week to push the plant toward producing compounds that enhance flavor and potency, though this technique requires careful monitoring.
Light Spectrum Optimization: Blue Spectrum for Vegetative Growth, Red for Flowering
Blue-spectrum light (400-500nm wavelength) promotes compact vegetative growth with strong stems and dense foliage. Red-spectrum light (600-700nm wavelength) drives flower development and cannabinoid synthesis. Modern LED panels allow spectrum adjustment or switching between panels optimized for different growth phases. Spectrum optimization maximizes growth during each stage.
Temperature Fluctuations: Strategic Day/Night Variations for Terpene Development
Slight temperature variations between day and night—typically 10°F differences—promote terpene production and development of more complex flavor profiles. Maintain day temperatures around 75-80°F and night temperatures around 65-70°F. These variations signal seasonal changes that naturally enhance aromatic compound production.
Harvest Timing Precision: Amber Trichome Percentages for Desired Effects
Trichome color indicates cannabinoid maturity. Clear trichomes contain primarily THCA (acidic THC). Milky trichomes indicate THCA has converted to THC and CBD begins accumulating. Amber trichomes show further conversion toward CBN (cannabinol), which creates sedative effects. For maximum THC potency, harvest at 10-20% amber trichomes. For more balanced or sedative effects, wait until 40-60% amber.
Curing Excellence: Humidity and Temperature Control During Post-Harvest Processing
Proper curing develops flavor complexity and smoothness. Maintain 55-65% humidity and 60-70°F temperature during the curing period. Open jars daily to exchange air and prevent mold. Cure for at least two weeks, though many growers continue curing for 4-8 weeks for optimal flavor development. Patient curing transforms good harvest into exceptional final product.
Why Fat Bastard Autoflower Dominates the Market
Blimburn Seeds' Reputation: Brand Credibility and Breeding Expertise
Blimburn Seeds has earned respect through decades of selective breeding and consistent delivery. The company maintains rigorous quality standards, ensures genetic stability, and backs products with grower feedback and results. Blimburn's reputation attracts serious cultivators who prioritize reliability over experimental genetics.
Customer Satisfaction Metrics: Best-Seller Status and Repeat Purchases
Fat Bastard's position as the number one best-selling strain on Blimburn Seeds' catalog reflects genuine customer satisfaction. Repeat purchases indicate growers achieve consistent success and positive results. Best-seller status doesn't happen through marketing alone—it requires reliable genetics that deliver promised results.
Consistency and Reliability: Stable Genetics Across Multiple Generations
Blimburn maintains consistent seed genetics across generations through professional breeding protocols and careful phenotype selection. Purchasing Fat Bastard Autoflower guarantees you receive the same genetic expression and growth characteristics as previous batches. This reliability eliminates surprises and allows precise planning.
Performance Benchmarks: Yield, Potency, and Growth Speed Comparisons
When evaluated against other autoflowering strains, Fat Bastard consistently benchmarks at the top for potency (38% THC), yield (40-80g per plant), and growth speed (8-10 weeks). Comparative performance data supports its premium positioning in the market.
Community Feedback: Grower Testimonials and Forum Discussions
Cannabis cultivation communities actively discuss strains through forums, social media, and grower networks. Fat Bastard Autoflower generates consistently positive feedback regarding germination rates, growth reliability, and final product quality. Community validation from experienced growers carries significant weight for deciding between strains.
Award Recognition: Industry Accolades and Competitive Rankings
Recognition in industry competitions and cultivar rankings validates strain quality. Awards from cannabis competitions reflect objective evaluation of potency, flavor, and overall characteristics. Fat Bastard's standing in competitive evaluations substantiates its premium positioning.
Accessibility: Availability Through Reputable Seed Banks Worldwide
Quality genetics mean nothing if unavailable. Fat Bastard Autoflower maintains availability through reputable seed banks globally, ensuring interested growers can source legitimate seeds. Broad availability reflects market demand and seed bank confidence in the strain's performance.
Value Proposition: Premium Quality at Competitive Pricing
Fat Bastard delivers premium genetics and performance at pricing consistent with other elite strains. The cost-per-seed remains reasonable relative to the quality delivered, creating strong value for investment. Competitive pricing combined with superior genetics drives repeat purchases.
Your Path to Premium Autoflower Success
Fat Bastard Autoflower stands as a masterclass in modern cannabis breeding—combining extreme potency with cultivation simplicity in a way that few strains achieve. The 38% THC content, rapid 8-10 week flowering cycle, and balanced hybrid effects create a trifecta of appeal for growers and consumers alike. Whether optimizing your first grow or scaling an established operation, this strain delivers measurable results without demanding years of experience.
The beauty of autoflowering genetics lies in their accessibility, and Fat Bastard proves that high performance doesn't require complexity. From seed selection through final harvest, the strategies outlined here will help you maximize yield, potency, and overall plant health. Blimburn Seeds' commitment to genetic stability means you're investing in a proven winner—not an experimental gamble.
Temperature control, nutrient precision, light optimization, and proper environmental management separate exceptional harvests from mediocre ones. The 8-10 week timeline accelerates results, allowing multiple cycles annually. Trichome monitoring ensures you harvest at peak potency. Post-harvest curing transforms dried buds into premium finished product.
Whether you're growing for personal use, exploring cultivation as a hobby, or operating commercially, Fat Bastard Autoflower adapts to your situation. Compact plant structure suits limited spaces; high yields satisfy production goals. Autoflowering genetics eliminate photoperiod concerns, simplifying logistics. The strain's popularity reflects genuine performance advantages, not marketing hype.
Success requires attention to fundamentals: quality seeds from reputable sources, proper environmental conditions, consistent feeding, and pest prevention. Master these basics, implement the techniques covered throughout this guide, and Fat Bastard Autoflower will reward your efforts with potent, abundant harvests. The strain's top-seller status confirms that countless growers have already experienced these results.
Ready to experience why this strain commands the top-seller position? Secure your Fat Bastard Autoflower seeds from a trusted source and begin your journey toward premium harvests.
Leave a Reply