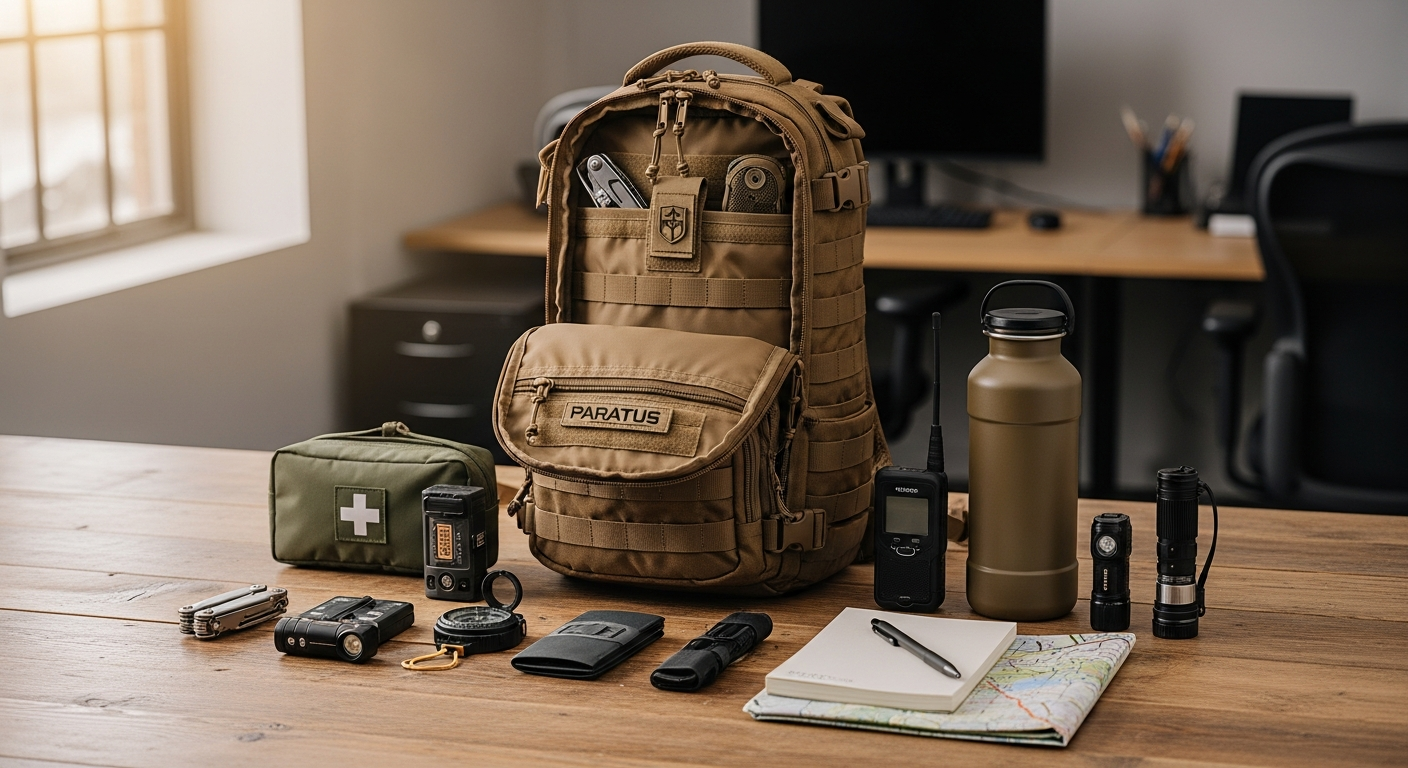
A poorly packed backpack doesn't just slow you down—it can compromise your mission, whether you're heading into the wilderness or preparing for an emergency situation. The weight settles unevenly, accessibility becomes a frustrating game of dig-and-search, and fatigue sets in faster than it should. Your gear scatters across multiple pockets, and when you need something critical, it's buried beneath three layers of equipment.
The 3V Gear Paratus 3-Day Backpack has earned its reputation as a best-selling tactical pack with its modular design, extensive MOLLE webbing, and multiple compartments. At $139.95, this rugged operator's pack delivers exceptional durability and versatility without breaking the bank. Yet owning a well-designed pack and actually using it to its full capacity are two different things entirely.
Discover how to maximize your Paratus 3-Day Backpack with strategic packing techniques.
This guide walks you through exact strategies that transform the Paratus into an organized, efficient carrying system. You'll leverage its compartment layout, master weight distribution principles, and adapt your packing approach for different scenarios—from multi-day hiking expeditions to bug-out preparedness.
Understanding Your Paratus's Organizational Architecture
The Paratus isn't just a single storage cavity. Its compartmentalized design creates distinct zones for different gear categories. The main compartment provides substantial capacity for bulk items like sleeping bags, shelter systems, and clothing. Secondary compartments allow you to separate items by function and access frequency, preventing the chaos of one large cavity.
Detailed breakdown of main compartment capacity and secondary storage sections
The primary compartment dominates the pack's usable volume, designed to accommodate extended-carry loads. This is where sleeping gear, extra clothing layers, and bulkier items naturally belong. The secondary compartments typically positioned toward the top or sides offer quick-access storage for items you'll need during the day—snacks, maps, first aid, or communication devices. Understanding this hierarchy prevents you from burying critical gear beneath three days' worth of clothing.
Identifying external pockets and their optimal use cases
External pockets aren't afterthoughts—they're strategic access points. Front pockets work best for items you need frequent access to without opening the main compartment. Side pockets suit hydration systems or rolled-up layers. Bottom pockets can secure wet gear separately from dry equipment. The key is establishing a consistent system where specific item categories always inhabit the same pockets. This muscle memory means you'll locate what you need without thinking.
How to leverage MOLLE webbing for customized attachment points
MOLLE webbing transforms the Paratus from a fixed container into an infinitely customizable platform. Rather than cramming everything inside, strategic external attachments free up internal space and improve weight distribution. Tactical pouches can hang from MOLLE strips—ammunition carriers, first aid kits, or specialized tool organizers. The mini-pack that often accompanies the Paratus can attach to the front or side, creating additional compartments without adding internal clutter.
Weight Distribution Principles for Tactical Backpacks
Comfortable carries depend on how you position weight within the pack. Poorly distributed loads create shoulder strain, back fatigue, and reduced mobility—exactly what you want to avoid during critical situations.
Center of gravity positioning and how it affects comfort during extended carries
Your center of gravity should sit close to your body and roughly at shoulder-blade height. Pack too high, and you'll feel the weight pulling backward. Pack too low, and gravity works against your legs during long carries. The sweet spot keeps weight centered and stable, allowing your legs and core to handle the load rather than forcing your shoulders and neck to compensate. Test your loaded pack with a short walk to verify the position feels balanced and natural.
Placing heavier items closer to your back versus distributing weight evenly
Heavy items shouldn't rest against your back indiscriminately. Instead, position them in the mid-pack zone, slightly higher than your actual center of gravity. Denser items like water bottles, ammunition, or tools should sit centrally and toward your back, while lighter items can occupy outer layers. This arrangement prevents the pack from pulling away from your body and keeps weight distributed across your entire frame rather than concentrating stress on shoulders and lower back.
Preventing shoulder strain through strategic load balancing
Uneven weight distribution creates one-sided strain that compounds over hours of carry time. Pack symmetrically—if you have ammunition on the right side, balance it with equivalent weight on the left. Distribute heavier items between multiple compartments rather than consolidating them in one area. Test your loaded pack by wearing it and walking for several minutes. If you feel pressure concentrating on one shoulder or experience awkward tilting, rebalance before committing to extended use.
Packing for 3-Day Expeditions: A Systematic Approach
Three days represents the threshold where planning becomes essential. Too much gear and you're carrying unnecessary weight. Too little and you're unprepared for unexpected conditions.
Creating a pre-packing checklist specific to your mission duration
Before touching your pack, write down everything you anticipate needing for three days in your specific environment. Weather-appropriate clothing, sleeping system, shelter, cooking apparatus, water, navigation tools, first aid—the list varies wildly between summer hiking and winter wilderness operations. Organize your checklist by category and cross-reference against your pack's compartments. This prevents the last-minute scramble to find space for forgotten items and forces you to make intentional decisions about what actually fits.
Organizing clothing layers within designated compartments
Clothing represents substantial volume in any 3-day pack. Rather than rolling everything into one mass, separate layers by expected use. Base layers and socks occupy one section, insulation layers another, and weather protection gear a third. This approach lets you grab specific garments without excavating your entire pack. Use compression bags for bulkier items like down jackets or sleeping layers—they reduce volume significantly and create distinct, identifiable blocks within your compartments.
Securing sleeping gear, shelter, and insulation materials
Your sleep system often comprises your pack's heaviest and most voluminous components. Position the sleeping bag in the bottom main compartment, using it as a weight anchor. The shelter can roll compactly and nestle alongside. Insulation layers—whether foam pads or inflatable mattresses—distribute weight evenly and create a stable base. This arrangement keeps weight centered while protecting delicate gear from exterior elements.
Get your 3V Gear Paratus backpack optimized for any mission today.
Modular Customization: Building Your Ideal Setup
The Paratus's true power emerges when you adapt it to your specific needs rather than accepting a one-size-fits-all configuration.
Selecting tactical pouches and accessories compatible with MOLLE webbing
Your local tactical retailer stocks countless pouches designed for MOLLE integration. Ammunition carriers, magazine holders, medical kits, utility pouches—each serves a specialized function. Rather than acquiring everything at once, identify your highest-priority needs and source compatible pouches strategically. A quality first-aid pouch might rank higher than an extra ammunition carrier if your primary mission is hiking rather than tactical operations. Build your accessory ecosystem incrementally, testing each addition to ensure it enhances functionality without creating imbalance.
Attaching the mini-pack for additional storage or specialized equipment
Many Paratus configurations include a detachable mini-pack that can function as a standalone bag or attach to the front or side of the main pack. This accessory expands your carrying capacity while keeping specialized gear organized separately. Use it to consolidate first aid supplies, emergency rations, or technical equipment. The mini-pack's separation means you can easily remove it for quick runs without hauling your entire system, or detach it for specialized tasks while leaving your main pack secured at a base camp.
Creating mission-specific loadouts without overhauling your entire pack
A pack configured for 3-day hiking differs fundamentally from one optimized for tactical operations or bug-out preparedness. Rather than maintaining multiple complete packs, establish core configurations that swap components efficiently. Your base layer—clothing, shelter, sleep system—remains constant. Secondary items like ammunition, technical tools, or specialized medical gear can attach and detach via MOLLE webbing. This modular philosophy means you can reconfigure your Paratus for different missions in minutes rather than hours.
Tactical Operations Packing: Operator-Ready Configuration
Tactical deployments demand instant access to mission-critical equipment while maintaining comfortable carry during extended operations.
Positioning ammunition, tools, and tactical gear for rapid deployment
Magazine carriers belong on the front chest area or accessible side pockets where you can reach them without removing your pack. Tactical tools—multi-tools, breaching implements, communication devices—need immediate access without rummaging through the main compartment. Position these items on MOLLE webbing or external pockets where muscle memory guides you directly to them. During actual operations, seconds matter, and accessible gear could be the difference between mission success and failure.
Creating easily accessible compartments for mission-critical equipment
Designate specific sections for equipment you'll access frequently during operations. Communication devices, navigation tools, and quick-reference materials belong in secondary compartments or attachment points near the top and sides of the pack. Keep these areas organized and consistent across different operations—your mind should navigate your pack as instinctively as your hands navigate your equipment.
Securing firearms accessories and protective gear safely
Ammunition and firearms components require secure storage that prevents loss during dynamic movement. Use dedicated pouches with closures that stay sealed even during exertion. Protective gear like gloves or goggles should stay accessible but organized, attached via MOLLE webbing rather than loose in compartments. Every item should have a designated home where it returns after use, preventing loss and maintaining operational readiness.
Bug-Out Bag Essentials: Organizing for Emergency Readiness
A bug-out bag prioritizes survival and self-sufficiency when normal systems fail. Organization determines whether you can access critical items under stress.
Categorizing survival gear by priority and access frequency
Your bug-out bag contains items you'll hopefully never need but must never be without. Organize by urgency—water purification, shelter, and fire-starting materials represent tier-one priorities. Navigation, first aid, and tools form the second tier. Comfort items and redundant supplies occupy lower-priority positions. This hierarchy ensures critical equipment always occupies the most accessible locations. If you need to grab your pack and leave immediately, you want survival essentials instantly available rather than buried beneath secondary gear.
Securing first-aid supplies and emergency medical equipment
Medical supplies should inhabit a dedicated compartment or external pouch where you can locate them under stress or darkness. Organize items by type—wound closure materials together, pain management separated, emergency medications isolated. Consider waterproof containment to protect medicines and bandages from moisture. A fully equipped medical pouch can mean the difference between a minor issue and a survival-threatening situation.
Organizing water purification, fire-starting, and shelter materials
These three elements form your survival foundation. Water purification devices and tablets should be easily accessible—a separate pouch prevents them from getting lost among other gear. Fire-starting materials (matches, lighters, tinder) belong in a waterproof container in a consistently accessible location. Shelter materials—emergency bivy, tarp, or lightweight tent—should occupy a prominent compartment in the main pack where you can locate them quickly when darkness or weather demands immediate action.
Hiking and Camping Packing Strategies
Wilderness expeditions prioritize comfort and practical access to gear you'll use daily.
Separating wet-weather gear from everyday items
Wet conditions are inevitable in extended wilderness travel. Designate specific compartments or waterproof bags for rain gear, keeping it separated from items that would suffer from moisture exposure. This segregation prevents your sleeping bag or clothing layers from absorbing water from your rain jacket or wet socks. Pack rain gear in an external pocket where you can deploy it quickly without emptying your pack.
Organizing cooking equipment and food storage safely
Cooking systems can occupy a compact external pouch or designated compartment near your shelter area. Food storage requires bears-country considerations if applicable—secure food in bear canisters or hang systems rather than inside your pack near your sleeping location. Within your pack, keep cooking fuel isolated from food items and fragile gear. Organize snacks and quick-energy foods in readily accessible locations for frequent munching throughout the day.
Positioning hydration systems for convenient refilling
Water systems define hiking comfort. Hydration bladders should occupy compartments where drinking tubes can route to your shoulder strap, or bottles should nestle in side pockets for easy access. Position water containers where you can refill them at streams without dismounting your entire pack. This accessibility encourages regular hydration, preventing dehydration that compounds fatigue during long hiking days.
Maximizing Comfort During Extended Carries
Physical comfort during extended carries isn't luxury—it's essential for maintaining pace, morale, and decision-making capability.
Distributing weight to reduce shoulder and back strain
Weight distribution strategies beyond just placing items heavier pieces in the center. Consider your torso length and adjust pack positioning accordingly. A pack that sits too high creates shoulder strain; one that hangs too low concentrates pressure on your lower back. Shoulder straps should feel secure without digging into your shoulders. Hip belts—if your Paratus includes them—should transfer substantial weight to your hips and legs, relieving shoulder burden significantly.
Adjusting straps and load lifters for optimal weight distribution
Your pack's straps are tuning mechanisms, not just attachment points. Shoulder straps should angle slightly backward, not vertically, to position the pack's weight favorably. Load lifter straps (if included) angle downward from the pack's top to your shoulders, pulling the pack closer to your body. Experiment with incremental adjustments—one finger's worth of strap looseness can dramatically change comfort. Spend time dialing in your pack's geometry before committing to extended carries.
Testing your loaded pack before committing to extended use
Never assume a newly configured pack will feel comfortable after eight hours of carry time. Load it completely and wear it for a 30-minute walk, paying attention to pressure points, weight distribution, and overall balance. Adjust straps and repositions items based on what you discover. Only after confirming comfort should you embark on extended expeditions. A poorly configured pack that feels fine for thirty minutes becomes agonizing torture during multi-day carries.
Real-World Packing Examples and Scenarios
Abstract principles become concrete when applied to actual situations.
Complete packing breakdown for a 3-day wilderness hiking trip
Bottom main compartment: Sleeping bag, closed-cell foam pad. Lower-middle section: Shelter system (tent or tarp), compact stove. Upper-middle compartment: Insulation layers (fleece, down jacket in compression bag), extra clothing. Top secondary compartment: Quick-access items—first aid kit, navigation tools, communication device. External pockets: Water bottles, snacks, rain jacket, sun protection. MOLLE attachments: Utility knife, headlamp, emergency whistle. This configuration keeps weight centered, distributes load evenly, and positions essential items for frequent access.
Bug-out bag organization for emergency preparedness situations
Bottom compartment: Water purification system, fire-starting materials (waterproof container), first aid supplies (dedicated pouch). Lower-middle: Shelter materials (emergency bivy, space blanket), compact food rations. Upper compartments: Navigation tools (maps, compass), communication device, flashlight with extra batteries. External pockets: Water bottles, emergency signaling equipment, multi-tool, medications. This organization prioritizes survival essentials in the most accessible positions, recognizing that bug-out situations demand rapid action and unpredictable conditions.
Tactical operator loadout for field operations
Bottom compartment: Ammunition storage, tactical tools, technical equipment. Lower-middle: Secondary ammunition, protective gear, specialized operational equipment. Upper compartments: Communication devices, mission-specific documentation, secondary medical supplies. Front MOLLE webbing: Magazine carriers, breaching tools, emergency components positioned for instant access. Side attachments: Additional ammunition carriers, tactical pouches, specialized equipment. This configuration prioritizes rapid equipment deployment while maintaining load balance and protecting sensitive gear.
The Paratus Advantage: Turning Organization Into Action
The 3V Gear Paratus isn't just a backpack—it's a platform for organization. When you understand how to leverage its compartments, respect weight distribution principles, and adapt your packing strategy to your specific mission, this investment becomes indispensable. Strategic packing transforms potential chaos into seamless efficiency. Your gear stays accessible, your load feels balanced, and you move with confidence.
Stop treating your backpack as a dumping ground and start treating it as a system. Each compartment serves a purpose. Every attachment point enables customization. The modular design accommodates different missions without requiring multiple complete packs. Apply these packing strategies to your Paratus, test different configurations, and refine your approach based on real-world conditions. The difference between a good experience in the field and an exceptional one often comes down to how thoughtfully you've organized your gear.
Transform your 3V Gear Paratus into your most reliable field companion today.
Leave a Reply