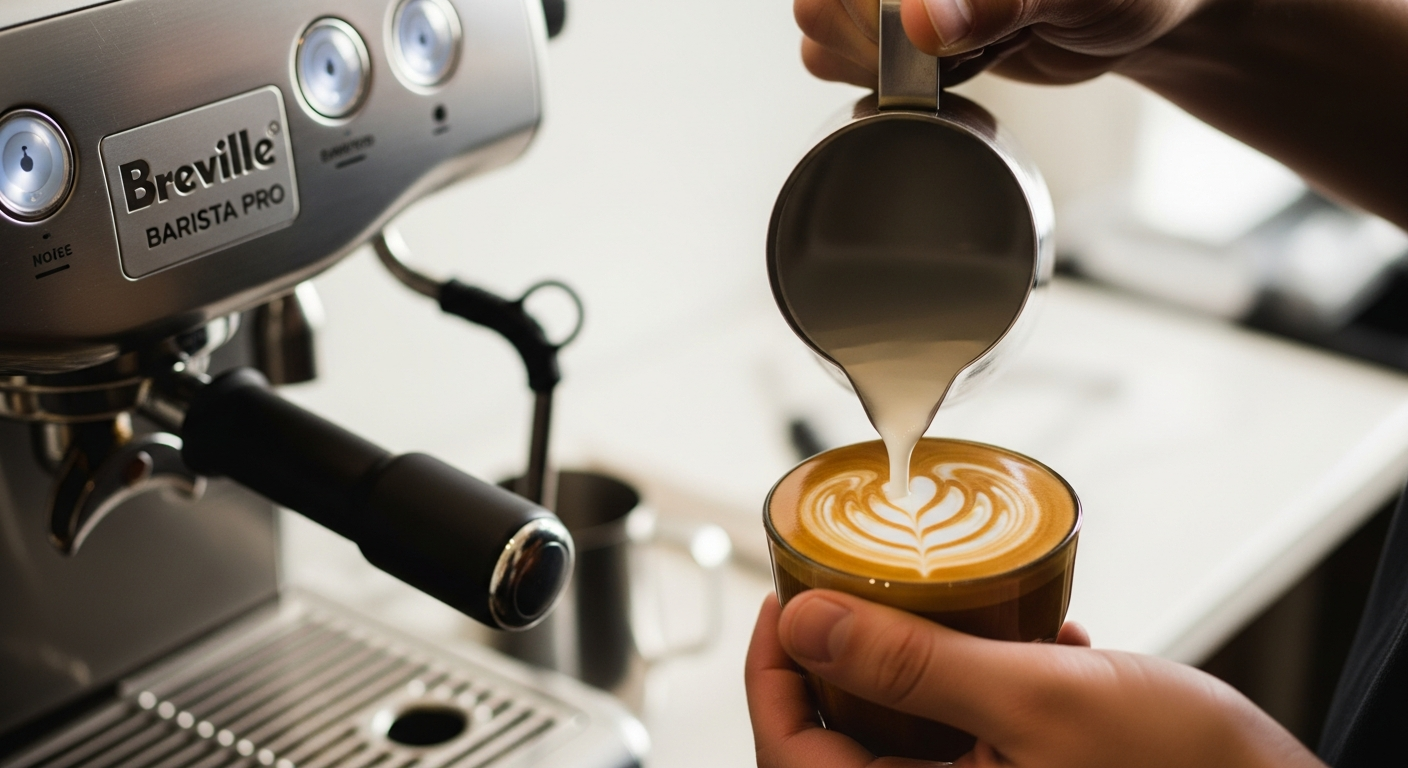
Struggling to recreate that silky microfoam you get at your favorite café? You're not alone. Most home espresso enthusiasts find milk steaming to be the trickiest part of the equation—yet it's the difference between a mediocre cappuccino and one that tastes like it came straight from a professional barista's hands.
The Breville Barista Pro BES878BSS stands out in the crowded espresso machine market because it prioritizes manual control without sacrificing speed or convenience. While many machines either automate milk steaming or leave you with weak, inconsistent results, the Barista Pro's powerful manual microfoam steam wand gives you the precision and feedback needed to develop real barista skills.
Discover how the Breville Barista Pro can transform your home espresso experience.
Perfecting Your Microfoam Technique with the Barista Pro's Steam Wand
How the manual steam wand design enables precise control over milk texture and temperature
The Barista Pro's steam wand isn't just a tube—it's engineered to give you tactile feedback and real-time control over what's happening inside your milk pitcher. Unlike automatic systems that do the thinking for you, this manual wand lets you feel the milk's resistance and temperature changes directly through your hand. That connection between operator and machine is where true skill development happens.
Step-by-step microfoam creation process: positioning, steam pressure, and timing
Begin by filling your stainless steel jug about one-third full with cold milk. Position the steam wand tip just below the milk's surface, angling the pitcher slightly so the milk creates a gentle whirlpool. Turn on the steam valve gradually—aggressive movements lead to large bubbles and wasted milk. Once you hear a soft hissing sound, you've found the sweet spot where air is being incorporated at the right rate. After about three to four seconds, submerge the wand tip deeper while maintaining that consistent hissing sound. This phase builds on the bubbles you've already created, incorporating air throughout the milk rather than just at the surface.
The importance of pitcher angle and milk jug depth for consistent results
Pitcher angle directly determines how effectively your milk circulates and incorporates air. Hold the pitcher at approximately 20 degrees—a slight tilt that creates that essential whirlpool motion. The 480ml stainless steel jug included with the machine is purposefully designed for this angle; its tapered shape encourages the right circulation patterns. Milk depth matters equally. Starting with one-third full milk gives you enough volume to work with while preventing overflow. Too little milk and you're fighting against a pitcher's sides; too much and you risk boiling rather than steaming.
Temperature targets and how to recognize when microfoam reaches optimal consistency
Aim for a final temperature between 60 and 65 degrees Celsius—hot enough to extract flavor but not so hot that you scald the milk's natural sweetness. Most experienced baristas use their free hand on the pitcher's outside surface as a thermometer; when it becomes uncomfortable to hold for more than three seconds, you've hit the target range. The texture itself tells a story. Properly textured milk should flow like wet paint from your pitcher—smooth, glossy, and without visible bubbles on the surface. If you see foam sitting on top like shaving cream, you've incorporated too much air too early.
Common beginner mistakes when steaming milk and how to avoid them
The most frequent error is positioning the wand too deep from the start, which prevents air incorporation and creates large bubbles instead of microfoam. Another trap is keeping the steam pressure constant throughout—as milk heats and expands, you need to gradually increase pressure to maintain consistent texture. Many newcomers also lift the pitcher too high or angle it incorrectly, disrupting the whirlpool and creating dead zones where milk doesn't circulate. Start with these positioning fundamentals before worrying about speed.
Differences between wet microfoam (cappuccino) and velvety microfoam (flat white) textures
Cappuccino microfoam has slightly more visible bubbles—what baristas call "wetter" foam—with a ratio of roughly 50% air to 50% milk. This creates height and a distinct foam layer that sits atop your espresso shot. Flat white microfoam is denser and smoother, achieved by incorporating less air while steaming longer at higher temperatures. The milk becomes almost glossy, flowing as a single unified texture rather than separating into foam and liquid. The difference comes down to your timing; both start with the same technique, but flat whites require you to submerge the wand deeper earlier and maintain pressure longer.
Why the 480ml stainless steel jug included with the machine is optimized for steaming
This jug's design isn't arbitrary. The tapered sides encourage proper milk circulation patterns that smaller or wider jugs can't achieve as effectively. Stainless steel also conducts heat evenly and allows you to monitor milk color changes through the metal's reflection. The 480ml volume is large enough to prevent overflow during aggressive steaming yet small enough that you maintain control over milk movement. Using the included jug rather than improvising with household pitchers makes the learning curve considerably shorter.
Troubleshooting weak steam output or inconsistent milk texture
If your steam feels weak, check whether the wand's internal pathway is blocked by dried milk—even small residue buildup significantly reduces pressure. Purge the wand immediately after each use by running steam for several seconds into your sink. Inconsistent texture often indicates temperature fluctuation. The Barista Pro's PID system keeps this stable, but if you're steaming back-to-back drinks without pause, the boiler may cool slightly between shots. Allow 15-20 seconds between drinks to let the machine stabilize. If texture issues persist across multiple sessions, descaling might be necessary; mineral buildup inside the boiler affects steam generation.
Latte Art Fundamentals: From Basics to Advanced Patterns
Why the Barista Pro's manual control makes it suitable for developing latte art skills
Latte art requires a machine that responds to your input without fighting you or doing things automatically. The Barista Pro delivers exactly that—you control steam pressure, milk temperature, and pour rate entirely through your own technique. This direct cause-and-effect relationship means you learn faster. Every mistake teaches you something specific about pressure or positioning, rather than hiding behind automation. You're developing genuine muscle memory and understanding rather than following a program.
Essential milk texture requirements for pouring clean lines and designs
Latte art demands microfoam that's simultaneously smooth and flowing. If your foam is too thick and chunky, your lines will break apart mid-pour. If it's too thin and soupy, you won't get definition between colors. The sweet spot is that glossy, paint-like consistency where the foam and steamed milk move as one unified medium. Surface tension should be tight enough to hold a pattern but loose enough to flow seamlessly into the espresso. Many latte art failures trace back to suboptimal milk texture rather than pouring technique.
Basic latte art patterns to master first: hearts, rosettas, and tulips
Start with hearts—they're forgiving and teach fundamental pour control. Begin your pour from about two inches above the espresso, holding the pitcher low and steady. Once your cup is three-quarters full, raise the pitcher and move it side-to-side in small motions, creating a white line through the crema. At the end, lower the pitcher back down and pull through the center to create the heart's point. Rosettas (leaf patterns) come next; they require tighter control and a faster pour speed. Tulips demand the most precision—they're essentially multiple rosettas stacked together. Each of these patterns teaches specific muscle memory that transfers to more complex designs.
How the machine's PID temperature control ensures consistent heat for reliable pours
The PID system maintains water temperature within ±2°C, which sounds like a small range until you realize how dramatically even one degree affects milk behavior. Cooler water steams milk more slowly and produces different foam density than hot water. Inconsistent temperatures mean your microfoam texture changes between drinks, making it nearly impossible to develop reliable pouring technique. With the Barista Pro's precision, you can focus entirely on your pour mechanics rather than compensating for temperature variation.
The relationship between espresso extraction quality and latte art success
Beautiful latte art means nothing if your underlying espresso is poorly extracted. A thin, under-extracted shot produces weak crema that your microfoam cuts through too easily. Over-extracted espresso creates bitter-tasting drinks where latte art becomes visual distraction rather than complement. The Barista Pro's low-pressure pre-infusion and gradual pressure increase support consistent extraction. Your espresso should have a substantial, caramel-colored crema layer—that's your foundation for pour definition.
Practice drills and exercises to build pouring muscle memory
Dedicate one session weekly to repetitive patterns rather than trying to nail perfect designs every time. Pour 10 hearts in succession, focusing only on pitcher height and movement consistency. The first few will be rough; by the tenth, your hands know the motion without conscious thought. Repeat this with rosettas the following week. Record your practice pours on video—what looks okay in the moment often reveals subtle hand movements that are throwing off your design. Muscle memory develops through repetition, not perfection.
Common latte art failures and what they reveal about your technique
A heart that splits down the middle suggests your initial pour was off-center or you pulled through too aggressively. Rosettas that blur together indicate you're pouring too fast or your milk isn't textured densely enough. Lines that fade out before reaching the cup's edge usually mean your pitcher is too high or your wrist motion stopped abruptly. Each failure is diagnostic information about specific aspects of your technique. Rather than frustration, approach failures as targeted feedback about what to adjust next time.
Progressing from simple designs to more intricate patterns with confidence
Once hearts feel automatic, move to rosettas. When rosettas become consistent, try tulips. Only progress when a pattern feels genuinely routine—when your hands execute it without conscious instruction. More advanced designs like swans, dragons, or geometric patterns are simply combinations and variations of basic techniques applied with refined control. The progression isn't about achieving Instagram-worthy results immediately; it's about building genuine skill that compounds over time.
Steam Wand Maintenance: Keeping Your Machine in Peak Condition
Daily cleaning protocols to prevent milk buildup and blockages
Immediately after steaming milk, purge the wand by running steam into your sink for three to five seconds. This forces out any milk that's started to dry inside the nozzle. While steam is still running, wipe the wand's exterior with a damp cloth—never use a dry cloth as this can deposit dried milk back onto the surface. Once the machine has cooled slightly, use a small brush (the Barista Pro's cleaning kit includes one) to gently clean the wand tip's holes. These daily actions take less than a minute but prevent the buildup that eventually requires deep cleaning.
Why immediate post-use purging extends the life of your steam wand
Milk proteins begin coagulating the moment steam exposure ends. Dried milk hardens into a cement-like substance that's exponentially harder to remove than fresh milk. Purging immediately keeps milk from sitting inside the wand's internal passages, where you can't physically reach it. This simple habit prevents blockages that reduce steam pressure and forces you into time-consuming deep cleaning sessions. The five seconds of purging today saves you thirty minutes of disassembly and soaking next month.
Deep cleaning methods using specialized espresso machine cleaners
For deep cleaning, use a dedicated espresso machine cleaner like Cafiza or similar products designed for milk-based residue. Backflush the wand by inserting it into a small container of cleaning solution and pressing the steam button repeatedly—the solution is forced backward through the internal pathways, dislodging stubborn deposits. Run plain water through the same process afterward to rinse out all cleaning solution. This should be done monthly if you're steaming daily, less frequently if you steam occasionally. The cleaning kit included with your Barista Pro contains the necessary brushes and tools.
Descaling frequency and its impact on steam pressure consistency
Mineral deposits from water accumulate inside the boiler and steam lines over time, gradually reducing steam pressure. Descaling monthly is ideal for hard water areas; every six to eight weeks works for softer water. The machine will signal when it needs descaling. Use a commercial espresso machine descaler, follow the manufacturer's instructions carefully, and always run fresh water through the system for at least a minute after descaling to remove all acidic solution. Consistent steam pressure depends on this maintenance.
Signs that your steam wand needs professional servicing
If you're maintaining the wand properly but steam pressure becomes noticeably weaker, or if steam comes out unevenly from the holes, internal damage may have occurred. Some blockages resist home cleaning methods and require professional disassembly. If the wand leaks water rather than producing steam, the internal seal is likely compromised. These aren't issues you can typically fix at home—professional servicing is the appropriate response.
Protecting the wand's internal pathways from calcium deposits and milk residue
The best protection is prevention through consistent maintenance. Purge immediately after each use, wipe the exterior regularly, and descale on schedule. If you notice steam pressure dropping gradually, increase descaling frequency rather than waiting for a failure. Hard water areas should consider using filtered water in the machine's tank—this single change dramatically extends the lifespan of internal components. Regular maintenance costs nothing; wand replacement costs considerably more.
Disassembly and reassembly tips for thorough internal cleaning
The Barista Pro's steam wand can be disassembled by loosening the collar nut where it connects to the boiler—refer to your manual for the specific procedure. Inside, you'll find a nozzle and internal pipe that harbor dried milk. Soak these components in hot water with espresso machine cleaner for 15-20 minutes, then use a small brush to remove softened deposits. Reassemble carefully, ensuring the internal pipe is fully seated, and run water through the wand before reattaching it to verify nothing is blocked. Take a photo before disassembly to guide reassembly if needed.
Storage best practices when the machine isn't in regular use
If you'll be away for more than two weeks, run fresh water through the entire steam system—both the wand and the brewing group—and purge steam for several seconds. Leave the machine in a cool, dry location. Before returning to regular use, run water through all pathways again to ensure nothing has settled or dried. The included cleaning kit should be stored in a dry place; brushes can develop mildew if stored damp.
Speed Meets Skill: How the ThermoJet System Supports Milk Steaming
The 3-second heat-up advantage: why rapid temperature achievement matters for milk drinks
Traditional espresso machines require 10-15 minutes (or more) to reach brewing temperature. During that waiting period, the boiler is warming, thermal stability hasn't been achieved, and your first shot often suffers from temperature inconsistency. The Barista Pro's ThermoJet system reaches optimal temperature in three seconds—meaning you can pull a shot and begin steaming milk without the lengthy preheat that older machines demand. For morning routines where every minute counts, this speed transforms the practicality of making espresso drinks at home. You're not sacrificing your morning to wait for the machine; the machine adapts to your schedule.
How PID temperature control (+/- 2°C precision) stabilizes steam consistency
Temperature stability is invisible until it's absent. Without PID control, water temperature fluctuates during the brewing cycle, creating shots that taste different on day one than day thirty. Steam temperature also wavers, affecting how milk responds to heat and air incorporation. The PID system actively monitors boiler temperature and adjusts heating elements microsecond-by-microsecond to maintain the target within ±2°C. This precision means your microfoam behaves the same way in your first drink as your tenth drink of the morning. Consistency builds confidence and accelerates skill development.
The relationship between machine temperature stability and microfoam quality
Milk steaming is temperature-dependent chemistry. Water molecules respond predictably to consistent heat, creating uniform bubble structures and smooth texture. Temperature fluctuations cause uneven heating, large bubbles forming in cool zones and scalding in hot zones. The Barista Pro's stable temperature environment means milk heats uniformly throughout your pitcher. You're not fighting against thermal inconsistency; you're working with a machine that responds predictably to your technique.
Why faster heat-up times allow you to steam milk immediately after pulling shots
Older machines required a brief pause between pulling espresso and steaming milk because the boiler needed to recharge for steam production. The Barista Pro is ready to steam within seconds of finishing your shot. This workflow advantage is enormous—you pull your double shot, immediately begin steaming milk, and have a finished drink ready in under two minutes from start to finish. This speed enables practicing multiple drinks in a single session, which accelerates your learning of microfoam technique and latte art.
Comparing the Barista Pro's heating system to older espresso machines for milk work
The original Barista Express, the Barista Pro's predecessor, also featured rapid heat-up but with less precise temperature control. Machines from five or more years prior routinely required waiting between brewing and steaming phases. Professional machines use dual boilers specifically to avoid this waiting, but they cost five to ten times more than the Barista Pro. The ThermoJet system delivers professional-level speed in a single-boiler format that fits home kitchens and budgets. That's the engineering achievement that makes this machine special.
Managing temperature fluctuations during back-to-back milk steaming sessions
When steaming multiple drinks in succession, the boiler cools slightly with each extraction. The PID system compensates automatically, but if you're making more than four or five milk drinks within 10 minutes, allow 15-20 seconds between drinks for the boiler to fully recharge. Don't wait longer than necessary—the machine recovers quickly enough that your workflow isn't interrupted. The single boiler design works excellently for typical home use (one to three drinks at a sitting) but isn't ideal for café-volume production.
How the single boiler design affects workflow when making multiple milk-based drinks
A single boiler heats water for both brewing and steaming, which is why brief pauses occur between functions. Higher-end machines use separate boilers—one maintains brewing temperature while another handles steam. The Barista Pro's single boiler represents a conscious design choice: prioritize speed and convenience for home users over high-volume capability. For someone making one cappuccino and one latte at breakfast, this design is perfect. For someone making eight drinks simultaneously for a family gathering, limitations emerge. Understanding this helps set realistic expectations about the machine's intended use case.
Integrated Grinder Benefits for Espresso-to-Milk-Drink Workflow
The convenience of fresh-ground beans for every shot in your milk drinks
Grinding immediately before pulling shots preserves aromatics and volatile oils that deteriorate once beans are exposed to air. Pre-ground coffee begins losing flavor within hours; whole beans remain fresh for weeks. The Barista Pro's integrated grinder means your cappuccino and latte both contain coffee ground moments before extraction. That freshness translates into noticeably more vibrant flavor in milk drinks, where subtle aromatics easily disappear into steamed milk. You're not grinding yesterday's portafilter worth of beans; you're working with coffee at peak flavor.
How the 30 grind settings allow fine-tuning for different bean origins
Ethiopian beans often shine with slightly coarser grinds, while Brazilian beans frequently prefer finer settings. Having 30 grind positions lets you match your grind to whatever beans you're currently using. The integrated grinder also saves counter space compared to owning a separate grinder—a significant advantage in smaller kitchens. Consistency between grinds is excellent; the conical burrs produce uniform particle size across all 30 settings.
Grinding directly into the portafilter: speed and consistency advantages
The Barista Pro grinds directly into your portafilter, eliminating the intermediate step of grinding into a separate container and then dosing into the filter basket. This saves 15-20 seconds per drink while also reducing mess and ground coffee waste. You pull your portafilter out before starting your next milk drink, maintaining continuous workflow rhythm. From beans to espresso to milk steaming happens in smooth, uninterrupted sequence.
Why bean freshness impacts the flavor foundation of your cappuccinos and lattes
A cappuccino is roughly 70% espresso by volume, even though milk dominates what you taste. If that espresso is made from stale beans with muted, flat flavors, the entire drink suffers. Fresh-ground espresso from quality beans creates the aromatic foundation that makes a cappuccino or latte genuinely delicious rather than simply warm and caffeinated. The integrated grinder's convenience means there's no temptation to pre-grind beans the night before or use yesterday's grounds.
The integrated grinder's role in achieving balanced extraction for milk-based beverages
Balanced espresso extraction—neither under-extracted and sour, nor over-extracted and bitter—creates the flavor base that milk complements rather than masks. The Barista Pro's 30 grind settings let you dial in the exact grind size for balanced extraction with your specific beans. This control is crucial because milk-based drinks amplify extraction flaws; an imperfect espresso becomes obviously unbalanced once milk is added, whereas a balanced shot becomes something genuinely enjoyable.
Managing grinder noise during early morning milk drink preparation
The integrated grinder is admittedly loud—this is the machine's primary acoustic weakness. Grinding at 6 AM before others wake up can be problematic. Solutions include grinding the previous evening (though this sacrifices freshness), using the machine during daytime hours when noise is less disruptive, or moving the machine to a basement or enclosed space where sound is dampened. Some users place the machine on a rubber mat or inside a small box while grinding, reducing noise transmission. The tradeoff is accepting either some noise or slightly less fresh beans; there's no perfect solution here.
Consistency benefits when you're making multiple drinks in succession
When you're making three cappuccinos for family breakfast, the integrated grinder delivers fresh grounds for each shot without requiring you to switch between grinding and espresso-pulling. You grind-pull-steam-serve repeatedly without the workflow disruption of cleaning out and refilling a separate grinder between drinks. This efficiency encourages practicing multiple drinks in a session, which directly accelerates your skill development with microfoam and latte art.
Comparing the Barista Pro to Other Machines for Milk-Drink Enthusiasts
How the Barista Pro stacks up against the Barista Express (predecessor) for steaming
The Barista Express was Breville's original all-in-one machine and remains popular today. Both machines feature integrated grinders and manual steam wands, but the Barista Pro improved heating speed (3 seconds versus 11 seconds on the Express) and added PID temperature control for greater precision. The Barista Express included a pressure gauge that some experienced baristas appreciated, though the Barista Pro's PID system arguably provides more useful real-time feedback. For milk-focused work, the Barista Pro's speed advantage matters because you're not waiting between shots and steaming phases.
Manual steam wand advantages over automatic milk frothers
Automatic milk frothers produce consistent foam but don't teach you anything—they're like cruise control for milk steaming. Manual steam wands require skill and attention, which means you're constantly refining technique and developing intuition about milk behavior. That active involvement is why baristas trained on manual equipment produce better results than those relying on automation. You understand milk texture intimately, can adjust on the fly, and develop reliable muscle memory that transfers across different machines.
Why the lack of a pressure gauge matters less for milk-focused baristas
The Barista Express included a pressure gauge indicating when optimal extraction pressure was reached. The Barista Pro omits this, relying instead on flow rate observation and the PID system to manage pressure automatically. For espresso purists who obsess over every extraction variable, this feels like a step backward. For milk-drink enthusiasts, it matters far less—you're more focused on microfoam quality and shot flavor than analyzing pressure dynamics. The PID system handles pressure consistency automatically, eliminating the need for manual gauge monitoring.
Price-to-performance ratio for home baristas prioritizing milk texturing skills
The Barista Pro costs approximately AUD $930–$1,499 in Australia or around $849 USD in North America. Compare that to super-automatic machines (which cost similar amounts but teach nothing), prosumer machines (which cost $2,000+), or café-quality equipment (which starts at $5,000+). For the price, the Barista Pro delivers manual control, speed, integrated functionality, and consistent results that support genuine skill development. Spending significantly less gets you equipment that teaches you very little; spending more adds features many home users never utilize.
Alternative machines to consider if high-volume milk drink production is your goal
If you're making more than six milk-based drinks daily, the single boiler system becomes limiting. Machines with dual boilers (separate brewing and steaming boilers) eliminate waiting between functions and handle high volume without thermal instability. Rancilio Silvia, Gaggia Classic Pro modifications, or entry-level prosumer machines from Rocket or Lelit offer greater capacity. These typically cost $300-600 more and require significantly more learning curve, so the upgrade is only justified if volume genuinely demands it.
The Barista Pro's sweet spot: serious hobbyists who want to develop real skills
The Barista Pro excels for people who genuinely want to learn barista-level technique without professional commitment or budget. You get enough control to develop real skills, enough automation to avoid frustration, and enough speed to enable practice. You're not fighting the machine; you're partnering with it to improve. That balance is precisely what makes the Barista Pro best-selling—it serves a real market segment exceptionally well.
Feature trade-offs: what you gain and lose compared to higher-end espresso machines
Trading up to prosumer machines gains you larger water tanks, dual boilers, rotary pumps, and significantly more pressure consistency. You lose the compact footprint and simplicity that makes the Barista Pro approachable. Higher-end machines demand more maintenance, deeper technical knowledge, and workflow adjustments. The Barista Pro's strength is accessibility without sacrificing core capabilities; prosumer machines add capabilities most home users never fully utilize. It's not a matter of one being objectively superior—it's about matching the machine to your actual goals and commitment level.
Explore the Breville Barista Pro and start your milk steaming journey today.
Kitchen Space and Workflow Optimization with the Barista Pro
Compact footprint advantages for small kitchens and apartment living
The Barista Pro measures approximately 14" × 16" × 15.5", making it genuinely compact for an all-in-one espresso system. Many apartments and small kitchens simply can't accommodate separate espresso machines, grinders, and milk steamers. The integrated design consolidates everything into counter space roughly equivalent to a coffee maker. This footprint advantage is practical—you're actually more likely to use the machine regularly because it's not dominating your kitchen.
Counter placement considerations for steam wand accessibility
Position the machine with clearance on the right side if you're right-handed (or left side if left-handed) for comfortable pitcher access during steaming. The steam wand extends about four inches from the machine body, so ensure at least six inches of clear counter space in that direction. Avoid placing the machine directly below kitchen cabinets where steam vents upward; steam and heat can damage cabinet finishes over time. A ventilation hood above the machine helps redirect steam away from your kitchen.
How the machine's size impacts milk pitcher positioning during steaming
The machine's compact height means your pitcher angle during steaming is comfortable and natural. You're not reaching or contorting awkwardly to position the pitcher relative to the steam wand. The included 480ml jug fits beneath the wand with natural arm positioning, which contributes to better technique development. Taller machines sometimes force awkward pitcher angles that create tension and make consistent technique harder to master.
Workflow efficiency: proximity to water, grinder, and milk storage
Position the machine near your water source (the tank is removable but frequent refilling from the kitchen sink is convenient), with milk storage in your refrigerator nearby. Keep your bean hopper accessible—it holds 250 grams, roughly a week's worth of beans for one-two drinks daily. This proximity thinking reduces the friction in your morning routine. You're not hunting for beans, filling the water tank, or walking across the kitchen repeatedly; everything is within arm's reach of your machine location.
Design aesthetics: brushed stainless steel appeal in modern kitchens
The brushed stainless steel finish looks professional and contemporary. It complements most modern kitchen aesthetics without appearing dated or overly industrial. The understated design means the machine integrates into your kitchen rather than dominating it visually. Unlike some espresso machines that scream "specialty equipment," the Barista Pro could almost pass for a premium appliance without closer inspection.
Cable management and ventilation requirements for optimal performance
The power cable is reasonably long, allowing placement on most kitchen counters without requiring an extension cord directly under the machine. Ensure adequate ventilation around the machine—don't wedge it into a tight cabinet or corner where heat and steam can't dissipate. A few inches of clearance on all sides supports longevity. Keep the water tank access unobstructed so you can easily remove and refill it weekly.
Creating a dedicated milk-steaming station around your Barista Pro
Consider assembling a small station with your machine as the centerpiece: milk storage in a nearby fridge, a small cup warming rack beside the machine, cleaning supplies within arm's reach, and a cloth or small towel for steam wand purging. This organized approach turns casual coffee making into a deliberate ritual that reinforces skill development. You're creating an environment that supports practice rather than rushing through drinks.
Investment Perspective: Is the Barista Pro Worth It for Milk-Drink Lovers?
Price range context: AUD $930–$1,499 in Australia, ~$849 USD in North America
The Barista Pro sits at the intersection of affordability and capability. It's not an impulse purchase for casual coffee drinkers, but it's also not a financially devastating investment for someone serious about improving their espresso skills. Compared to café spending (a $5-7 specialty drink daily across a year totals $1,800-2,500), the machine pays for itself within six to twelve months if you're replacing regular café visits.
Long-term durability and build quality relative to cost
Breville machines are known for durability; many Barista Express units remain functional after years of regular use. The Barista Pro's construction appears robust, with quality materials throughout. It's not a disposable appliance—you're investing in equipment likely to serve you for five to ten years with proper maintenance. That longevity meaningfully improves the value proposition.
Cost per espresso drink versus café pricing over time
A double shot with microfoam milk costs roughly $0.50-0.75 in beans, milk, and electricity. Your local café charges $5-7 for the equivalent drink. Even accounting for the machine's cost, you're achieving dramatic savings after the first year. If you're making three specialty drinks weekly, you're saving $600+ annually compared to café visits. The financial argument alone justifies the purchase for regular consumers.
Skill development value: learning real barista techniques at home
Beyond financial savings, you're developing genuine competence—the ability to create café-quality drinks reliably. That knowledge doesn't expire and transfers to other machines if you ever upgrade. You understand milk steaming, espresso extraction, and flavor balance in ways that automatic machines never teach. This competence brings satisfaction beyond cost-benefit analysis; you've invested in understanding something complex and mastering it through practice.
Resale value and market demand for the Barista Pro
Used Barista Pro units sell reasonably well on secondary markets, typically for 60-70% of original retail price. If you decide espresso-making isn't your passion, the machine retains sufficient value that your loss is limited. This resale stability provides some financial cushion against the risk of the purchase proving disappointing.
Warranty coverage and after-sales support considerations
Breville offers standard manufacturer warranty (typically one to two years depending on region) and maintains service support networks in most developed countries. Replacement parts are available and reasonably priced. This support infrastructure means if something breaks, you have clear remediation paths rather than owning an expensive paperweight.
ROI timeline for frequent home espresso and milk drink consumers
For someone making two specialty drinks daily, the machine generates ROI within six months. For someone making drinks once weekly, ROI takes several years. Honest assessment of your actual consumption patterns is crucial—if you're occasionally making lattes, the machine might not be justified. If you genuinely enjoy espresso and milk drinks and currently buy them frequently, the Barista Pro's ROI is compelling.
Addressing Common Limitations and Workarounds
Single boiler system implications for rapid back-to-back milk drinks
The single boiler heats water for both brewing and steaming. After pulling a shot, the boiler temperature drops as cold water enters for the next pull. The PID system reheats the boiler quickly (usually 15-20 seconds), but if you're making six drinks in rapid succession, brief pauses accumulate. For typical home use (one to three drinks at a sitting), this is barely noticeable. For higher volumes, it becomes a limitation. Understand this constraint upfront rather than discovering it during your first family gathering.
Noisy grinder: soundproofing solutions and timing strategies
The integrated grinder is undeniably loud—roughly 80 decibels during operation, comparable to a blender. Grinding at 6 AM when others are sleeping is problematic. Workarounds include grinding the previous evening (accepting slightly less fresh coffee), grinding during afternoon hours when background noise masks the sound, or placing the machine in a basement or pantry during grinding. Some users build a simple wooden box enclosure that dampens noise by roughly
Leave a Reply