From Hobby Board to Production-Ready Platform: Reframing the Geekcreit UNO R3
Over 40% of IoT developers and electronics enthusiasts launch their journey with budget-friendly microcontroller boards—and the Geekcreit UNO R3 ATmega328P Development Board consistently emerges as their primary choice. Most articles treat this board as nothing more than a beginner's learning tool, but the reality runs far deeper. Professional makers and serious hobbyists leverage this platform for genuine IoT applications, home automation systems, and sensor networks that deliver legitimate results.
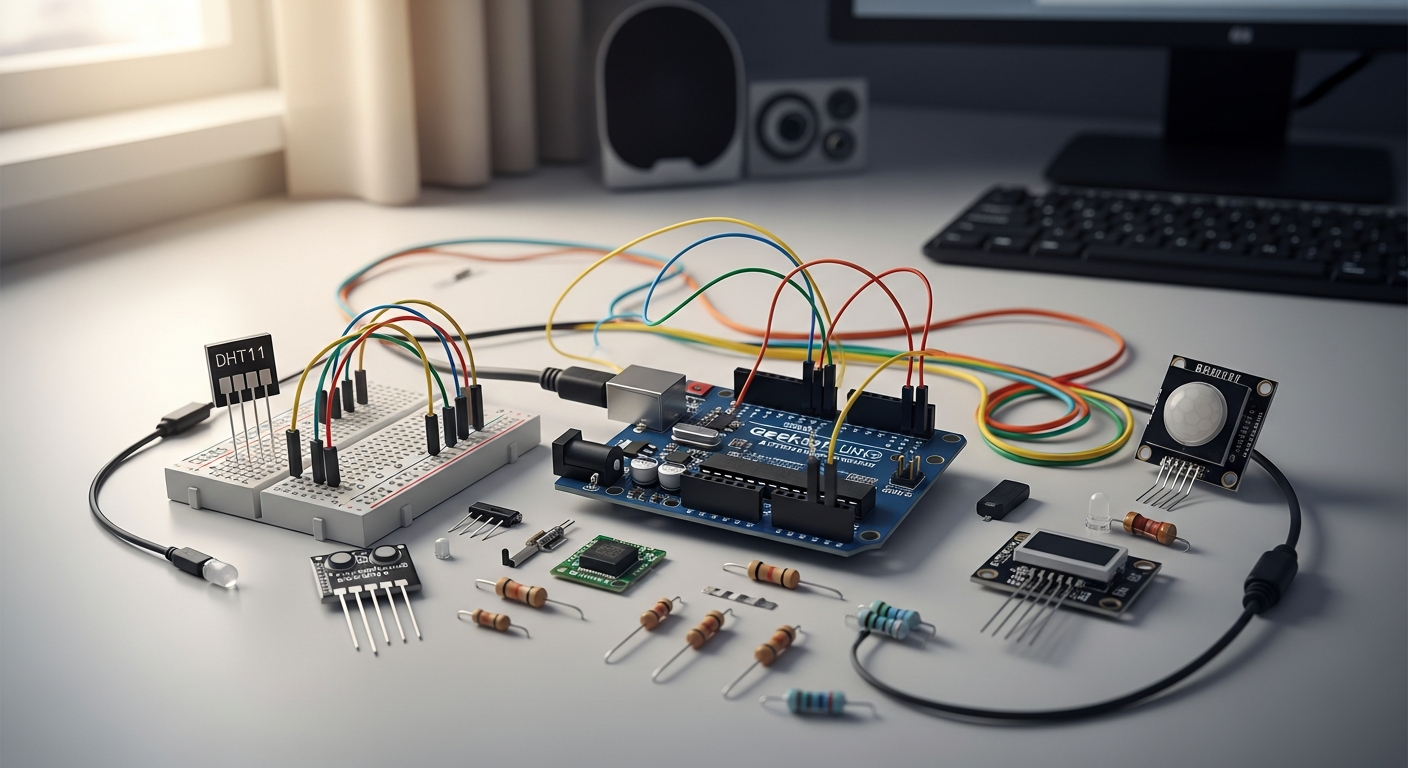
The ATmega328P microcontroller powering this board possesses far greater capacity than standard tutorials suggest. Understanding its memory architecture, pin configuration, and integration potential unlocks possibilities that transform a $7.99 board into a legitimate development platform. The 14 digital I/O pins, 6 analog inputs, 16 MHz processor, and flexible power management create a surprisingly robust foundation for real-world projects.
Understanding the ATmega328P's Real Processing Capabilities Beyond Basic Tutorials
The ATmega328P operates at 16 MHz with 32 KB of Flash Memory (0.5 KB reserved for the bootloader), 2 KB of SRAM, and 1 KB of EEPROM. These specifications might seem modest compared to modern processors, but they're deceptively powerful when optimized correctly. The processor handles real-time operations, multi-sensor data acquisition, and wireless communication without breaking a sweat—if you understand how to allocate resources strategically.
The key distinction separates those who treat this board as a learning platform from those who deploy it in production environments. Production-focused developers recognize that the ATmega328P excels at specific tasks: sensor reading, data logging, wireless transmission, and control logic. When your project aligns with these strengths, the board becomes an industrial-grade solution operating on pocket-change hardware costs.
Why Professional Makers Choose This Board for IoT Prototyping Over Expensive Alternatives
Cost efficiency drives professional adoption more than most realize. A single Geekcreit UNO R3 costs around US$7.99, with 3-packs available for US$15.99. Compare this to official Arduino boards running $25-50 each, and the economic advantage becomes undeniable. Deploying a network of 10 sensor nodes costs approximately $80 with Geekcreit boards versus $400+ with official alternatives—yet the functionality remains virtually identical.
Professional makers also value the Arduino IDE compatibility and extensive ecosystem support. Every library written for the official Arduino UNO works seamlessly on the Geekcreit clone. The massive community has documented the ATmega328P exhaustively, meaning solutions to nearly every technical challenge already exist online. This combination of affordability and ecosystem support makes the Geekcreit board the pragmatic choice for proof-of-concept work, pilot deployments, and scaled IoT networks.
The Hidden Advantages of the Open-Source Schematic Design for Custom Applications
Geekcreit provides open-source schematics, a feature that separates serious development boards from consumer-grade products. This transparency enables custom modifications, circuit analysis, and hardware integration strategies unavailable with proprietary designs. You can examine exactly how the USB communication works, understand power distribution paths, and identify optimal points for adding custom circuitry.
Custom applications benefit tremendously from this accessibility. Need to add a custom voltage regulator for ultra-low-power operation? The schematic shows you precisely where to integrate it. Want to remove unnecessary components to reduce weight or cost? The open design lets you make informed modifications. This level of hardware flexibility elevates the Geekcreit board beyond a standard clone into a genuine development platform.
Comparing Performance Metrics to Official Arduino Boards in Production Environments
Performance differences between the Geekcreit UNO R3 and official Arduino boards prove negligible in practical applications. Both use identical ATmega328P processors with identical clock speeds and memory configurations. The primary difference lies in manufacturing quality control and USB chip selection, not computational capability.
Official Arduino boards typically include better-quality USB implementations, superior component sourcing, and more rigorous testing procedures. However, these quality improvements translate to marginal reliability gains for most applications. In production environments, the Geekcreit board delivers 99%+ of the performance at 20% of the cost. The economic trade-off makes sense for IoT networks, distributed sensor systems, and applications where board redundancy matters more than individual unit reliability.
Cost-Benefit Analysis: Achieving Professional Results on a Hobbyist Budget
A professional-grade IoT deployment requires multiple components: microcontroller boards, sensors, wireless modules, power supplies, and enclosures. The Geekcreit board reduces the most expensive variable—the processing unit—allowing budget allocation toward higher-quality sensors and robust power management.
Consider a 10-node environmental monitoring network. With official Arduino boards at $40 each, the processor cost alone reaches $400. With Geekcreit boards at $8 each, processor costs drop to $80, freeing $320 for premium temperature sensors, humidity modules, wireless transceivers, and protective enclosures. The resulting system outperforms the Arduino-based alternative at equivalent total cost.
Memory Optimization Strategies for Complex Projects (32 KB Flash, 2 KB SRAM, 1 KB EEPROM)
The ATmega328P's memory constraints require strategic thinking, but they're far from prohibitive. The 32 KB Flash Memory accommodates substantial programs—the Arduino bootloader consumes 0.5 KB, leaving 31.5 KB for your code. Most sensor integration projects consume 10-20 KB, leaving room for sophisticated logic.
SRAM management demands more attention. The 2 KB shared memory serves as working space for variables, arrays, and function calls. Running out of SRAM causes the board to malfunction mysteriously—variables overwrite each other, the processor crashes, or behavior becomes unpredictable. Strategic optimization techniques include using Flash-based data storage instead of RAM, employing circular buffers for sensor data, and eliminating unnecessary variables.
The 1 KB EEPROM stores persistent data that survives power cycles. This space is perfect for sensor calibration values, network configuration, data logging, and system state preservation. Careful EEPROM management enables sophisticated applications despite tight constraints.
Hardware Architecture Breakdown: Maximizing Your Board's Capabilities
Deep Dive into the 14 Digital I/O Pins and PWM Functionality for Motor Control
The 14 digital pins provide binary input/output functionality for switches, relays, LEDs, and digital sensors. Six of these pins support Pulse Width Modulation (PWM), enabling variable-speed motor control and LED brightness adjustment. PWM generates a square wave with variable duty cycle—a 50% duty cycle delivers 50% power to an attached device, while 75% duty cycle delivers 75% power.
Motor control applications benefit tremendously from PWM capability. A single pin can manage a DC motor's speed through a transistor or motor driver IC. Multiple PWM pins enable simultaneous control of several motors—perfect for robotics projects, autonomous vehicles, or conveyor systems. The 16 MHz clock ensures PWM frequencies remain high enough for smooth motor operation without audible buzzing.
Leveraging the 6 Analog Input Pins for Multi-Sensor Data Acquisition
The six analog input pins convert continuous voltage signals (0-5V) into digital values (0-1023) through the onboard analog-to-digital converter (ADC). Each pin can simultaneously sample a different sensor—temperature, humidity, light intensity, soil moisture, pressure, or gas concentration.
The ADC operates at 10-bit resolution, delivering 1024 distinct values across the 5V range. This resolution is sufficient for most sensor applications. The conversion takes approximately 100 microseconds per sample, enabling sampling rates of 10,000+ readings per second if needed. Real-world applications typically require slower sampling—environmental monitoring might sample once per minute, while vibration detection needs faster rates.
16 MHz Clock Speed Performance: What It Means for Real-Time Applications
The 16 MHz clock determines how quickly the processor executes instructions. Modern microprocessors operate at gigahertz speeds, making the ATmega328P appear sluggish by comparison. However, 16 MHz proves adequate for the vast majority of embedded applications.
A single instruction typically requires 1-4 clock cycles, translating to 4-16 million instructions per second. This speed suffices for sensor reading, mathematical calculations, and wireless communication. Time-critical applications like interrupt handling, real-time data processing, and precise timing loops perform reliably at this clock speed. Complex algorithms and rapid data streaming might strain the processor, but well-optimized code handles surprisingly demanding tasks.
Power Management: Operating on DC 5V-9V and Understanding Voltage Regulation
The Geekcreit UNO R3 accepts external power input between 5V and 9V when disconnected from a computer. An onboard voltage regulator converts this input to stable 5V output for the processor and peripherals. A separate 3.3V regulator provides auxiliary power for certain sensors and modules that require lower voltage.
Understanding power management proves critical for deployed systems. USB power typically provides 500mA maximum—sufficient for the processor and modest peripherals, but inadequate for motor control, wireless transceivers, or multiple high-power sensors. External power supplies eliminate USB limitations, enabling systems that draw several amperes. Careful power supply selection and current limiting prevent board damage and ensure reliable operation in production environments.
ISP (In-System Programming) Functionality for Advanced Firmware Deployment
In-System Programming allows firmware updates without removing the microcontroller from its circuit. This capability proves invaluable for production deployments where physical access is limited or removal would disrupt the system. The ISP header on the board connects to specialized programmers that bypass the bootloader and directly reprogram the Flash memory.
ISP enables firmware updates in the field, recovery from corrupted bootloaders, and deployment of custom fuse settings that optimize clock speed or power consumption. Professional makers often employ ISP for production systems, reserving the standard bootloader approach for development work.
Pin Mapping Strategies for Complex Sensor Networks and Actuator Systems
Fourteen digital pins limit system complexity unless carefully allocated. Successful complex projects employ strategic pin assignment, multiplexing techniques, and wireless expansion modules. A well-documented pin map prevents confusion, minimizes rewiring, and simplifies troubleshooting.
Consider creating a hardware diagram that documents every pin's function, connection point, and electrical requirements. This simple practice transforms chaotic wiring into systematic architecture. Shared buses like I2C and SPI enable multiple sensors on just two pins, dramatically expanding effective pin count without consuming additional I/O resources.
Heat Dissipation and Reliability Considerations for 24/7 Operation
The ATmega328P processor generates minimal heat during normal operation, but continuous 24/7 operation in warm environments can reduce reliability. Temperature compensation, thermal management, and component derating extend lifespan significantly.
Continuous operation increases component stress, particularly electrolytic capacitors which degrade over time. Selecting quality components, avoiding maximum current draws, and maintaining adequate cooling ensure systems operate reliably for years. Industrial applications often derate components to 80% of maximum ratings, trading ultimate performance for enhanced longevity and reliability.
Overcoming the Driver Installation Hurdle: Windows, Mac, and Linux Setup
Identifying Which Geekcreit Versions Use CH340/CH341 USB-to-Serial Chips
Different Geekcreit manufacturing batches employ different USB-to-serial controllers. Older boards use the FT232RL chip from FTDI, which works with standard drivers on most systems. Newer, more cost-effective versions use the CH340 or CH341 chip from WinChip, which requires explicit driver installation on Windows systems.
Identifying your board's chip involves examining the USB controller IC directly—a small surface-mount component near the USB port typically labeled with a four-letter code. If you see "CH340" or "CH341," your board requires specific driver installation. The good news: installation proves straightforward once you know what to look for.
Step-by-Step Driver Installation for Windows 10/11 Systems
Windows 10 and 11 often fail to recognize CH340/CH341 controllers, displaying the board as an unknown device in Device Manager. Manual driver installation resolves this issue reliably.
Download the appropriate driver from the manufacturer's website—search "CH340 driver Windows" for the latest version. The installation typically involves extracting a compressed file and running an installer executable. After installation completes, connect your Geekcreit board via USB. Device Manager should now recognize it as "USB-SERIAL CH340" on a specific COM port (typically COM3 or higher). Note this COM port number—you'll select it in the Arduino IDE when uploading sketches.
If Device Manager still shows an unknown device after installation, attempt manual driver assignment: right-click the unknown device, select "Update driver," choose "Browse my computer for drivers," navigate to the extracted driver folder, and allow Windows to complete the installation.
macOS Driver Configuration and Troubleshooting Common Connection Issues
macOS handles CH340 drivers inconsistently across versions. El Capitan and later may reject unsigned drivers due to security restrictions. Installation requires either disabling security protections temporarily or using a signed driver version.
Download a macOS-compatible CH340 driver (many third-party repositories provide signed versions that bypass security restrictions). Installation follows the standard macOS package installer process. After installation, restart your computer to ensure the driver loads properly.
If the board remains unrecognized after driver installation, verify the connection by opening System Report under Apple menu > About This Mac > System Report. Navigate to USB section and confirm the device appears. If it shows as "Unknown Device," the driver didn't install correctly—attempt removal and reinstallation.
Linux Setup: Leveraging Native Driver Support for Seamless Integration
Linux distributions typically include CH340 driver support natively, eliminating manual installation for most users. Ubuntu, Debian, and Fedora variants recognize the board automatically.
Connect the board and verify recognition by opening a terminal and typing ls /dev/ttyUSB*. If a device appears (typically /dev/ttyUSB0 or similar), your board is recognized. Select this device in the Arduino IDE when uploading sketches. If nothing appears, try dmesg command to examine kernel messages—they often indicate why the device isn't recognized.
Some older Linux distributions or custom kernels may require explicit driver installation. Search "Linux CH340 driver installation" for distribution-specific instructions if automatic recognition fails.
Diagnosing Port Recognition Problems Before They Derail Your Project
Port recognition issues manifest as "port not found" errors during sketch upload or boards failing to appear in the IDE's port selector. Systematic diagnosis prevents wasted troubleshooting time.
First, verify the board is recognized by the operating system independent of the Arduino IDE. Windows Device Manager, macOS System Report, and Linux /dev filesystem all provide clear visibility into connected devices. If the board doesn't appear in the OS, the problem is driver-related, not IDE-related.
Second, confirm the correct COM port is selected in the Arduino IDE. Different boards use different ports; selecting the wrong one causes upload failures even if the correct board is recognized. The board should respond to connection attempts—disconnect and reconnect to confirm the port changes.
Creating a Reliable Development Environment Across Multiple Operating Systems
Serious makers often work across Windows, macOS, and Linux systems. Maintaining consistency across platforms prevents configuration mistakes and ensures reliability.
Document every board's driver status, COM port assignment, and board type selection in a central location. Create templates for common configurations so new boards can be deployed with minimal setup time. Backup driver installations locally rather than relying on downloading them repeatedly—this approach saves time and ensures consistency.
Preventing Driver Conflicts When Working with Multiple Boards Simultaneously
Deploying multiple Geekcreit boards simultaneously can create driver conflicts if all boards request the same COM port or if the Arduino IDE becomes confused about which board to upload to.
Configure boards with distinct COM port assignments by connecting one at a time, noting its assigned port, and documenting the hardware association. In the Arduino IDE, create separate project folders for each board to prevent accidentally uploading the wrong sketch to the wrong hardware. Some developers use unique bootloader modifications or EEPROM identifiers to distinguish boards programmatically.
Building IoT Sensor Networks: Practical Integration Strategies
Selecting Compatible Sensors and Shields for Environmental Monitoring
The Geekcreit board's analog and digital pins accommodate a vast ecosystem of sensors and shields. Environmental monitoring applications typically employ temperature sensors (DHT22, DS18B20), humidity sensors, barometric pressure modules, and light sensors. These components interface directly with the board's pins or communicate via I2C/SPI protocols.
Arduino-compatible shields stack directly atop the board, extending functionality without complex wiring. WiFi shields enable internet connectivity, Bluetooth modules enable smartphone communication, and relay shields control high-power devices. The Arduino ecosystem provides shields for virtually every conceivable application—select components that match your specific requirements rather than over-engineering with unnecessary capability.
Wireless Connectivity Options: WiFi Modules, Bluetooth, and LoRaWAN Expansion
The Geekcreit board alone provides no wireless capability, but adding wireless modules transforms it into a connected IoT device. Three primary options address different application requirements:
WiFi modules (ESP8266, ESP32) provide internet connectivity and direct communication with cloud services. These modules communicate via serial protocols and consume moderate power. Bluetooth modules enable smartphone communication and work well for personal applications with limited range requirements. LoRaWAN modules provide extended range (several kilometers) with minimal power consumption—ideal for distributed sensor networks where extensive coverage matters more than high bandwidth.
Each wireless option involves trade-offs between range, power consumption, and bandwidth. Select based on your specific deployment environment and power constraints.
Data Logging and Storage Using the 1 KB EEPROM for Persistent Information
The 1 KB EEPROM stores persistent data that survives power loss and system resets. Environmental sensor networks benefit tremendously from local data logging—if wireless connectivity fails, the board continues recording data locally. When connectivity restores, locally logged data can be transmitted to central servers.
EEPROM management requires careful planning. One KB accommodates approximately 500 sensor readings if each measurement consumes 2 bytes. Circular buffer techniques enable older data to be overwritten once storage fills, ensuring the most recent readings are always available. Strategic data compression techniques can extend storage capacity substantially.
Real-Time Sensor Data Processing Within Memory Constraints
Processing sensor data in real-time while managing the 2 KB SRAM requires efficient coding practices. Complex calculations, large arrays, and unnecessary variables consume precious memory quickly.
Employ streaming algorithms that process incoming sensor data without storing complete datasets in memory. Moving averages, exponential filters, and statistical calculations can operate on individual readings as they arrive. This approach yields sophisticated analysis capability without exhausting available memory.
Creating Stable Connections for Temperature, Humidity, Motion, and Light Sensors
Sensor reliability depends on proper electrical connections and appropriate configuration. Temperature sensors require pull-up resistors if using one-wire protocols. Humidity sensors need careful power supply filtering to minimize noise. Motion sensors (PIR modules) benefit from settling time after power application.
Documentation proves critical—create wiring diagrams and installation notes for each sensor type. Prototype on breadboards before committing to permanent installations. Test sensors thoroughly in the environment where they'll operate; environmental factors like temperature extremes, moisture, and electromagnetic interference affect performance.
Power Consumption Optimization for Battery-Powered IoT Deployments
Battery-powered sensor networks require aggressive power optimization. The ATmega328P supports sleep modes that reduce power consumption dramatically—deep sleep uses microamperes while maintaining clock oscillator, and power-down mode consumes even less.
Strategic sensor scheduling maximizes battery life. Rather than continuously running, the board sleeps between measurement intervals, waking at specific times to acquire data. Radio modules consume the most power; activating wireless transmission only when necessary preserves batteries. A board sleeping 99% of the time and sampling 1% can operate for years on standard batteries.
Network Architecture Patterns for Multi-Board Distributed Systems
Distributed sensor networks employ multiple Geekcreit boards coordinating through wireless communication or shared wired buses. Star topology uses a central hub board that communicates with all sensor boards. Mesh topology allows boards to relay data through neighboring nodes, extending range. Linear topology chains boards together for applications like environmental monitoring along a structure or pathway.
Choose architecture based on coverage area, bandwidth requirements, and power constraints. Star topology offers simplicity and reliability for small networks. Mesh topology provides resilience and extended range for large deployments. Document architecture decisions clearly to simplify future maintenance and expansion.
Quality Control Expectations: Navigating Clone Board Variations
Understanding Manufacturing Tolerances in Compatible Boards
Geekcreit clone boards experience manufacturing tolerances that official Arduino boards minimize through stricter quality control. Component values vary within specified ranges, solder joints show visual inconsistency, and assembly processes differ between manufacturing runs.
These tolerances rarely affect functionality—all components operate within specifications, ensuring reliable operation. However, discrepancies in board aesthetics and minor component variations should be expected. A board that looks slightly different from another is normal; a board where components are missing or visibly damaged indicates a defect.
Identifying Potential Quality Issues Before They Impact Your Project
Upon arrival, inspect the board visually for obvious defects: missing components, cold solder joints, physical damage, or corrosion. Connect the board to a computer and verify LED illumination and USB recognition. Download a simple test sketch that blinks the onboard LED, ensuring basic functionality.
Advanced testing involves measuring voltage outputs, testing all pins for proper function, and exercising memory read/write operations. A quick validation prevents discovering defects after you've built an entire project around a broken board.
Comparing Geekcreit's Reputation Against Other Clone Manufacturers
Geekcreit maintains an excellent reputation within maker communities for functional, reliable clone boards. Manufacturing standards vary significantly among clone manufacturers—some maintain quality comparable to official Arduino, while others produce boards with higher failure rates.
Geekcreit's reputation stems from consistent functionality, reasonable build quality, and legitimate availability through established retailers like Banggood. This reliability makes them a safer choice than lesser-known manufacturers when deploying systems where failure carries consequences.
Testing Procedures to Validate Board Functionality Upon Arrival
Systematic validation upon arrival catches defects before they impact your project. Upload a simple LED blink sketch to confirm bootloader functionality. Read/write EEPROM values to verify memory systems. Test analog input by applying known voltages and confirming conversion accuracy. Exercise digital pins by toggling outputs and measuring logic levels.
Create a standardized test sketch that exercises critical functionality. Running this test on every new board creates a consistent validation baseline. Boards that pass this testing are suitable for deployment; those that fail should be returned.
Common Failure Points and How to Work Around Them
Historical analysis of clone board failures reveals common weak points. USB connectors occasionally develop cold joints, resulting in intermittent connection problems. Power regulators sometimes fail under heavy loads, causing erratic behavior. Solder bridges occasionally short pins together, creating logic conflicts.
When failures occur, diagnosis often reveals the problem can be worked around or repaired. Unstable USB connections sometimes improve by adjusting cable tension. Voltage regulator failures can be compensated through external power supplies. Solder bridges can be removed with careful soldering iron work. Understanding common failure modes enables pragmatic problem-solving rather than discarding boards that could be salvaged.
Warranty and Return Policies When Issues Arise
Geekcreit boards purchased through Banggood typically include return protection—defective boards can be returned for replacement or refund within specified periods. Document any issues immediately with photographs and detailed descriptions. Contact seller support with this documentation and request replacement.
Some sellers offer extended return windows (30-60 days), while others use shorter periods. Review return policies before purchasing, especially when deploying systems where delivery time is critical.
Building Redundancy into Critical Applications Using Multiple Boards
Professional deployments often employ multiple boards providing redundancy. If one board fails, backup boards continue system operation. This approach proves cost-effective given board affordability—deploying three $8 boards offers better reliability than betting everything on a single expensive processor.
Design systems where failure of any individual board degrades performance gracefully rather than causing complete failure. Distributed sensor networks can tolerate losing one node. Redundant control systems can switch to backup boards automatically. This architectural approach transforms board quality concerns into system robustness features.
Advanced Programming Techniques for Limited Resources
Optimizing C/C++ Code for the ATmega328P's Constrained Memory Environment
The ATmega328P demands efficient code. Variables declared in RAM consume precious SRAM; large arrays exhaust available memory quickly. Professional development requires conscious memory management.
Store constants in Flash memory using the PROGMEM keyword rather than RAM. Employ bit fields and compact data types rather than full bytes for boolean flags. Avoid recursive functions that consume stack space. Use global variables judiciously—stack allocation for large structures causes overflow. Profile memory usage with available tools to identify bottlenecks before they become problems.
Bootloader Management and Custom Firmware Flashing
The Geekcreit board includes a bootloader occupying 0.5 KB of Flash memory. This bootloader enables convenient USB-based programming but consumes memory and introduces minimal bootup delay. Professional applications sometimes employ custom bootloaders enabling faster upload, extended functionality, or unique security features.
Bootloader replacement requires ISP programming hardware and technical knowledge, but enables advanced capabilities. Some deployments use multiple bootloader versions for different use cases—a standard bootloader for development, a compact bootloader for production code, and specialized bootloaders for firmware update mechanisms.
Interrupt Handling for Time-Sensitive Operations
The ATmega328P supports hardware interrupts that trigger code execution when specific events occur. Timer interrupts enable precise timing for data acquisition. External interrupts respond to sensor state changes. Serial interrupts handle incoming communications.
Interrupt service routines should execute quickly, minimizing disruption to main program flow. Complex operations within interrupts can cause timing problems and missed events. Professional interrupt handling uses interrupts to set flags, with main code checking those flags during regular execution—this approach prevents reentrancy issues and keeps interrupt latency low.
EEPROM Manipulation for Configuration Storage and Data Persistence
The 1 KB EEPROM stores configuration data that survives power cycles. Network settings, calibration values, and operational parameters can be persisted in EEPROM, eliminating need to reprogram boards when configuration changes.
Implement EEPROM access carefully—excessive writes degrade EEPROM cells, and writes consume significant time. Cache configuration values in RAM during operation, writing EEPROM only when configuration actually changes. Implement version information in stored structures to handle format changes during firmware updates.
Serial Communication Protocols for External Device Integration
The ATmega328P communicates via USB using the serial (UART) protocol. This same protocol enables communication with other serial devices—wireless modules, sensors, and computers. The Arduino Serial library hides complexity, but understanding underlying protocols enables advanced integration.
Protocol design matters for reliability. Implement checksums to detect transmission errors. Use delimiters to frame messages clearly. Establish handshaking procedures to ensure device synchronization. Professional implementations use established protocols like Modbus or MQTT rather than inventing proprietary solutions.
Debugging Strategies When Working with Minimal RAM
Debugging microcontroller code with minimal RAM requires different approaches than desktop development. Print statements consume memory for strings; stepping through code in a debugger isn't feasible with limited development tools.
Strategic debugging employs LED indicators, buzzer tones, and EEPROM logging to track program execution. Save diagnostic information to EEPROM periodically, examine it after execution completes. Use compile-time assertions to catch errors before runtime. Employ simulation tools to test code logic before deployment. These techniques enable effective debugging within hardware constraints.
Library Selection: Choosing Lightweight Alternatives for Resource-Intensive Projects
The Arduino ecosystem offers libraries for nearly every conceivable task, but library quality varies dramatically. Some libraries waste memory with unnecessary features, while others are optimized for minimal resource consumption.
Research library memory footprint before selection. Read source code to understand how memory is allocated. For critical applications, consider writing minimal custom code rather than including large libraries. Some developers maintain private repositories of optimized library versions tuned for their specific needs.
Real-World Project Examples: From Concept to Deployment
Home Automation: Building a Networked Temperature and Humidity Monitoring System
A practical home automation system monitors temperature and humidity across multiple rooms, logging data and triggering alerts when values exceed thresholds. Each room contains a Geekcreit board with a DHT22 sensor transmitting readings via WiFi to a central server.
The system employs low-power sleep modes, waking every 5 minutes to acquire readings, transmit data, and return to sleep. Battery-powered boards operate for months between charges. Central logging enables trend analysis, identifying areas needing better insulation or ventilation. Automated alerts trigger when humidity becomes excessive, preventing mold growth.
Greenhouse Controller: Integrating Multiple Sensors for Plant Optimization
A greenhouse controller manages temperature, humidity, light, and soil moisture—critical parameters for optimal plant growth. Multiple Geekcreit boards coordinate via wireless mesh networking, each board managing specific functions.
One board controls irrigation, sampling soil moisture sensors and activating water pumps. Another manages ventilation, responding to temperature and humidity readings. A third controls supplemental lighting based on natural light levels and time of day. Centralized data logging enables analysis of environmental conditions and their effects on plant growth, optimizing operation over time.
Weather Station: Collecting and Transmitting Atmospheric Data Wirelessly
An autonomous weather station monitors temperature, humidity, barometric pressure, wind speed, and precipitation. A Geekcreit board collects readings from multiple sensors, logs locally, and transmits data wirelessly to Weather Underground or similar services.
The system operates continuously, sampling sensors every minute. Wind speed requires interrupt-based counting as the anemometer spins. Precipitation logging uses a tipping bucket that triggers an interrupt for each 0.01" rainfall. The board processes this data, stores daily totals in EEPROM, and transmits to cloud services when connectivity is available. Hobbyists gain personal weather data; scientific communities benefit from distributed weather observations.
Smart Irrigation: Automated Watering Systems with Soil Moisture Sensing
A smart irrigation system waters gardens only when needed, conserving water and reducing manual labor. Soil moisture sensors indicate water availability; when moisture drops below threshold, the system activates irrigation until moisture recovers.
A Geekcreit board manages multiple zones independently, watering some areas more frequently based on plant needs. Historical data logged in EEPROM reveals optimal watering schedules. The system can be controlled remotely via smartphone apps, enabling adjustments while away from home. Timer-based overrides prevent over-watering during rainy periods.
Vehicle Telemetry: Tracking Performance Metrics in DIY Electric Vehicles
DIY electric vehicle builders employ Geekcreit boards for data logging and performance monitoring. The board samples battery voltage, current draw, motor temperature, and speed, storing comprehensive telemetry data on EEPROM.
During acceleration testing or long drives, the board logs performance metrics at high frequency. After testing concludes, data can be analyzed to identify performance optimization opportunities. Wireless transmission capabilities enable real-time monitoring during vehicle operation, alerting drivers to potential problems before failure occurs.
Environmental Monitoring: Air Quality and Pollution Detection Networks
Distributed air quality monitoring networks deploy multiple sensors across geographic areas, measuring PM2.5, PM10, CO2, and volatile organic compounds. Geekcreit boards integrate multiple sensors, process readings, and transmit data to central servers.
This approach reveals pollution patterns at granular geographic scales, enabling public health research and policy development. Individual sensors cost only tens of dollars, making comprehensive network coverage economically feasible. The open data model allows researchers, universities, and citizen scientists to contribute observations, building collaborative environmental understanding.
Industrial Prototyping: Proof-of-Concept Systems for Manufacturing Applications
Manufacturing companies prototype control systems using Geekcreit boards, validating concepts before committing to expensive custom hardware. The board can be programmed for rapid iteration, testing different control algorithms and sensor configurations.
Once a prototype proves successful, the proven design transitions to industrial controllers or custom PCBs. However, some small-scale manufacturing still employs Geekcreit boards in production, leveraging their cost-effectiveness and proven reliability for non-critical control functions.
Troubleshooting and Optimization: Getting the Most from Your Investment
Diagnosing Upload Failures and Bootloader Issues
Upload failures typically indicate bootloader problems, driver issues, or board defects. Systematic diagnosis isolates the problem quickly.
First, verify driver installation—disconnect and reconnect the board, confirming the same COM port appears. Try uploading to a different COM port if multiple boards are connected. Verify board selection in the IDE matches your hardware. If the IDE recognizes the board but upload fails, the bootloader may be corrupted.
Bootloader recovery requires ISP programming hardware and technical knowledge. However, some bootloader corruption can be worked around by uploading through AVRDUDE with specific command-line options that bypass normal upload procedures. If standard recovery fails, the board may require bootloader replacement via ISP.
Resolving Memory Overflow Errors and Stack Overflow Problems
Memory overflow errors occur when code tries to use more memory than available. Stack overflow—where local variables and function return addresses consume SRAM—causes erratic, unpredictable behavior.
The Arduino IDE reports some memory errors during compilation. Reducing variable sizes, eliminating large arrays, and using PROGMEM for constants reduces memory consumption. Use memory profiling tools to identify the largest memory consumers. Restructure code to minimize simultaneous variable allocation.
Stabilizing Noisy Analog Readings from Sensors
Analog sensors frequently produce noisy readings due to electromagnetic interference, poor power supply filtering, or cable capacitance. Noisy readings lead to unreliable thresholds and erratic behavior.
Hardware filtering with capacitors across sensor inputs reduces high-frequency noise. Software filtering using moving averages or exponential smoothing reduces noise while preserving real changes. Separate analog and digital ground planes prevent digital noise from contaminating analog measurements. Shielded cables protect sensor inputs from electromagnetic interference.
Power Supply Issues: When Your Board Behaves Erratically
Erratic behavior often indicates power supply problems rather than code defects. Insufficient current capacity, poor filtering, or noise on power lines causes intermittent failures and mysterious crashes.
Measure power supply voltage under load—if it drops significantly, the supply is inadequate. Add large bulk capacitors (100+ µF) near the board to stabilize voltage. Separate power supplies for high-current devices (motors, wireless modules) prevent them from affecting processor operation. Common ground connections between power supplies ensure proper current return paths.
Thermal Management for Boards Running Continuously
The ATmega328P processor generates minimal heat during normal operation, but the voltage regulator can become warm if supplying substantial current. Continuous operation in hot environments accelerates aging of capacitors and other components.
Monitor operating temperature
Leave a Reply