Smart home technology has exploded in popularity, yet most commercial solutions cost hundreds or thousands of dollars. The barrier to entry has always been steep—until now. The Geekcreit UNO R3 ATmega328P Development Board makes affordable DIY home automation possible, opening doors to smart home control that rivals expensive commercial alternatives without the premium price tag.
Home automation isn't just a luxury anymore—it's becoming a practical necessity for modern living. From controlling lights and temperature to monitoring security sensors, the ability to automate your home has shifted from a tech enthusiast's dream to an achievable goal for anyone with basic electronics knowledge. What once required hiring professionals or purchasing proprietary systems is now within reach for hobbyists, students, and budget-conscious homeowners.
Start building your smart home with the Geekcreit UNO R3 ATmega328P Development Board today.
Why the Geekcreit UNO R3 ATmega328P is Ideal for Home Automation Beginners
Budget-friendly entry point
Your home automation journey doesn't require a substantial investment. Boards cost under $10, leaving your budget available for sensors, modules, and other essential components. This affordability means you can experiment with multiple projects, learn from mistakes, and iterate quickly without financial strain. Many beginners purchase several boards to run different automation systems throughout their homes.
Full Arduino ecosystem compatibility
Access thousands of pre-built libraries and existing code designed for home automation projects. The Arduino community has created resources for nearly every sensor and module you might need. Whether you're working with temperature sensors, motion detectors, or wireless communication modules, someone has already written functioning code and documented the process.
Sufficient processing power
The ATmega328P microcontroller handles multiple sensor inputs and relay controls simultaneously without performance issues. This processor manages 14 digital input/output pins, 6 analog inputs, and various communication protocols. For most residential home automation applications, this processing capability far exceeds what you'll actually need, giving your projects room to grow.
Extensive community documentation
Thousands of tutorials, forums, and GitHub repositories specifically cover Arduino-based home automation. When you encounter problems, solutions are usually just a search away. The community actively supports beginners and shares working examples that accelerate your learning curve.
Reliable long-term support
The Arduino platform has been around for 15+ years, ensuring your projects remain supported and upgradeable. This longevity means your investment won't become obsolete, and future versions will likely maintain backward compatibility with existing code.
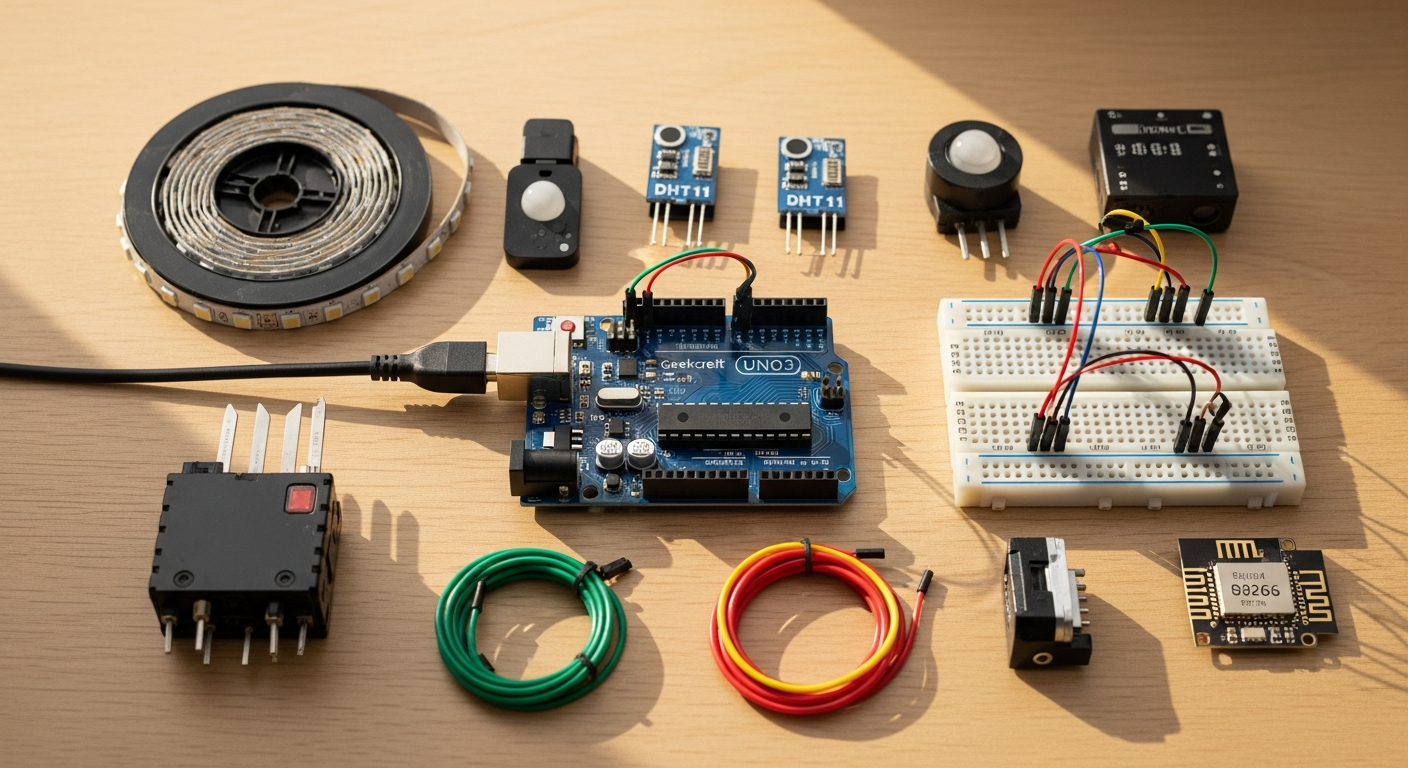
Essential Hardware Components for Home Automation Setup
Relay modules
Control high-voltage devices like lights and fans safely from the microcontroller's low-voltage pins. Relay modules act as electronic switches, isolating your sensitive development board from the higher voltages needed to operate household appliances. A basic relay module costs just a few dollars and is essential for any project involving actual home devices.
Temperature and humidity sensors (DHT22)
Monitor environmental conditions and trigger automatic climate responses. These affordable sensors provide accurate readings that enable your system to adjust heating, cooling, or ventilation automatically based on real-time conditions.
Motion detection sensors (PIR)
Enable occupancy-based lighting and security features throughout your home. Passive infrared sensors detect movement and allow you to create sophisticated automation rules—lights that turn on when someone enters a room and off after inactivity.
Light sensors (LDR)
Create intelligent lighting systems that adjust based on ambient brightness. Light-dependent resistors measure surrounding light levels, enabling your system to distinguish between day and night, and adjust lighting accordingly.
Wireless communication modules
WiFi shields and Bluetooth modules enable remote control and automation scheduling. These additions transform your local automation system into one you can control from anywhere, whether you're at work or traveling.
Step-by-Step Guide to Your First Smart Lighting Project
Planning your circuit design
Map out which pins control which lights and how sensors trigger changes. Before connecting anything, sketch out your system on paper. Identify which digital pins will control relays, which analog pins will read sensors, and what logic will connect inputs to outputs. This planning phase prevents costly mistakes and wasted components.
Wiring the relay module
Connect relay coils to digital pins and high-voltage circuits with proper isolation. Follow the relay module's documentation carefully. The key principle is keeping the low-voltage control circuit separate from the high-voltage switching circuit. Use appropriate wire gauges for high-voltage connections and ensure all connections are secure.
Writing the control code
Create simple Arduino sketches that read sensor inputs and activate outputs. Start with basic code that simply turns a relay on and off. The Arduino IDE provides a straightforward programming environment, and countless examples online show exactly how to accomplish common tasks.
Testing individual components
Verify each relay, sensor, and connection works before integrating the full system. Test your relay with a simple circuit before adding it to your complete system. Confirm sensors read accurate values. This methodical approach catches problems early when they're easiest to fix.
Implementing automation logic
Build conditional statements that trigger lights based on time, motion, or light levels. Once individual components work, write code that combines them intelligently. For example: "If motion is detected AND the sun has set, turn on the lights."
Advanced Features You Can Add with Minimal Cost
Time-based scheduling
Use real-time clock modules to automate lights on specific schedules. Your home can automatically adjust based on the time of day—morning lights that gradually brighten, evening lights that activate at sunset, and nighttime lighting that provides safe navigation without disturbing sleep.
Remote smartphone control
Integrate WiFi shields to control your home from anywhere using mobile apps. Once connected to your home network, you can check sensor readings and trigger actions from your phone, tablet, or computer.
Voice assistant integration
Connect to Alexa or Google Home ecosystems for hands-free automation. Voice control turns home automation into a natural, intuitive experience. Simply speaking commands feels more human than tapping buttons or typing codes.
Energy monitoring
Track power consumption with current sensors to identify inefficient devices. Understanding which appliances consume the most energy enables intelligent cost-saving measures and helps you make informed decisions about your home's power usage.
Multi-room synchronization
Coordinate lighting and temperature across different areas of your home. Rather than controlling each room independently, create unified automation scenarios where multiple rooms respond together to conditions or commands.
Getting Started with Home Automation Today
The Geekcreit UNO R3 ATmega328P Development Board removes the financial barrier that once kept home automation projects out of reach. You're not just buying a microcontroller—you're gaining access to a thriving ecosystem of makers, developers, and innovators who've already solved most of the problems you'll encounter.
Your first project might be as simple as an automated light or as ambitious as a complete smart home system. Either way, the Geekcreit UNO R3 provides the foundation you need to build something remarkable. Start small, learn the fundamentals, and scale up as your confidence grows.
The only real barrier between you and a smarter home is taking that first step. At under $10, there's no reason to wait any longer. The technology is accessible, the community is supportive, and the potential applications are nearly limitless.
Leave a Reply