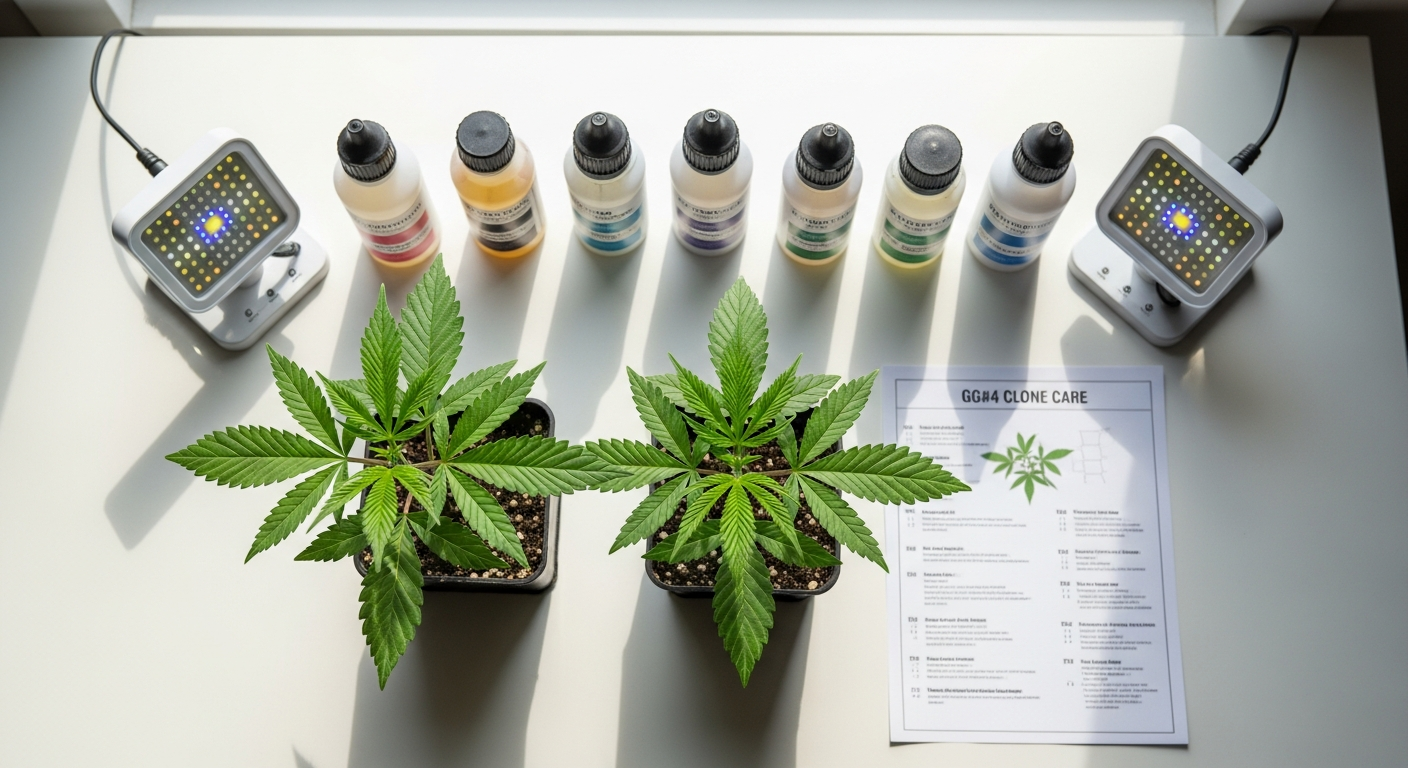
Did you know that GG#4 can stretch between 50-100% during flowering, potentially doubling your plant's height overnight? This explosive growth phase catches many growers off guard, especially those transitioning from smaller, more compact strains. The unpredictability of vertical expansion demands serious planning before you flip the switch to flower mode.
GG#4 Clone, also known as Gorilla Glue #4 or Original Glue, has become the gold standard for indoor cultivators seeking reliable genetics with exceptional results. This indica-dominant hybrid (60% indica, 40% sativa) delivers consistent quality, vigorous growth, and resin production that extract enthusiasts absolutely crave. Its 24-30% THC content and dense, trichome-saturated buds have earned it multiple Cannabis Cup awards and a reputation that precedes it in cultivation circles.
Throughout this guide, you'll discover the specific techniques that transform GG#4 clones into high-yielding plants. You'll cover everything from optimal flowering timelines and nutrient feeding strategies to branch support systems and humidity management. Whether you're setting up your first grow room or refining your technique, this comprehensive breakdown will equip you with the knowledge to maximize your harvest.
Source your GG#4 clones from Seeds & Clones today and start building your high-yield operation.
Selecting and Sourcing Authentic GG#4 Clones
Understanding the Clone-Only Phenotype
GG#4 is fundamentally a clone-only strain. The original cut cannot be reliably reproduced from seeds without significant phenotypic variability, which explains why sourcing authentic genetics matters more here than with most other strains. When you purchase a true GG#4 clone, you're getting a genetic duplicate of the original award-winning phenotype—the exact same plant that earned those Cannabis Cups and built the strain's legendary reputation.
Seed-grown alternatives may exhibit wildly different characteristics: weaker resin production, lower potency, different stretch patterns, or inferior flavor profiles. Some breeders offer S1 feminized seeds from the authentic cut, but even these introduce genetic variation compared to clone propagation. For growers prioritizing consistency and predictability, clone sourcing remains the only way to guarantee you're cultivating the genuine article.
Price Range and Cost Factors
GG#4 clones typically range from $50 to $120 per clone, depending on several variables. Supplier reputation plays a significant role—established operations with verified genetics and healthy stock command premium prices. Quantity purchases often lower per-clone costs; buying five clones typically costs less per unit than purchasing a single one. Geographic location also matters; some regions face higher shipping costs or regulatory compliance expenses that suppliers pass along to customers.
Seasonal demand fluctuates pricing as well. Peak growing seasons see higher demand and correspondingly higher prices, while off-season sourcing might yield better deals. Bulk discounts from wholesale suppliers can drop costs substantially if you're planning a larger cultivation operation.
Verifying Authenticity and Quality
Before committing your money, request documentation from your supplier about clone lineage. Reputable vendors can trace their stock back to verified original cuts and provide detailed grow records or customer testimonies. Ask about the mother plant's testing results—legitimate suppliers have had their genetics tested for potency and cannabinoid profiles.
Upon arrival, inspect your clones carefully. Healthy GG#4 clones display vibrant green foliage with no yellowing, spotting, or wilting. The stem should be firm, the root system visible through the medium's drainage holes, and the overall plant structure compact without stretching. Any signs of pest damage, mold, or disease are immediate red flags.
Quarantine and Acclimation Protocols
New clones require a transition period before integration into your main grow space. Place them in a separate area for 7-10 days under lower light intensity (around 200-300 μmol/m²/s) to minimize transplant shock. Maintain higher humidity (65-75%) during this window to support the clones' underdeveloped root systems as they adjust to their new environment.
Water consistently but avoid waterlogging the medium. The clone's root zone is still fragile and prone to rot if conditions turn anaerobic. After acclimation, gradually transition your clones toward your intended vegetative conditions over another 7-10 days. This staggered approach dramatically improves survival rates and establishes vigorous growth trajectories before flowering.
Indoor Flowering Timeline and Environmental Setup
The 8-9 Week Flowering Window
GG#4 typically flowers in 8-9 weeks under standard 12/12 photoperiods. Week 1-2 marks the transition phase; pistils appear and vertical stretch accelerates dramatically. Weeks 3-5 see aggressive flower site development, calyx formation, and peak resin production begins. The plant continues stretching throughout this period, so adequate vertical space remains critical.
Weeks 6-7 shift focus toward bud density and cannabinoid maturation. Trichomes transition from clear to cloudy, and the plant's nutrient demands peak. Week 8-9 brings final resin coating and trichome amber conversion. By late week 8, most phenotypes reach optimal harvest maturity, though some growers extend to day 65 for slightly higher CBD development and deeper sedation.
Temperature and Humidity Management
During vegetative growth, maintain temperatures between 70-85°F (21-29°C) with relative humidity around 50-70%. These conditions support vigorous growth and strong lateral branching that GG#4 naturally exhibits.
Once flowering begins, gradually reduce humidity to 40-55% to prevent bud rot development. This is non-negotiable during weeks 6-9 when dense bud structure creates moisture-trapping microclimates. Temperature should drop slightly to 65-78°F (18-26°C) during this phase—cooler nights (60-65°F) actually enhance terpene expression and can deepen the strain's earthy diesel character.
Monitor vapor pressure deficit (VPD) religiously during late flowering. Aim for 0.8-1.5 kPa during early bloom, dropping to 0.6-1.0 kPa as buds mature. Rooms that ignore VPD often experience rapid mold development in dense canopies, wiping out entire harvests despite otherwise optimal conditions.
Light Cycle and Photoperiod Requirements
Standard 12 hours on / 12 hours off photoperiod triggers and maintains flowering reliably in GG#4. Consistency matters more than perfection—light leaks during dark periods can stress the plant and delay flowering progression. Install blackout curtains and verify your timer's accuracy monthly.
Light intensity should remain high throughout flowering: 600-1000 μmol/m²/s depending on your grow system. LED systems capable of delivering 800+ μmol/m²/s will maximize resin production without excessive heat stress. Older HPS systems should maintain 600-750 μmol/m²/s depending on ventilation capacity.
Ventilation and Air Movement
GG#4's dense bud structure demands aggressive ventilation. Install exhaust fans sized to completely refresh your grow space 3-4 times per hour. Stagnant air pockets create humidity gradients that mold exploits ruthlessly.
Oscillating fans should run 16-18 hours daily, positioning airflow to gently move canopy foliage without creating wind burn. This continuous air movement strengthens plant stems, improves gas exchange, and prevents moisture from accumulating on developing buds. Position fans to avoid direct blasts on bud sites while ensuring all canopy regions receive some air circulation.
When to Transition to Flowering
Begin flowering when your clones have developed 8-10 vegetative nodes and robust lateral branches. This typically requires 3-4 weeks of vegetative growth. Transitioning too early limits yield potential; waiting too long risks canopy overgrowth and space constraints when the plant stretches 50-100%.
Calculate your available vertical space and plan accordingly. If you have 60 inches of height available and your clone finishes vegetative growth at 12 inches, anticipate final plant height of 18-36 inches after stretch. This gives you comfortable headroom for light fixtures and airflow.
Nutrient Feeding and Growth Optimization
Medium-to-Heavy Feeder Classification
GG#4 qualifies as a medium-to-heavy feeder, meaning it consumes nutrients aggressively throughout its lifecycle. This isn't a light-feeding strain that thrives on minimalist approaches; it demands consistent nutrient availability to support vigorous growth, massive resin production, and dense bud development.
During vegetative growth, nitrogen-dominant formulas (higher N relative to P and K) support vegetative biomass. Transition toward phosphorus and potassium emphasis once flowering begins. Heavy feeders benefit from consistent feeding schedules rather than feast-famine cycles; feeding every watering (fertigation) often outperforms weekly heavy feeds with plain water days between.
Nutrient Ratios Throughout the Lifecycle
Vegetative phase demands roughly 3:1:2 nitrogen-to-phosphorus-to-potassium ratios. This supports chlorophyll synthesis, stem strength, and lateral branching development. Calcium and magnesium become increasingly important as the plant scales; maintain 1:0.3 calcium-to-magnesium ratios through foliar sprays or soil amendments.
When you flip to flowering (week 1-3), shift toward 1:3:2 N:P:K to encourage flower site initiation and branching development continues. Weeks 4-6 see full flowering emphasis: 1:4:3 N:P:K redirects energy toward bud density and cannabinoid accumulation. Final weeks 7-9 call for slight potassium increase (1:3:4) to support trichome maturation and resin coating.
Macro and Micronutrient Specifics
Beyond NPK, GG#4 demands robust secondary and micronutrient availability. Calcium supports stem strength for handling heavy buds—critical for this strain's structural demands. Magnesium powers photosynthesis during intense light regimens. Sulfur, zinc, iron, and boron all influence resin and terpene production.
Micronutrient deficiencies often manifest mid-flower as mysterious leaf discoloration or stunted bud development. Iron deficiency (interveinal chlorosis) appears as yellow leaves with green veins; manganese and zinc deficiencies cause similar-looking symptoms. Test your input water and foliar spray solutions monthly to catch imbalances early.
Feeding Frequency and Concentration
Daily or every-other-day fertigation works best for GG#4 in soilless systems. Monitor runoff EC (electrical conductivity) to verify you're staying within safe ranges: 1.2-1.4 EC during vegetative growth, 1.6-2.0 EC during flowering. Concentration varies by nutrient brand, but the principle remains consistent—frequent, moderate feeding beats occasional heavy feeding.
Organic soil systems can handle weekly compost teas and microbial inoculants instead of synthetic salts. However, organic medium still demands medium-to-heavy feeding to support GG#4's vigor; lightweight organic mixes often underfeed this strain unless heavily amended.
Deficiency and Toxicity Recognition
Nitrogen deficiency shows as progressive yellowing of lower leaves while upper canopy remains green. Early detection allows simple feeding schedule increases. Phosphorus deficiency causes dark purple or reddish leaf discoloration, particularly visible during cooler periods. Potassium deficiency creates marginal leaf burn (brown edges) appearing first on older leaves.
Toxicity symptoms include salt burn (brown leaf tips and edges), stunted growth, or leaf curl. Runoff EC exceeding 2.2 signals nutrient accumulation; flush with plain water to reset the medium. Some growers prefer monitoring leaf tissue samples monthly through a lab; this eliminates guesswork and provides precise micronutrient feedback.
Organic Versus Synthetic Approaches
Synthetic nutrients offer precise control and rapid uptake, crucial for managing GG#4's aggressive feeding demands. They allow fine-tuning EC levels and troubleshooting deficiencies quickly through concentration adjustments.
Organic approaches support beneficial microbial ecosystems that some growers believe enhances terpene expression and overall plant vigor. However, organic systems provide less immediate control; nutrient availability depends on microbial activity rates and medium decomposition. Many successful GG#4 cultivators use hybrid approaches—organic base amendments with synthetic nutrient additions when growth demands exceed microbial supply.
Managing Stretch and Providing Structural Support
Why 50-100% Stretch Demands Advance Planning
GG#4's explosive vertical growth during early flowering can double or even triple plant height within 2-3 weeks. A 12-inch clone entering flower becomes 18-36 inches before stretch stabilizes around week 4. This unpredictability frustrates growers who haven't allocated adequate space, leading to light burn, restricted air circulation, or buds pressed against hot fixtures.
Sketch your grow space dimensions before flowering begins. Measure from your canopy top to your light fixture; you need minimum 12-18 inches clearance for safe light intensity without heat stress. Account for the plant's stretch, including bud extension above the main canopy. Planning prevents the common mistake of starting with proper spacing only to discover insufficient headroom by week 4.
Low-Stress Training (LST) Techniques
LST begins during vegetative growth and continues through early flowering to manage vertical development. Gently bend the main stem and lateral branches downward and outward, creating a wider, flatter canopy structure. Use soft plant ties or velcro straps—never wire or string that can girdle stems.
Apply LST before the stem becomes woody and resistant to bending. Early application (weeks 1-2 of vegetative growth) establishes horizontal orientation; the plant naturally develops upward from tie points. Continue gentle adjustments every 3-5 days, incremental bends beat aggressive single-session efforts. LST doesn't eliminate stretch but reduces it by 20-30% while creating a wider canopy that distributes bud weight more evenly.
Support System Options
Single stakes work for smaller single-stem operations but rarely suffice for GG#4's multiple heavy bud-laden branches. Scrogging (using screen or netting) supports the entire canopy uniformly; weave branches through the screen as they develop, creating a horizontal network of distributed bud sites. This maximizes light penetration and prevents any single branch from supporting excessive weight.
Trellising with string or soft ties offers flexible support that adjusts as branches thicken. Attach strings to overhead framework, then loosely tie branches underneath, allowing vertical growth while supporting horizontal weight distribution. This method works particularly well in smaller spaces where screen installation becomes cumbersome.
Stakes anchored to heavy pot bases support individual heavy branches. Position stakes before flowers fully develop; installing them mid-flower risks disturbing developing buds and creating access issues within dense canopies.
Timing Your Support Installation
Install screens or trellis systems before transitioning to flowering. Once flowering has begun, adding support becomes difficult without damaging pistils and early flower development. Vegetative plants tolerate structure installation with minimal stress; flowering plants respond with temporary growth pauses.
For stake-based support, prepare stakes before week 4 of flowering when buds begin weighing branches downward. Don't wait until breakage occurs; structural damage to large bud clusters is irreversible.
Pruning Strategies
Remove lower branches that receive inadequate light penetration before flowering. These "popcorn" buds consume plant energy while producing minimal usable flower. Removing lower 4-6 inches of branching redirects energy toward upper canopy development and improves air circulation in lower canopy regions where mold thrives.
During early flowering, remove any branches showing obvious disease, pest damage, or structural weakness. Diseased branches only worsen as humidity increases; early removal prevents spread. Don't over-prune once flowering is underway—each removal stresses the plant and delays flower maturation. After week 3 of flowering, adopt a hands-off approach.
Real-World Spacing Recommendations
For 4×4 foot grow tents (16 square feet), space clones 2 feet apart in a 2×2 grid—four plants maximum. This provides adequate room for stretch and support system installation while maintaining airflow. Denser spacing reduces individual plant yields despite higher plant count; airflow improves with lower plant density.
Commercial operations running larger spaces often space plants 3×3 feet apart, accepting lower plant counts per square foot but achieving superior individual yields and reduced disease pressure. Smaller spaces (2×2 feet) can accommodate 1-2 plants comfortably.
Account for walkways and equipment access when calculating spacing. A perfectly spaced grow room that you can't reach plants in becomes a liability during emergency branches or late-flowering humidity management.
Maximizing Resin Production and Bud Quality
Terpene Profiles and Environmental Optimization
GG#4's dominant terpenes—Caryophyllene (peppery, spicy), Myrcene (earthy, herbal), and Limonene (citrus, bright)—develop throughout the flowering cycle. Environmental conditions profoundly influence terpene expression; cooler nights (60-65°F) enhance terpene volatility while warm conditions can suppress aromatic complexity.
Light spectrum impacts terpene development subtly but measurably. Full-spectrum lighting (4000-5000K color temperature) during early flowering, transitioning toward warmer spectrum (3000K) during late flowering, encourages diverse terpene synthesis. Some LED manufacturers now offer spectrum-adjustable systems optimized specifically for terpene production.
Relative humidity also plays a role; excessively dry conditions (below 35% RH) can limit terpene expression by stressing the plant. Moderate humidity (45-55% during flowering) maintains plant health without creating mold conditions.
Light Intensity and Spectrum Optimization
High light intensity (800+ μmol/m²/s) increases trichome density and resin coating thickness. LEDs delivering consistent 800-1000 μmol/m²/s throughout the canopy produce noticeably heavier resin coverage compared to 600 μmol/m²/s systems. However, light quality matters as much as quantity; inefficient fixtures waste energy while generating excess heat.
Spectrum adjustments fine-tune cannabinoid profiles and terpene expression. UVB light exposure in the final 2-3 weeks theoretically increases trichome density and potency, though research remains ongoing. Conservative growers avoid UVB exposure to prevent plant stress; aggressive optimization advocates swear by brief UVB treatment.
Far-red light supplementation (700-750nm) can extend flowering slightly while promoting trichome development. Commercial systems often include far-red diodes specifically for this purpose.
Controlled Stress Techniques
Mild environmental stress in the final 3-4 weeks—slightly reduced watering frequency, slightly cooler nighttime temperatures, or subtle light stress—triggers plant defensive resin production. The plant perceives threat and upregulates trichome development as a survival mechanism.
This requires careful calibration; excessive stress reduces yields and delays maturity. Defoliation (removing large fan leaves) early in flowering redirects energy toward flower sites while improving light penetration. Late-flowering defoliation stresses the plant and risks infection; perform defoliation only during weeks 1-3.
Some growers reduce water availability in week 8 to create mild drought stress, prompting the plant to produce resin-protecting trichomes. However, this risks nutritional deficiencies and bud quality loss; it's an advanced technique requiring monitoring expertise.
Harvest Timing and Trichome Assessment
Harvest timing determines cannabinoid ratios and psychoactive effects. Trichomes progress from clear to cloudy to amber over 1-3 weeks. Cloudy trichomes (70-80% of trichomes showing white/opaque appearance) deliver peak THC levels with balanced CBD, maximizing psychoactive potency. This timing typically occurs around day 56-60 of flowering.
Pushing toward more amber trichomes (20-30% amber, 60-70% cloudy) shifts cannabinoid profiles toward higher CBN (cannabinol), which develops as THC oxidizes. CBN is associated with heavier sedation and sleep effects. Some medical users prefer this profile for nighttime consumption.
Use a 30x magnifying loupe to inspect trichomes closely. Clear trichomes indicate early harvest with lighter effects; amber trichomes indicate late harvest with sedating effects. Most GG#4 cultivators target 10-15% amber for balanced potency and full flavor development.
Curing and Storage Methods
Cure freshly harvested buds in darkness at 60-65°F with 55-65% relative humidity for minimum 2-3 weeks. This process allows residual moisture to redistribute evenly, softens the harsh smokiness of fresh flower, and allows chlorophyll breakdown—developing smoother flavor. Properly cured GG#4 develops the full diesel-chocolate complexity that fresh flower can't match.
Glass mason jars work exceptionally well for home grower curing. Pack buds loosely (not compressed), seal jars daily, and "burp" them (open for 30-60 seconds) daily during the first week, every other day during week two, and every few days thereafter. This releases excess moisture while maintaining humidity stability.
Store cured flower in cool (65-70°F), dark conditions. Light exposure degrades cannabinoids and terpenes over time. Vacuum sealing extends shelf life significantly; properly vacuum-sealed and refrigerated GG#4 maintains potency and aroma for 6+ months.
Extreme Stickiness and Trimming Implications
GG#4's famous stickiness—that "glue" characteristic giving the strain its name—signals exceptional resin production and quality. However, sticky buds make trimming exceptionally time-consuming. Expect 20-30% longer trimming time compared to average strains.
Trimming tools gum up rapidly; clean your trimmer frequently with isopropyl alcohol or specialized trimmer cleaning products. Dry-trimming (removing leaves before drying) produces tighter, more aesthetically pleasing buds but maximizes the sticky mess. Wet-trimming (removing leaves after initial drying) feels less sticky but produces fluffier-appearing buds.
Many commercial operations employ hash-focused strategies, processing sticky GG#4 into concentrates rather than fighting sticky-bud trimming. The exceptional resin content makes GG#4 ideal for rosin pressing, bubble hash, or ethanol extraction—often yielding 15-25% concentrate weight compared to typical 8-12% from less resinous strains.
Yield Expectations and Harvest Planning
Indoor Yield Benchmarks
Quality indoor cultivation of GG#4 consistently produces 600-700 grams per square meter under optimal conditions. For perspective, a 4×4 foot tent (approximately 15 square meters) yields roughly 9-10.5 pounds with proper technique. Four plants spaced optimally deliver approximately 2.25-2.6 pounds each.
These benchmarks assume full-spectrum lighting, balanced nutrients, optimal environmental control, and mature plant management. First-time growers typically achieve 400-500 grams per square meter as they develop proficiency. Experienced cultivators push toward 700-800 grams per square meter with advanced optimization.
Outdoor cultivation yields higher per-plant production (1000-1400 grams per plant) due to unlimited vertical growth and light penetration, though environmental variables introduce unpredictability that indoor systems eliminate.
Factors Influencing Final Yield
Lighting remains the primary yield determinant. Doubling light intensity from 400 to 800 μmol/m²/s increases yields by roughly 30-40% when all other variables remain consistent. Underperforming light fixtures dramatically limit yield potential regardless of how perfectly you execute other cultivation techniques.
Nutrient availability during peak flowering (weeks 4-7) determines bud density and final weight. Nutrient-starved plants produce airy, light buds; properly fed plants produce dense, heavy buds. The genetic potential remains identical; execution determines realization.
Genetics and clone phenotype influence yield significantly. Authentic GG#4 cuts from established mother plants typically outperform clones from inferior sources. Inferior phenotypes may yield 30-40% less despite identical conditions.
Temperature stability, humidity control, and CO₂ levels (if supplemented) all contribute incrementally. However, these optimize around optimal light and nutrition; inadequate lighting or feeding won't be compensated by perfect temperature control.
Calculating Grow Space Efficiency
Divide your total gram harvest by your total square footage to determine grams-per-square-foot yield. Standard benchmarking uses square meters (600-700 g/m² for GG#4), but convert to square feet if more intuitive: 55-65 grams per square foot.
A 4×4 tent (16 square feet) targeting 600 g/m² should yield approximately 880-960 grams (31-34 oz, roughly 2 pounds). A 5×5 tent (25 square feet) yields approximately 1375-1500 grams (48-53 oz, roughly 3.2 pounds).
These calculations guide investment decisions. Light fixtures, ventilation, and environmental control systems require proportional investment matching yield targets. Undersized equipment produces underwhelming results; oversized equipment wastes electricity and capital.
Drying and Curing Post-Harvest
Fresh-harvested buds contain 60-75% water weight; proper drying reduces this to 8-12% for stable storage. Hang-dry buds from stems at 60-65°F with 45-55% RH for 7-14 days until the outer stem snaps cleanly when bent. Insufficient drying leads to mold; over-drying produces harsh, less flavorful flower.
Once dried, cure in jars for minimum 2-3 weeks per the previous section's guidance. Many growers cure 4-6 weeks for maximum flavor development. This post-harvest timeline (drying + curing) adds 3-8 weeks to your complete grow cycle from clone to final product.
Trimming Time Allocation
GG#4's exceptional stickiness makes trimming labor-intensive. Plan 2-3 minutes per gram of wet-trimmed flower, or 1.5-2 minutes per gram for dry-trimmed. A 900-gram harvest requires 25-45 hours of trimming labor—roughly one full-time work week for a single operator.
Some cultivators prefer machine trimming despite quality sacrifices, dramatically reducing labor. Others outsource trimming to contract operations, allocating 10-20% of gross harvest value for labor. Trimming cost represents one of the largest operational expenses for small-scale producers.
Post-Harvest Cannabinoid and Terpene Preservation
Light, heat, and oxidation degrade cannabinoids and terpenes post-harvest. Store in opaque containers in cool conditions; clear containers or warm locations accelerate degradation. Vacuum-sealed or nitrogen-flushed storage extends shelf life by eliminating oxygen exposure.
Ethanol extraction or pressure washing can remove surface cannabinoids if buds remain at room temperature too long before curing. Every stage from harvest through final storage impacts final product quality; rushed post-harvest handling sacrifices the quality you worked 8-9 weeks to cultivate.
Troubleshooting Common GG#4 Growing Challenges
Bud Rot Susceptibility and Management
GG#4's dense bud structure creates internal moisture conditions that mold exploits ruthlessly. Botrytis (bud rot) appears as gray fuzzy growth inside buds, often invisible externally until the infection is advanced. Prevention far exceeds treatment; removing infected tissue salvages the plant but destroys harvest.
Humidity must remain below 55% during weeks 4-9 of flowering. Invest in dehumidifiers capable of maintaining strict humidity control. Even brief periods above 60% RH create risk, especially when combined with poor air circulation or cool nighttime temperatures.
Remove dead leaves and plant material from the canopy daily during late flowering. These become moisture traps and mold vectors. Prune aggressively but carefully, avoiding damage to healthy buds while removing any visibly diseased tissue immediately.
If bud rot develops, immediately remove the affected bud and surrounding material (including 1-2 inches of healthy-appearing tissue as a buffer). Increase air circulation and reduce humidity immediately. Some growers introduce beneficial microbes (Bacillus subtilis) to outcompete mold pathogens.
Nutrient Imbalances in Heavy Feeders
Medium-to-heavy feeders like GG#4 accumulate nutrient salt buildup if feeding schedules exceed plant uptake. Weekly EC testing of runoff identifies accumulation; flush with plain pH-neutral water if EC exceeds 2.2.
Conversely, nutrient deficiencies appear mid-flower when demand peaks but feeding hasn't scaled accordingly. Nitrogen deficiency (lower leaf yellowing), phosphorus deficiency (purple discoloration), and potassium deficiency (marginal burn) all appear suddenly in late flowering. Catch these early through weekly visual inspection; late-cycle nutrient additions can't fully remedy severe deficiencies.
Calcium and magnesium deficiencies manifest as interveinal chlorosis (yellowing between leaf veins while veins remain green). These secondary nutrient deficiencies are easily corrected through calcium/magnesium supplements or foliar spray applications. Micronutrient deficiencies (iron, zinc, manganese) appear as similar symptoms but respond specifically to appropriate micronutrient additions.
Branch Support Failures and Prevention
Heavy buds breaking branches mid-flower is catastrophic; the broken branch loses circulation and wilts, and the flower buds attached to it die. Install support systems before this occurs. Vertical branches laden with heavy buds need structural support before they fail, not after.
Reinforce main stems with stakes or soft ties early in flowering. Create secondary support points on lateral branches as they develop buds. Scrogging distributes bud weight across an entire screen network rather than concentrating it on individual branch junctures. Test your support systems weekly; gently pull branches to verify support adequacy.
If a branch threatens breakage, immediately install or reinforce its support. A few minutes of preventative work beats losing an entire branch's harvest.
Pest and Disease Management
Dense canopies create favorable conditions for spider mites, fungus gnats, and powdery mildew. Scout plants twice weekly for pest signs: webbing, yellowing leaves, small insects, or white powder on leaves.
Spider mites appear first on lower leaves; spray neem oil or insecticidal soap immediately. Introduce predatory mites (Phytoseiulus persimilis) early in flowering for biological control. Chemical insecticides in late flowering leave residues on final product—use only early-flowering or vegetative-stage treatments.
Powdery mildew appears as white powder on leaves and buds, thriving in warm (75°F+), humid (60%+ RH) environments. Prevention through humidity control and air circulation is far superior to treatment. If detected, reduce humidity aggressively and improve air movement. Sulfur dust or potassium bicarbonate fungicides address early-stage infections; advanced infections on buds are essentially untreatable.
Vigor Management in Limited Space
GG#4's vigorous growth can overwhelm small grow spaces by mid-flowering. Growers with height restrictions discover this unpleasantly during the 50-100% stretch phase.
Begin flowering with smaller clone size if space is limited. Allow only 2-3 weeks of vegetative growth before transitioning to 12/12 photoperiod. Aggressive LST management limits vertical development by 20-30%. Consider using shorter plant varieties for future grows; GG#4 isn't suited to minimal-height operations.
If overgrowth occurs mid-flower, carefully tilt or bend canopy portions sideways rather than aggressively pruning (which causes stress and delays maturity). Some growers remove shade leaves on lower portions of taller plants, redirecting growth energy laterally rather than vertically.
Recovery from Environmental Fluctuations
Temperature swings, humidity spikes, or brief power outages stress flowering plants. A few hours of darkness or temperature extremes won't kill plants but may delay maturity by 3-5 days. Extended disruptions (48+ hours of darkness or extreme temperatures) significantly impact final yield and quality.
Invest in backup systems: backup generators, thermostats with alarm functions, or secondary fans triggered if primary ventilation fails. These prevent catastrophic losses from temporary environmental breakdowns.
If disruption occurs, resume optimal conditions immediately and resist the urge to "compensate" through excessive feeding or environmental extremes—plants recover more effectively through stable, moderate conditions than reactive over-correction.
The Grower's Edge: Why GG#4 Remains the Industry Standard
GG#4 Clone delivers on its promises—powerful effects, award-winning genetics, and reliable indoor performance that keeps experienced cultivators coming back. The 8-9 week flowering window is manageable, the yields are genuinely impressive at 600-700 grams per square meter, and the resin production speaks for itself. The strain's dense, trichome-saturated buds consistently test at 24-30% THC, delivering the potent effects that medical and recreational users equally value.
Yes, you'll need to plan for significant stretch, invest in robust support systems, and stay vigilant about humidity during late flowering—but these are solvable challenges with the right approach. The strain's vigorous growth and strong lateral branching actually work in your favor when you understand how to harness them. Proper LST, scrogging, or trellising transforms that explosive growth into a dense, high-yielding canopy that maximizes light exposure and bud development.
With the cultivation strategies outlined here, you're positioned to achieve those 600-700 gram-per-square-meter yields and produce the sticky, potent buds that command respect in any grow community. Your investment in quality clones, dialed-in environmental controls, and medium-to-heavy feeding schedules pays dividends through reliable performance and consistent results. GG#4's award-winning legacy exists for reason—it simply delivers exceptional results when you execute the fundamentals correctly.
Ready to start your GG#4 journey? Source your clones from a reputable supplier, dial in your environment, and watch this
Leave a Reply