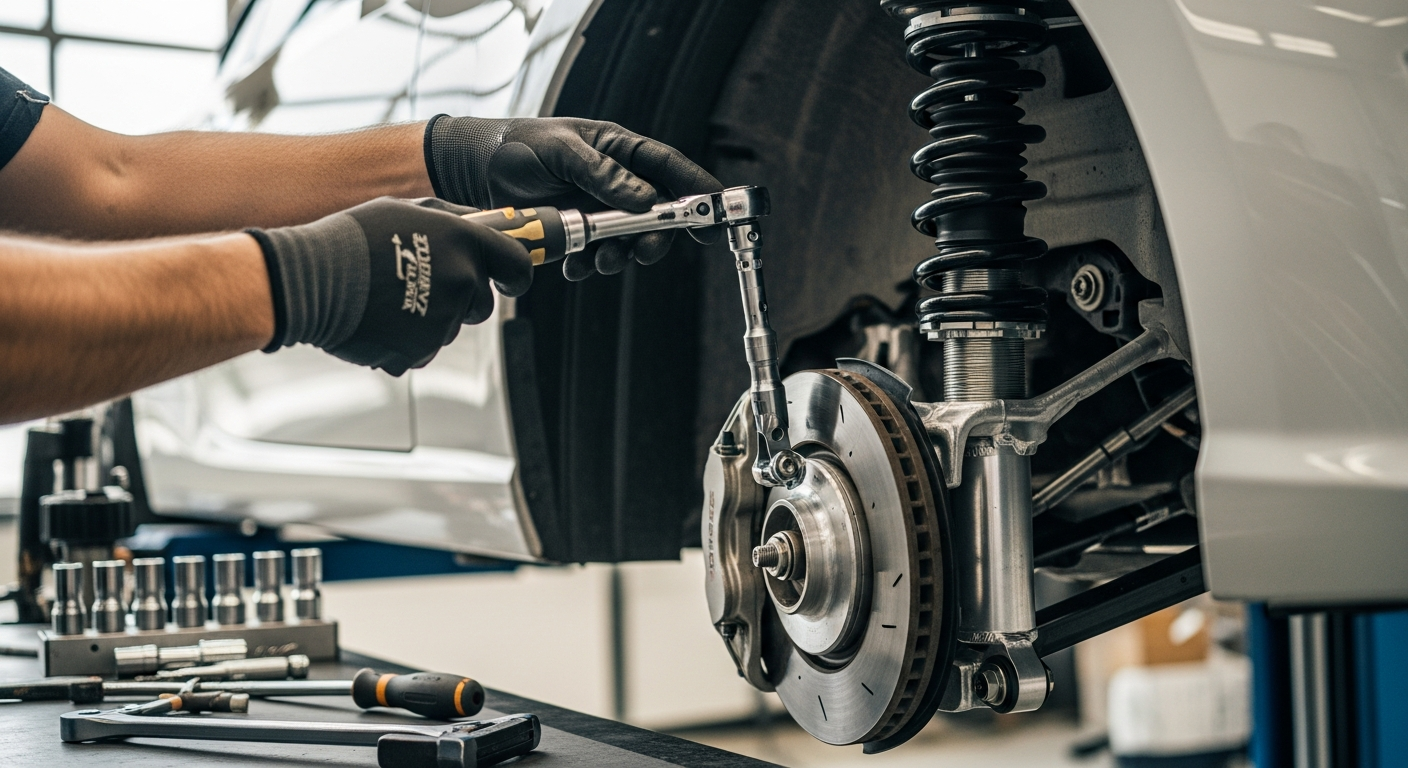
If you're among the nearly 60% of car enthusiasts tackling your first suspension upgrade without professional help, the Maxpeedingrods T7 Series offers a practical pathway forward. These coilovers are purpose-built for DIY mechanics, balancing genuine adjustability with straightforward installation principles that don't demand a shop's worth of equipment or expertise.
This guide maps the complete installation journey, from foundational pre-installation checks through dialing in your 24-level damping system for your specific driving conditions. You'll discover how to sidestep common pitfalls, properly calibrate rebound damping, and maintain your T7 coilovers through years of reliable performance.
Explore the T7 Series Adjustable Coilovers at Maxpeedingrods today.
Pre-Installation Preparation: What You Need Before You Begin
Essential tools required
Gather your equipment before breaking any fasteners. You'll need a hydraulic jack rated for your vehicle's weight, proper jack stands for safety, a spring compressor to manage coil spring tension, and basic hand tools including wrenches, sockets, and screwdrivers. A torque wrench becomes essential for achieving manufacturer-specified fastener tension without over-tightening aluminum components.
Safety considerations and workspace setup
Working beneath a suspended vehicle demands respect. Establish a clean, well-lit workspace on level ground—never rely solely on a jack. Position jack stands at manufacturer-recommended points before any work begins. Ensure adequate ventilation if working in an enclosed space, and keep your phone accessible for emergencies.
Checking vehicle specifications and ensuring T7 Series compatibility
Verify your vehicle platform against the T7 Series compatibility list. Different model years and configurations require specific coilover versions. Confirm ride height ranges, mounting point designs, and any platform-specific considerations that affect installation complexity.
Gathering OEM suspension components for reference
Keep your factory struts, springs, and fasteners organized throughout the process. These components serve as reference points for proper positioning and help troubleshoot fitment questions. Photograph your original suspension from multiple angles before disassembly.
Creating a workspace checklist
Establish a system for fasteners and small components. Use labeled containers or magnetic trays to segregate bolts by location and size. Lost fasteners delay installation and compromise assembly integrity—preventive organization saves frustration.
Reviewing manufacturer instructions specific to your vehicle platform
The Maxpeedingrods documentation provides platform-specific guidance that generic suspension installation guides cannot. Review these instructions completely before beginning, noting any special considerations or warnings for your particular vehicle.
Understanding the difference between coilover height and damping adjustments
Height adjustment affects your stance and ride clearance. Damping adjustment controls how quickly the suspension compresses and extends—these are separate systems requiring different approaches. Confusing one for the other leads to improper setup and suboptimal performance.
Removing Your Stock Suspension: The Foundation Step
Safely lifting and securing your vehicle
Begin by loosening lug nuts while the vehicle sits on the ground—never attempt fastener removal while suspended. Position the hydraulic jack under the frame at designated points, then carefully raise the vehicle. Install jack stands at proper support locations, double-checking stability before proceeding.
Disconnecting sway bar links and brake line brackets
Locate the sway bar end links connected to your factory struts and disconnect them using appropriate wrenches. Next, locate brake line brackets mounted on the strut body. These connections must be freed before strut removal prevents accidental line damage.
Removing factory upper strut mounting bolts and lower control arm connections
Access upper strut mounts from the engine bay or interior trunk area depending on your platform. Remove the bolts securing the strut to the upper mounting point. Subsequently, disconnect the lower control arm from the factory strut using a pickle fork or ball joint separator tool—avoid prying with a pry bar, which damages bushings.
Extracting stock coil springs and dampers without damaging surrounding components
Support the lower control arm with a jack before removing the strut completely. This maintains the vehicle's height and prevents suspension geometry distortion. Carefully work the strut assembly free from the vehicle.
Inspecting mounting points for corrosion or damage
Examine the strut tower mounting points, control arm attachment areas, and sway bar link mounts for rust or corrosion. Light surface corrosion can be cleaned with a wire brush. Deep pitting or structural damage may require professional attention before new component installation.
Labeling and organizing all OEM fasteners
Store factory bolts, nuts, and brackets in clearly marked containers. Include details about their original location and purpose. This organization proves invaluable if you need to reference original specifications or restore factory suspension later.
Documenting the original suspension geometry with photos
Photograph the suspension from multiple angles showing fastener positions, brake line routing, and sway bar link attachment points. These images become references during T7 installation, ensuring correct positioning and connection sequencing.
Installing Your T7 Series Coilovers: Step-by-Step Assembly
Positioning the new coilover assembly into the strut tower mounting points
Carefully align the T7 coilover's upper mounting point with the strut tower opening. Support the lower control arm with a jack to position the lower mounting point correctly. This coordination prevents binding or misalignment during assembly.
Threading upper mounting bolts and achieving proper torque specifications
Insert upper mounting bolts through the coilover's top platform into the strut tower. Hand-thread bolts initially to ensure proper alignment. Using your torque wrench, gradually tighten each bolt to manufacturer specifications, alternating between bolts to achieve even pressure distribution.
Connecting lower control arm attachment points with correct fastener sequencing
Align the coilover's lower mounting point with the control arm attachment location. Insert fasteners and hand-thread them initially. Torque these bolts gradually in a criss-cross pattern, maintaining even clamping force across the connection.
Reattaching brake lines and sway bar links to the new coilover brackets
Carefully route brake lines to their attachment points on the coilover, ensuring no pinching or excessive bending. Reconnect sway bar end links, verifying that rubber bushings sit properly within their mounting brackets.
Verifying all connections are secure before lowering the vehicle
Perform a final visual inspection of every connection point. Tug gently on brake lines and sway bar links to confirm they're secure. Verify that upper strut mounting bolts show no gaps or misalignment.
Checking wheel alignment after installation
Lower the vehicle gradually while observing coilover positioning. Once fully settled, visit a professional alignment shop to verify camber, toe, and caster specifications. Improper alignment causes uneven tire wear and handling issues.
Test-driving at low speeds to identify any unusual noises or handling issues
Drive slowly around your neighborhood, listening carefully for clunks, squeaks, or other unusual sounds. These noises often indicate loose fasteners or improperly seated connections. Address any sounds before driving at normal speeds.
Adjusting Height and Spring Preload: Achieving Your Desired Stance
Understanding the 1-3 inch drop range and how it affects your vehicle's center of gravity
The T7 Series typically accommodates a 1 to 3-inch suspension drop, with more aggressive lowering placing your vehicle's center of gravity lower for improved cornering performance. However, excessive drops introduce rubbing hazards and suspension binding at full compression or extension.
Calculating proper spring preload settings for your vehicle's weight distribution
Spring preload determines how much compression force the spring maintains at rest. Your vehicle's weight distribution and height objectives guide preload adjustments. Most vehicles achieve balanced setup somewhere in the mid-range of adjustment collars, but individual configurations vary.
Using adjustment collars to set ride height without compromising suspension geometry
The T7 Series uses threaded adjustment collars to modify spring preload, which affects ride height. Rotate collars incrementally—typically one-quarter turn at a time—checking height changes. Avoid aggressive adjustments that could introduce binding or excessive preload.
Measuring ride height from multiple points to ensure balanced front-to-rear setup
Measure from the wheel center to the fender lip at four locations: front-left, front-right, rear-left, and rear-right. Balanced setup shows similar measurements on each side. Asymmetrical measurements indicate uneven preload adjustment or vehicle weight distribution issues.
Fine-tuning preload to maintain comfort while achieving your target stance
Start with conservative adjustments, measuring and test-driving after each modification. Increased preload improves handling response but can reduce ride comfort on rough roads. Find the balance point that satisfies both your handling objectives and daily driving comfort.
Avoiding excessive lowering that could cause rubbing or suspension binding
Monitor clearance between lowered suspension components and body panels during full compression. Suspension binding occurs when springs or dampers reach full compression before the wheel completes its travel—this destroys dampers and compromises safety.
Re-checking alignment after height adjustments to maintain tire contact patch
Height changes alter suspension geometry, affecting tire contact angles. Return to your alignment specialist after finalizing height settings to verify that camber, toe, and caster remain within acceptable ranges for safe handling and tire longevity.
Visit Maxpeedingrods to discover the complete T7 Series specifications and options.
Mastering the 24-Level Damping Adjustment System
Understanding rebound damping and how each level affects suspension response
Rebound damping controls how quickly the suspension extends after compression. Lower damping values allow faster extension, creating a softer, more responsive feel. Higher damping values slow extension, stiffening the suspension response and reducing body movement.
Starting with middle-range settings (level 12) as your baseline for street driving
Begin with the damping adjustment set to level 12, the mechanical midpoint of the 24-level range. This baseline allows evaluation of how damping changes affect your specific vehicle and driving conditions before making larger adjustments.
Adjusting damping in increments of 2-3 levels to feel noticeable differences
Moving incrementally from your baseline allows clear perception of how changes affect handling. Jumping multiple levels at once masks subtle improvements or degradations. Document each adjustment's effects during test drives.
Softer damping settings (levels 1-8) for comfortable daily driving and rough roads
Lower damping values absorb road imperfections more readily, improving comfort on rough pavement and daily commutes. However, excessive softness introduces body roll during cornering and may feel "bouncy" on smooth surfaces.
Stiffer damping settings (levels 16-24) for aggressive cornering and track-focused driving
Higher damping values control body motion during hard cornering, maintaining consistent tire contact and predictable handling. Track-focused drivers typically operate at levels 20-24, though street use at these settings can feel harsh over bumps.
Testing damping changes across different road surfaces and driving speeds
Evaluate damping adjustments during various driving scenarios: smooth highways, rough urban roads, gentle curves, and aggressive cornering. Real-world testing reveals how settings perform under actual conditions rather than theoretical expectations.
Documenting your preferred settings for future reference and seasonal adjustments
Record the damping level you select, noting the conditions under which you tested it. Many drivers adjust seasonally—softer settings for winter conditions, stiffer for summer performance driving. Your documented settings eliminate guesswork during future adjustments.
Protecting Your Investment: Maintenance and Long-Term Care
Inspecting the extended TPV dust cover for tears or damage during regular maintenance
The extended TPV dust cover protects internal damper components from road contamination. During monthly inspections, examine this cover for tears, cracks, or missing sections. Damaged covers allow dirt intrusion that accelerates damper wear.
Cleaning dust covers monthly to prevent debris accumulation and premature wear
Use low-pressure water or a damp cloth to remove accumulated dirt from dust covers. Avoid high-pressure washing that could force water past cover seals. Clean covers reduce contamination risks and allow visual inspection for damage.
Checking fastener torque specs every 5,000 miles during the first season
Suspension fasteners experience continuous vibration and stress. During your first season, check critical bolts every 5,000 miles, re-torquing to manufacturer specifications as needed. This preventive maintenance catches loose fasteners before they cause problems.
Monitoring for fluid leaks around the damper seals as an early warning sign
Trace damper bodies with your fingers after driving—feeling for oil residue indicates seal degradation. Minor dampness near the damper seal is normal, but actual dripping suggests seal replacement is approaching. Address this before damper performance suffers.
Scheduling alignment checks annually to catch suspension geometry changes
Annual alignment checks verify that suspension geometry remains stable. Over time, impacts and normal driving can shift camber or toe settings. Professional checks catch these changes before they cause excessive tire wear.
Protecting coilovers from road salt exposure in winter climates
Road salt accelerates corrosion of metal components. In winter climates, rinse your vehicle regularly to minimize salt accumulation. Consider protective coatings on exposed aluminum surfaces for additional corrosion resistance.
Planning for professional servicing if you notice performance degradation after extended use
While the T7 Series is designed for extended service, high-mileage use or aggressive driving may necessitate professional damper servicing. If you notice performance degradation—excessive bounciness, poor damping response, or fluid leaks—consult a professional before damage spreads.
Common Installation Mistakes and How to Avoid Them
Over-tightening fasteners that can strip aluminum components or crack brackets
Aluminum components suffer permanent damage from excessive torque. Use your torque wrench consistently rather than relying on "feel." If a bolt resists threading, verify proper alignment before increasing force—resistance often indicates cross-threading rather than insufficient force.
Installing coilovers asymmetrically, causing uneven ride height and handling issues
Installation sequence matters. Install coilovers consistently—completing one side fully before moving to the next prevents asymmetrical height or damping issues. Verify that both sides show identical ride heights and damping settings before driving.
Neglecting to adjust spring preload properly, resulting in excessive body roll
Inadequate preload allows excessive suspension compression, inducing body roll during cornering. Conversely, excessive preload stiffens the ride beyond intended parameters. Taking time to dial in proper preload prevents both scenarios.
Forgetting to reconnect brake lines or sway bar links before test driving
This critical oversight creates unsafe conditions before becoming apparent. Use your pre-lowering checklist to verify every connection. Brake line and sway bar link disconnection immediately impacts vehicle safety and handling.
Setting damping too stiff initially, which can mask installation problems
Excessively stiff damping can hide minor misalignments or connection issues that become obvious at more moderate settings. Begin with mid-range damping to identify installation problems, then adjust toward your preferred settings once proper assembly is confirmed.
Skipping the alignment check, leading to premature tire wear and poor handling
Suspension installation changes geometry. Professional alignment compensates for these changes, maintaining optimal tire contact patches and handling characteristics. Skipping alignment costs money in premature tire replacement.
Rushing the installation process without double-checking connections and torque specs
Suspension work demands deliberate pacing. Rushing introduces mistakes that compromise safety or performance. Schedule adequate time, work methodically through each step, and verify critical connections multiple times.
Your T7 Series Journey Starts Now
Installing the Maxpeedingrods T7 Series Adjustable Coilovers yourself transcends simply avoiding labor costs—it's about gaining intimate knowledge of how your suspension actually operates. The T7 Series excels through flexibility, adapting seamlessly whether you're a daily driver prioritizing comfortable commutes or a weekend track enthusiast chasing improved lap times.
Start with conservative adjustments, documenting what works for your specific vehicle and driving style. Gradually explore the full adjustment range as you gain confidence and understanding of how changes affect your driving experience. Your vehicle will handle with noticeable improvement, your stance will command attention, and you'll carry the satisfaction of having completed this transformation with your own hands.
Start your suspension upgrade journey with Maxpeedingrods T7 Series Coilovers now.
Leave a Reply