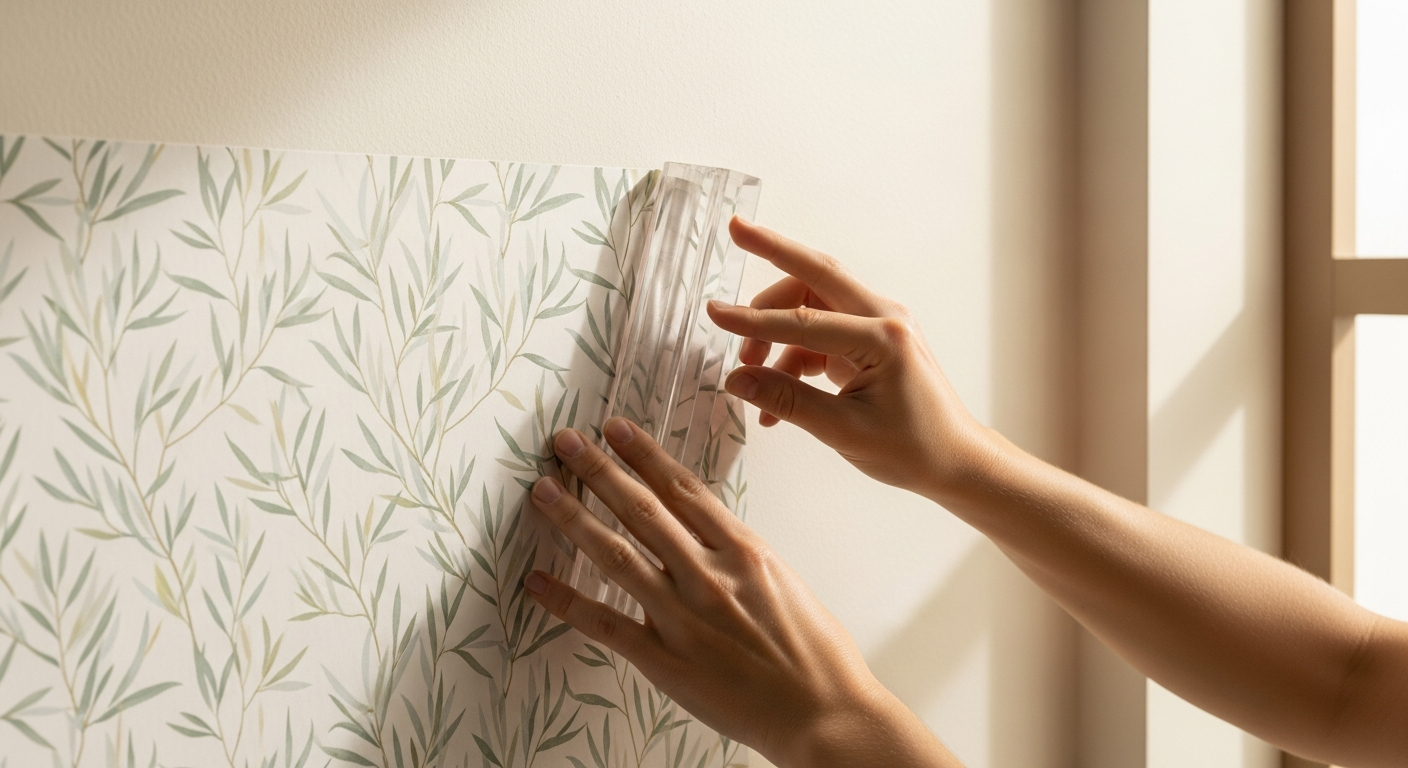
Over 70% of homeowners abandon wallpaper projects before completion—not because they lack vision, but because installation feels intimidating. The traditional paste-the-paper method demands precision, speed, and nerves of steel. You're racing against the clock as adhesive dries, fighting wrinkles and bubbles that seem to multiply with each smoothing stroke. It's no wonder so many projects end mid-wall, leaving behind half-finished dreams and frustration.
The paste-the-wall method used by Morris & Co. Willow Boughs Wallpaper is specifically designed to solve this problem. This non-woven wallpaper eliminates the guesswork of traditional methods, making installation accessible even for first-timers. You get to work at your own pace, adjust positioning without panic, and achieve professional-quality results without the professional price tag.
This guide walks you through everything needed to install this stunning wallpaper successfully. From the specific tools and materials required to the paste-the-wall technique executed step-by-step, pattern alignment strategies, and insider tricks that separate flawless installations from frustrating ones—you'll find actionable guidance at every stage.
Shop Morris & Co. Willow Boughs Wallpaper now and start your transformation today.
Tools & Materials You'll Actually Need for Willow Boughs Installation
Essential Tools: Building Your Installation Kit
Your success hinges on having the right equipment before you begin. A smoothing brush becomes your most valuable tool—it flattens the wallpaper against the wall and pushes out air pockets without creating new wrinkles. Unlike traditional rollers, a smoothing brush gives you control and precision.
A utility knife with fresh blades cuts clean edges without fraying the non-woven material. A measuring tape ensures accurate strip positioning and prevents the cascading measurement errors that compound across an entire wall. A level catches tilting strips before they're fully adhered—catching this mistake early saves hours of frustration later.
A damp sponge cleans excess paste from seams and the wallpaper surface without damaging the material. Non-woven wallpaper tolerates moisture better than traditional paper, but controlled dampness still matters. A paste applicator—either a roller or brush—applies adhesive evenly across the wall surface.
Why Non-Woven Wallpaper Requires Different Tools
Non-woven material behaves differently than traditional paper varieties. It's thicker, more durable, and more forgiving of minor handling errors. This durability means you can use a smoothing brush with confidence rather than the feather-light touch required for delicate paper wallpapers.
The material doesn't stretch or shrink as it dries, so pattern alignment remains stable after application. Traditional paper wallpaper can shift slightly during the drying process, requiring compensation during installation. Non-woven eliminates this variable, making your measurements and alignments reliable.
Recommended Paste Types for Paste-the-Wall Application
Adhesive selection directly impacts installation ease and final results. The paste-the-wall method specifically requires high-tack wallpaper adhesive designed for non-woven materials. Standard paste formulated for traditional wallpaper often lacks sufficient grab and holding power on non-woven surfaces.
Look for paste labeled "non-woven ready" or "paste-the-wall compatible." Brands matter here—premium adhesives from established wallpaper manufacturers contain additives that prevent slipping and sliding once the strip is positioned. Budget pastes may require repositioning efforts or incomplete bonding along edges.
Consistency also matters. The paste should spread smoothly without excessive thickness. Too thin, and it won't hold the wallpaper securely. Too thick, and it becomes difficult to achieve even coverage. Most quality pastes come pre-mixed or require simple water addition to reach working consistency.
Preparing Your Walls for the Willow Boughs Pattern
Why Wall Preparation Determines 80% of Installation Success
Professional installers know a secret that separates their work from amateur attempts: wall preparation determines success or failure far more than installation technique itself. A perfectly executed installation on an improperly prepared wall will eventually fail. Bubbles emerge weeks later, seams separate, and edges curl upward—all because the foundation wasn't solid.
The Willow Boughs wallpaper's intricate botanical pattern magnifies imperfections. Its detailed design draws attention to any deviation from perfect flatness. A smooth, clean wall becomes invisible, allowing the pattern to command all visual attention.
Assessing Your Wall Condition: Identifying Problem Areas Before You Start
Begin by examining walls in different lighting conditions. Harsh side-lighting reveals imperfections that disappear under normal room lighting. Look for bumps, gouges, rough patches, and areas where old paint bubbles or peels.
Press your hand across the entire wall surface, feeling for irregularities invisible to the eye. Cracks require attention—they'll telegraph through the wallpaper, creating visible lines that compromise the design. Damp patches indicate moisture problems that must be resolved before installation, or wallpaper adhesion will fail.
Test the existing paint by applying water with a sponge. Quality paint absorbs water slowly or not at all. Poor paint or damaged finish allows water to soak in instantly—a sign that the wall requires additional preparation. Run a putty knife across the wall to identify loose paint. Any paint that flakes away needs removal or repainting before wallpaper installation.
Cleaning and Priming: Removing Dust, Dirt, and Old Adhesive Residue
Dust and dirt create barriers between the wallpaper adhesive and the wall surface. Clean walls with a damp sponge and mild detergent solution. Work systematically from top to bottom, rinsing as you progress. Allow the wall to dry completely—rushing this step introduces moisture that interferes with paste application.
Old wallpaper residue and adhesive require removal or sanding. If previous wallpaper peels away easily, remove it completely. Stubborn adhesive can be softened with a wallpaper removal solution, allowing easier scraping. Sand any remaining rough spots until the wall feels smooth.
Primer serves multiple functions. It seals porous walls, ensuring consistent paste absorption and preventing patchy adhesion. It provides a stable base that prevents the wallpaper from shifting during installation. Quality primer formulated for wallpaper preparation makes the paste-the-wall process significantly more reliable.
Mastering the Paste-the-Wall Technique for This Specific Design
How Paste-the-Wall Differs Fundamentally from Paste-the-Paper Methods
Traditional paste-the-paper installation requires applying adhesive to the cut wallpaper strip, then carefully positioning it on the wall. Speed matters because the paste begins drying the moment it contacts paper. You have minutes to unfold, position, and smooth each strip before the adhesive loses effectiveness.
The paste-the-wall method reverses this sequence. Adhesive goes directly on the prepared wall surface, not the wallpaper. This difference transforms the entire process. You apply paste to a defined wall section, then hang the dry wallpaper into it. The wallpaper doesn't begin drying until full contact occurs, giving you extended working time to adjust positioning and achieve perfect alignment.
This method suits non-woven material perfectly. The material's thickness and stability prevent the stretching and shrinking that plagues traditional paper wallpapers. You can reposition strips multiple times without damaging the material, correcting alignment errors that would be catastrophic in traditional installation.
Step-by-Step Application: Measuring, Cutting, and Positioning Your First Strip
Start by measuring your wall height accurately. Use a level to establish a vertical reference line from ceiling to baseboard. This line guides your first strip's positioning—critical because all subsequent strips align to the first one.
Calculate wallpaper strip length by adding 2 inches to your wall height, providing overlap at ceiling and baseboard for final trimming. The Willow Boughs pattern features approximately 1 foot 6 inches repeat, so measure from the ceiling and mark repeat intervals down the wall. This planning prevents pattern discontinuity at eye level and ensures repeats align between strips.
Cut your first strip with a utility knife using a straightedge. Position the cut wallpaper at your reference line, allowing the 1-inch overlap at ceiling and baseboard. Before pressing it against the wall, apply paste to the wall section where this strip will hang. Use consistent pressure with your paste applicator to achieve even coverage without pools or thin spots.
Press the dry wallpaper into the adhesive, starting at the top and working downward. The paste's tackiness holds the wallpaper securely, allowing you to adjust positioning if the pattern isn't perfectly aligned with your reference line. Use your smoothing brush to press the wallpaper firmly, working out air bubbles and ensuring complete contact between wallpaper and adhesive.
Applying Adhesive Directly to the Wall Surface: Coverage Density and Consistency Tips
Even coverage determines successful bonding. Under-application leaves dry pockets where the wallpaper won't adhere, creating bubbles and loose edges. Over-application wastes paste and makes the wall slippery, causing the wallpaper to slide downward before it sets.
Apply paste with deliberate, overlapping strokes, similar to painting a wall. Ensure every square inch receives coverage. Pay particular attention to wall edges and corners—these areas often receive inadequate paste due to the applicator's shape and size. A brush works better than a roller in corners, providing control and complete coverage.
The paste should appear wet and glossy, not dripping. If paste runs downward, you've applied too much. If the wall appears streaky with dry patches, add more paste. Consistency improves with practice—after your first strip or two, you'll develop an intuition for proper application density.
Allow the pasted wall section to become tacky before hanging the wallpaper. This waiting period—typically 2 to 5 minutes depending on humidity and temperature—allows the paste to achieve optimal grab. Hanging wallpaper onto sticky paste, rather than freshly applied paste, provides better holding power and more stable positioning.
Bringing It All Together: Your Willow Boughs Installation Success
The Morris & Co. Willow Boughs Wallpaper represents more than just a design choice—it's an invitation to reclaim your decorating confidence. The paste-the-wall method removes traditional barriers that discourage DIY projects. You're no longer fighting the clock or battling stretching paper. Instead, you're working methodically through a process that rewards careful attention and forgiving of minor missteps.
The non-woven material's durability means small errors don't cascade into failures. A wrinkle can be smoothed out. Misaligned patterns can be adjusted. The wallpaper won't tear at a careless touch or shrink unpredictably as it dries. This forgiving nature transforms installation from an anxiety-inducing race into a manageable, even enjoyable, project.
Your careful attention to wall preparation, pattern alignment, and seam finishing yields results that rival professional installations at a fraction of the cost. The botanical motif with modern green tones creates visual sophistication that elevates any room. Whether you're refreshing a single accent wall or transforming an entire space, the techniques covered here provide a clear roadmap from blank walls to gallery-worthy results.
The journey from hesitation to completion follows a direct path. Order your samples first, seeing how the design complements your space and existing décor. Gather your tools methodically, checking each item before beginning. Follow this guide's step-by-step approach, trusting the paste-the-wall method's reliability. Prepare your walls with the same attention you'd give to a professional project. And then, watch your vision become reality as each strip reveals more of the intricate pattern.
The satisfaction of standing back to admire completed walls—walls you installed yourself—justifies every moment of planning and execution. You've joined countless homeowners who've discovered that wallpaper installation isn't intimidating when armed with proper technique and materials.
Leave a Reply