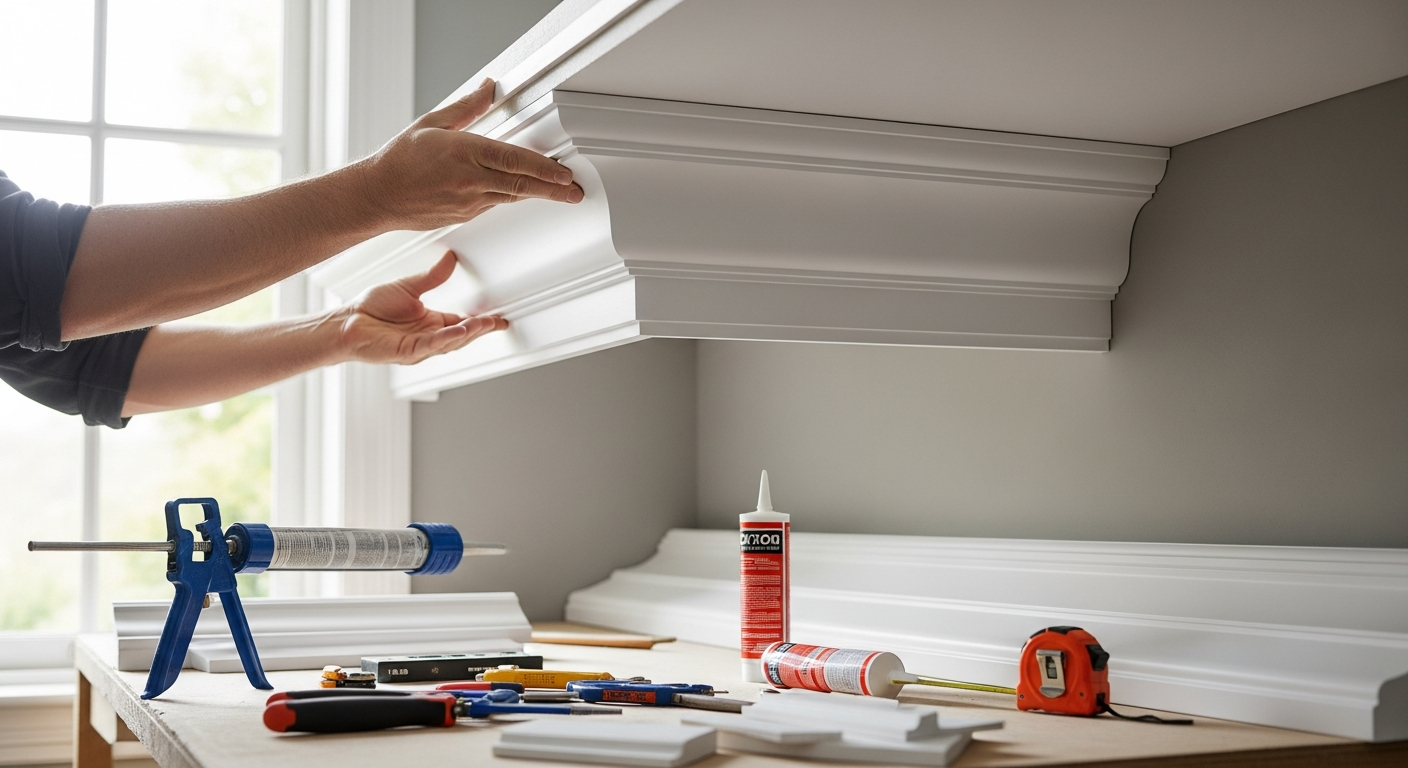
When you stand at the junction where wall meets ceiling, you're facing one of interior design's most transformative opportunities. A well-executed cornice creates architectural presence that fundamentally elevates how a room feels—yet for decades, achieving this required hiring specialists, managing plaster dust, and accepting premium costs. The Orac Decor CX106 Coving Cornice changed that equation entirely.
Over 20 years after its 2002 launch, the CX106 remains the go-to choice for homeowners tackling ceiling transformations. What makes this product so consistently beloved? The answer lies in its remarkable simplicity. You don't need professional plasterers, expensive equipment, or years of experience to achieve that high-end architectural finish. The CX106 represents a fundamental shift in how homeowners approach interior upgrades—offering an elegant solution that's genuinely accessible to anyone willing to learn.
Unlike traditional plaster coving that demands specialist skills and creates significant mess, this Duropolymer® alternative delivers professional results through straightforward techniques and readily available tools.
Explore the Orac Decor CX106 Coving Cornice options and pricing to start your project.
This guide walks you through everything required to install the CX106 like a seasoned professional—covering essential tools, preparation strategies, step-by-step installation techniques, and insider tips that transform a straightforward project into a stunning result.
Understanding the CX106: Why Material Matters for DIY Success
The material composition of the CX106 fundamentally distinguishes it from alternatives. Duropolymer® construction delivers lightweight handling without sacrificing durability or impact resistance—a balance that matters enormously during installation when you're working at ceiling height with multiple lengths.
Pre-priming arrives as a significant convenience factor. Rather than spending hours on surface preparation, the CX106 is ready for paint with just a single coat application. This eliminates a major portion of traditional cornice installation, allowing you to progress directly to the finishing stage.
The dimensions of 11.8 cm height and 11.7 cm depth create substantial visual impact on standard ceiling heights. The classic, concave profile features an extended stepped base with subtle line detailing along the top and bottom edges—providing strong design presence without appearing overwrought.
For specialized applications, a flexible Purotouch® variant addresses curved walls, bay windows, and moisture-prone areas like bathrooms. This waterproof capability opens installation possibilities that standard rigid coving simply cannot accommodate.
Shockproof material resists damage during transport, storage, and installation phases—reducing the frustration of discovering hairline cracks or impact marks when you're ready to hang the material. Duropolymer® demonstrates superior longevity compared to traditional plaster alternatives that crack and deteriorate over time, often requiring replacement within 10–15 years.
Essential Tools and Materials: Building Your Installation Kit
Successful installation begins with assembling the right tools. A rigid blade saw or fine-toothed handsaw enables precise 45-degree angle cuts essential for seamless joints. A mitre box—whether manual or power-assisted—ensures consistent, professional-quality angles without relying on freehand technique.
Recommended adhesive products formulated specifically for Duropolymer® bonding perform better than generic construction adhesives. This specification matters because incompatible adhesives may cure slowly, fail to bond permanently, or damage the material surface.
A flexible putty knife or scraper smooths adhesive application and cleans excess material before it hardens. For controlled adhesive dispensing along lengths, a caulking gun prevents waste and ensures even bead distribution.
Sandpaper rated 120–180 grit finishes edges and smooths imperfections after curing. Paint rollers, brushes, and drop cloths prepare the surface for final decoration, while safety equipment—dust mask, safety glasses, and work gloves—protects during cutting and installation.
Measuring tape, spirit level, and chalk line ensure accurate positioning and perfectly straight installation. A stud finder or moisture meter assesses wall and ceiling conditions, identifying structural concerns before you begin.
Preparation: The Foundation of Professional Results
Professional results begin long before adhesive touches the ceiling. Inspect the ceiling and wall junction for existing damage, moisture, or uneven surfaces. Water stains or soft spots indicate structural issues requiring attention before installation proceeds.
Clean the installation area thoroughly to remove dust, cobwebs, and paint flakes. Adhesive bonds poorly against contaminated surfaces, compromising joint integrity even when application technique is flawless.
Measure room dimensions and calculate total linear meters required, accounting for waste material. Most installers budget 10–15% additional material for test cuts, practice joints, and mistakes.
Mark guidelines using chalk line and spirit level to ensure perfectly straight installation. This step determines whether your finished cornice appears professionally aligned or noticeably off-level.
Test adhesive on a small section to verify compatibility and confirm drying time. Different room temperatures and humidity levels affect curing speed—better to discover this during testing than mid-project when time-sensitive alignment matters.
Assess ceiling height—the CX106 suits standard to higher ceilings, though lower ceilings may benefit from smaller profiles to avoid overwhelming the space visually. Identify any obstacles such as light fixtures, vents, or architectural features requiring cuts and planning.
Allow adequate workspace for maneuvering lengths and working comfortably at height. Cramped working conditions increase installation errors and safety risks.
Step-by-Step Installation Technique: Achieving Flawless Joints
Begin at a corner, cutting 45-degree mitre joints for seamless connections. This angle, when two pieces meet correctly, creates the optical illusion of one continuous element rather than visible joints.
Apply adhesive to the back of the cornice in a continuous, even bead pattern. Inconsistent application creates hollow spots where adhesive fails to support the material, leading to sagging or separation over time.
Press firmly against the wall-ceiling junction, using temporary support if needed during curing. Many installers use wooden wedges or props to maintain pressure while adhesive sets—a simple technique preventing frustration during the 24-hour cure period.
Align joints carefully. Improper alignment creates visible gaps that compromise aesthetics and reduce long-term material integrity. Take time adjusting pieces before adhesive begins setting; repositioning becomes nearly impossible once bonding begins.
Allow adhesive to cure fully (typically 24 hours) before painting or applying additional stress. Premature painting or handling can disrupt the bond before it reaches full strength.
Use a flexible putty knife to remove excess adhesive immediately for clean lines. Dried adhesive becomes difficult to remove without damaging the cornice surface or paint finish.
Work systematically around the room, maintaining consistent pressure and alignment throughout. Rushing this phase directly correlates with visible imperfections in the finished installation.
Double-check levelness periodically to catch and correct drift before adhesive sets. A spirit level placed against the cornice profile reveals any deviation from horizontal alignment.
View detailed installation guidance and product specifications at the Coving and Mouldings store.
Finishing Touches: From Raw Cornice to Polished Feature
Once adhesive has fully cured, sand any rough edges or imperfections. This preparation step ensures the final painted surface appears uniformly smooth rather than showing installation artifacts.
Apply primer coat if not relying on the pre-primed surface for additional durability. Quality primer improves paint adhesion and reduces the number of topcoats required for solid color coverage.
Paint with one coat of matt or gloss finish according to interior design preferences. Matt finishes absorb light, creating softer visual impact, while gloss finishes reflect light and emphasize the cornice profile dimension.
Use quality paint to ensure even coverage and professional appearance. Budget paint often requires multiple coats, negating cost savings through labor investment.
Consider coordinating color with ceiling or wall tones for design cohesion. White remains the traditional choice, but contemporary interiors increasingly feature cornice colors matching accent walls or ceiling hues.
Apply a second coat if needed for optimal color depth and uniformity. Most installers find one quality coat sufficient given the pre-primed surface, though personal preference varies.
Remove painter's tape carefully to avoid paint chipping or adhesive disturbance. Tape removal at a 45-degree angle reduces the likelihood of paint peeling.
Allow paint to cure fully before exposing the cornice to moisture or physical contact. Curing times vary by paint type; solvent-based paints typically require 48 hours, while water-based finishes cure faster.
Cost Analysis: Budget Planning for Your Project
Standard 2-meter lengths range from £29.22 to £35.10 per unit, making the CX106 accessible for projects of varying scope. Bulk purchasing through 5-packs (10 meters total) reaches approximately £199.35—a meaningful savings for larger spaces.
The flexible CX106 variant carries higher pricing at around £105.30 per 2-meter length, reflecting specialized manufacturing for curved applications. This premium proves economical when traditional rigid cornice would require complex piecing or remain unsuitable for architectural features.
Calculate total linear meters needed and compare bulk pricing against individual purchases. A typical living room spanning 50 linear meters costs considerably less through bulk ordering than purchasing individual lengths.
Factor in adhesive, paint, and tool costs when establishing overall project budget. If acquiring new tools, budget accordingly—though many homeowners already own basic items like paintbrushes and spirit levels.
Compare CX106 pricing against traditional plaster coving for cost-benefit analysis. Plaster typically requires professional installation at £50–100+ per linear meter, versus DIY CX106 installation at material cost only.
Evaluate long-term value considering durability, maintenance requirements, and aesthetic longevity. The 20+ year lifespan and minimal maintenance demands justify the initial material investment across decades of enjoyment.
Identify local suppliers offering competitive pricing and bulk discounts for extended projects. Regional variation exists; shopping around sometimes reveals meaningful savings on larger material quantities.
Common Installation Challenges and Solutions
Uneven ceilings or walls require shimming or flexible adhesive to maintain consistent appearance. Shimming behind the cornice compensates for surface irregularities that would otherwise create visible gaps.
Moisture in bathrooms or kitchens demands the waterproof flexible variant to prevent degradation. Standard Duropolymer® resists moisture reasonably well, but the Purotouch® variant provides superior protection in high-humidity environments.
Difficult ceiling heights necessitate scaffolding, ladders, or temporary support systems for safety. Working at height amplifies the physical and mental demands of installation; proper support reduces fatigue and error risk.
Adhesive setting too quickly creates time pressure when alignment precision matters most. Slower-setting formulations provide extended working time, though they extend overall project duration.
Paint adhesion issues resolve through ensuring surface cleanliness and using appropriate primers. Surface contamination—dust, oil residue, or previous paint incompatibilities—prevents paint bonding.
Joint visibility despite careful alignment caulks with flexible filler before painting. This technique conceals minor misalignment that sharp-eyed observers might otherwise notice.
Sagging during curing prevents through temporary bracing or support strips. Gravity constantly pulls on horizontal lengths; temporary support counteracts this force during the critical curing period.
Cuts and mitre angles requiring adjustment respond well to practice technique on scrap pieces first. A few minutes practicing your cutting angle on waste material prevents costly mistakes on installation pieces.
Room-by-Room Applications: Maximizing Design Impact
Hallways benefit from CX106's elegant profile, creating architectural interest in transitional spaces. The cornice draws visual attention upward, making hallways feel taller and more refined.
Dining rooms gain formal sophistication through refined ceiling-to-wall transitions. The classic design complements both traditional and contemporary décor while subtly elevating the space for entertaining.
Living rooms and lounges showcase the cornice's versatile design against various interior styles. Whether paired with exposed beams, coffered ceilings, or simple painted surfaces, the CX106 enhances visual interest.
Bedrooms achieve cozy elegance without overwhelming smaller or standard-height spaces. Proportionally, the CX106 suits master bedrooms particularly well, though secondary bedrooms benefit equally.
Kitchens and bathrooms utilize the waterproof flexible variant for moisture resistance. These high-humidity environments would compromise standard cornice over time, making the specialized variant worthwhile.
Bay windows and curved architectural features suit the flexible Purotouch® alternative. Traditional rigid coving cannot navigate curves; the flexible variant enables seamless integration with distinctive architectural elements.
Commercial spaces and offices leverage professional appearance for client-facing areas. Reception areas, conference rooms, and offices benefit significantly from the architectural polish CX106 provides.
Period properties balance modern installation ease with classic design authenticity. The CX106's traditional profile complements Georgian, Victorian, and Edwardian properties while eliminating traditional plaster's maintenance burden.
Maintenance and Longevity: Protecting Your Investment
Duropolymer® material resists cracking, warping, and impact damage over decades. Unlike plaster alternatives that develop hairline cracks within years, the CX106 maintains structural integrity across extended periods.
Painted surfaces require occasional dusting to maintain appearance and prevent dirt accumulation. A soft cloth or microfiber duster removes surface dust without requiring chemical cleaning.
Moisture-prone areas benefit from periodic inspection to ensure waterproof integrity. While the flexible variant provides superior protection, regular observation catches any unexpected moisture intrusion early.
Touch-up painting addresses scuffs or marks without requiring full reinstallation. A small paint tin matching your original color allows quick cosmetic repairs addressing normal wear.
Avoid harsh cleaning chemicals that may degrade paint or material finish. Gentle, pH-neutral cleaners prove sufficient for routine maintenance.
Flexible variants maintain integrity in temperature-fluctuating environments like kitchens. The material's flexibility accommodates expansion and contraction without developing stress cracks.
Longevity expectations exceed 20+ years with proper installation and basic maintenance. Many installations from the CX106's early 2000s launch remain in excellent condition, testament to material durability.
Replacement of damaged sections remains possible without removing the entire installation if needed. Should physical damage occur, replacing a single length costs far less than removing and reinstalling the complete cornice.
Making Your Ceiling Upgrade Decision
The Orac Decor CX106 Coving Cornice represents far more than decorative trim—it's your gateway to professional-quality interior transformation without specialist costs or complexity. What truly sets the CX106 apart is the combination of thoughtful engineering, accessible pricing, and straightforward installation.
Whether you're upgrading a hallway, transforming a dining room, or tackling a full-house project, the techniques and strategies covered here position you for success. The lightweight Duropolymer® construction, pre-primed finish, and adhesive-based installation eliminate barriers that once made ceiling upgrades feel intimidating.
Your next step involves measuring your space, calculating material requirements, and sourcing your tools. Start with a less-visible room or corner to build confidence, then expand your project knowing that thousands of homeowners have already discovered this product's genuine potential.
Shop the Orac Decor CX106 Coving Cornice and begin your ceiling transformation today.
Leave a Reply