Over 40 million bicycles sit unused in garages and sheds across North America and Europe every year. These frames represent untapped potential—machines that could be revived rather than replaced. The economics of e-biking have created a stark reality: a quality new electric bike demands $1,500 to $3,000, placing genuine e-bike ownership beyond reach for most riders. Yet thousands are discovering an alternative path that preserves both their existing bikes and their budgets.
The Yose Power E-Bike Conversion Kit has become the trusted solution for cyclists who refuse to compromise between affordability and capability. Rather than abandon their current bikes, riders are electrifying them with kits that deliver real performance at a fraction of new e-bike prices. This transformation isn't a shortcut—it's a deliberate choice that empowers riders to understand their machines while unlocking electric assistance for hills, distance, and commutes.
Throughout this guide, you'll discover the motor wattages and battery configurations that suit different riding styles, understand what the installation process actually involves, and learn whether this upgrade path matches your needs and mechanical comfort level. By the end, you'll possess the knowledge to make an informed decision about whether converting your existing bike represents your best route to e-biking or whether a different solution makes more sense.
What's Inside the Yose Power E-Bike Conversion Kit Box
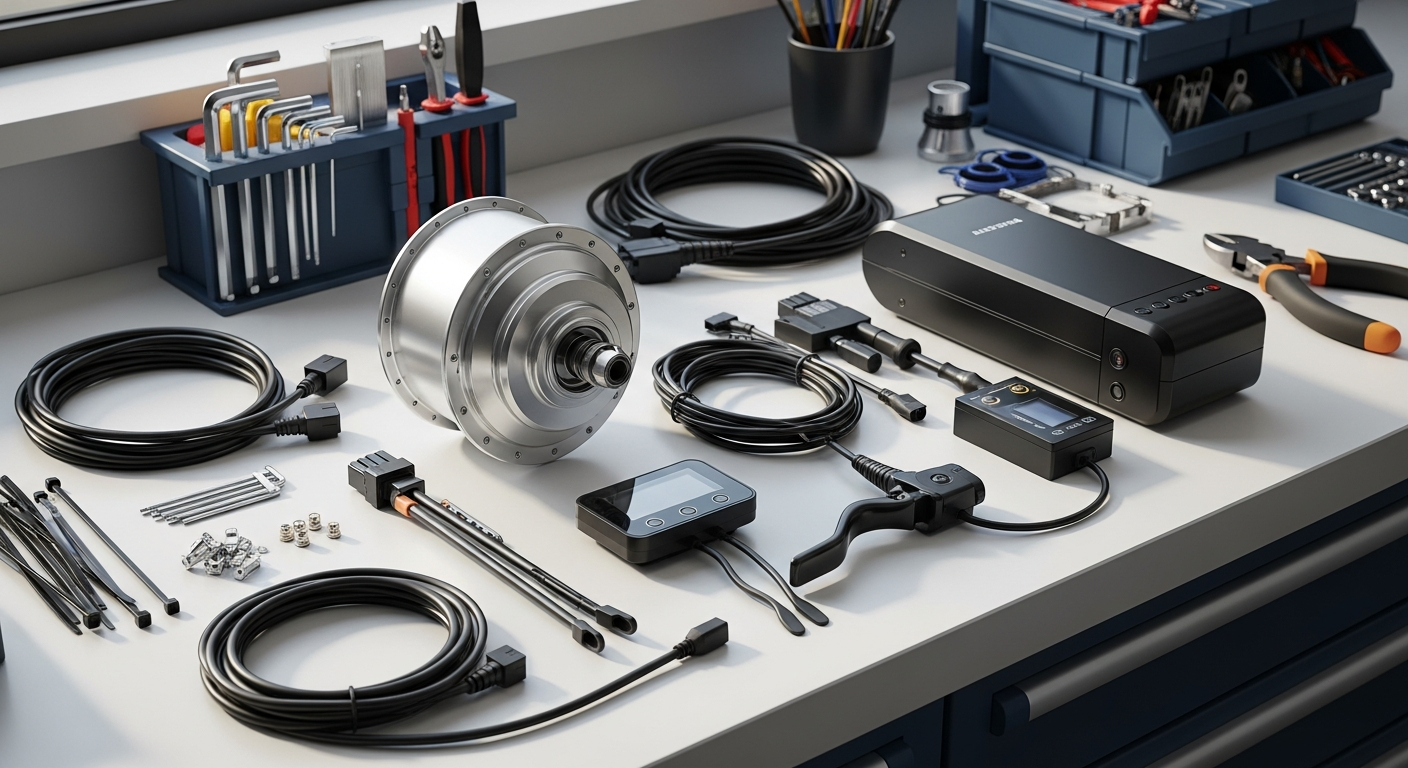
Opening a Yose Power conversion kit reveals a carefully assembled ecosystem of components designed to work together. The package typically contains a rear hub motor, controller unit, digital display, throttle assembly, and often a complete lithium-ion battery pack, though batteries can be purchased separately if needed.
Rear hub motor options — 250W (EU-legal), 350W, and 500W configurations for different power needs and regional regulations
Yose Power offers three distinct motor wattages, each serving specific riding profiles and regulatory environments. The 250W option satisfies European road legal requirements while providing genuine assistance for commuting and leisurely riding. The 350W represents a middle ground, delivering responsive power for mixed terrain without the intensity of high-wattage systems. The 500W configuration addresses riders tackling serious hills and seeking maximum performance, though regional regulations may limit its legal use on public roads.
Motor voltage systems — 36V or 48V setups, each affecting performance and battery compatibility
The conversion kit operates on either 36V or 48V electrical systems. Voltage selection influences overall power output, acceleration response, and battery pack compatibility. A 48V system typically delivers stronger performance, particularly when paired with higher-wattage motors, while 36V configurations suit lighter riders and less demanding terrain.
Lithium-ion battery packs — 10Ah to 17.5Ah+ capacities with varying ranges and weight considerations
Battery capacity directly determines range between charging cycles. Yose Power offers amp-hour ratings from 10Ah through 17.5Ah and beyond. Higher capacity batteries extend your range significantly but add weight to the bike. The choice between capacities hinges on your typical riding distance and how frequently you can recharge.
Intelligent controller unit — manages power delivery and communication between all components
The controller serves as the brain of your conversion system, regulating power flow from the battery to the motor while interpreting commands from the display, throttle, and pedal assist sensor. This component ensures smooth acceleration, responsive braking cutoffs, and efficient energy management.
Digital display dashboard — user-friendly interface showing speed, battery level, assistance mode, and distance traveled
The display provides real-time feedback about your e-bike's status. Users consistently praise the Yose Power display for its clarity and intuitive layout, offering quick access to essential information without unnecessary complexity.
Motor Wattage Breakdown: Choosing the Right Power Level for Your Riding Style
Selecting the appropriate motor wattage shapes your entire e-biking experience. Each tier addresses different terrain demands and riding philosophies.
250W motor performance — ideal for flat terrain and urban commuting; meets European road legal requirements; sufficient for assisted pedaling without overwhelming casual riders
The 250W motor excels for urban commuters navigating relatively flat routes. It provides noticeable assistance without aggressive acceleration, making it suitable for riders who value finesse over raw power. European cyclists particularly appreciate this option since it satisfies road legality requirements across the EU.
350W motor capabilities — bridges the gap between leisurely rides and moderate hill climbing; offers responsive acceleration for mixed terrain
Moving to 350W introduces substantially more capability. This wattage tier handles moderate inclines competently and delivers responsive acceleration when accelerating from stops or navigating mixed terrain. Riders describe the experience as noticeably more powerful than 250W without the intensity of maximum configurations.
500W motor power — tackles steep inclines and longer distances; best for riders prioritizing speed and hill performance; check local regulations before purchasing
The 500W configuration represents maximum performance. Steep hills become manageable climbs rather than exhausting battles. Speed and acceleration response feel immediate and forceful. However, 500W systems exceed legal limits in many regions, making them unsuitable for public road riding in jurisdictions with strict e-bike regulations.
Real-world power delivery — motors operate smoothly and quietly, with users consistently praising the refined riding experience
Across all wattage tiers, Yose Power motors earn praise for their refined operation. Riders report smooth acceleration without jerky power delivery, and the motors operate remarkably quietly—a stark contrast to louder conversion kits that announce their presence on every ride.
Battery Capacity and Range: Understanding Amp-Hours and Real-World Distance
Battery capacity represents one of the most consequential decisions in your conversion kit selection. Understanding amp-hours and realistic range expectations prevents frustration during ownership.
Amp-hour (Ah) ratings explained — 10Ah, 12Ah, 15Ah, and 17.5Ah+ options; higher capacity means longer range between charges
Amp-hours measure how much electrical charge a battery stores. A 10Ah battery provides baseline range suitable for short commutes. Moving to 12Ah or 15Ah extends your distance substantially, while 17.5Ah and higher capacities support full-day riding without requiring a midday charge.
Voltage systems and compatibility — 36V and 48V batteries pair with matching motor controllers; voltage affects overall power output
Your battery voltage must match your motor controller voltage. A 48V battery paired with a 48V controller delivers superior power delivery compared to 36V systems, though this improved performance comes with higher weight and cost.
Realistic range expectations — actual distance varies based on terrain, rider weight, assistance level, and motor wattage
Marketing claims often paint optimistic range estimates. Real-world performance depends on numerous variables: hills consume battery power more rapidly than flat terrain, heavier riders draw more energy than lighter cyclists, and higher assistance levels drain batteries faster than lower settings. Expect your actual range to be 10–15% less than manufacturer claims, though you'll still achieve substantial distance improvements over unpowered riding.
Battery degradation over time — lithium-ion longevity and how to maintain optimal performance through proper charging habits
Lithium-ion batteries gradually lose capacity over years of use. Proper maintenance extends their lifespan significantly. Avoid deep discharge cycles when possible, never leave batteries fully charged for extended periods, and keep them at moderate temperatures during storage.
The DIY Installation Experience: What to Expect When You Build Your Own E-Bike
Installing a Yose Power conversion kit requires mechanical aptitude and patience, but it's entirely achievable for determined DIY enthusiasts. Understanding the installation process prevents disappointment and sets realistic expectations.
Wheel removal and hub motor integration — detailed steps for safely removing your rear wheel and installing the motor hub
Begin by removing your rear wheel completely, detaching brake systems and drivetrain components. The motor hub replaces your existing wheel hub, integrating into your current rim and spokes. Proper alignment ensures balanced wheel operation and prevents wobbling during rides.
Spoke and rim compatibility — ensuring your existing wheel works with the conversion kit; potential modifications needed
Not every wheel works with conversion kits. Your rim must accept the motor hub's specifications, and spoke count and gauge must match the kit's requirements. Some wheels require replacement, representing an additional expense beyond the conversion kit itself.
Pedal assist sensor calibration — the most common 'fettling' point; getting PAS to trigger smoothly requires patience and adjustment
The pedal assist sensor detects when you're pedaling and activates motor assistance. Installing and calibrating this sensor represents the most frequently problematic installation step. Achieving smooth PAS engagement typically requires multiple test rides and adjustment sessions. Patience here prevents frustration later.
Wiring and connector assembly — routing cables through your frame, connecting the controller, display, and throttle
Cables must travel from the battery, through the motor controller, to the display and throttle. Routing these wires through frame tubes protects them from weather damage and creates a cleaner appearance than exposed cables. Proper connector assembly ensures secure electrical contact and prevents intermittent power loss.
Brake lever integration — installing motor cut-off switches on existing brake levers for safety compliance
Motor cut-off switches on your brake levers instantly disable power when braking, a critical safety feature. Installation involves carefully fitting switches into your existing brake lever mechanism without compromising braking performance.
Find detailed installation resources and support through the Yose Power conversion kit community.
Cost Comparison: E-Bike Conversion vs. Buying New
The financial comparison between converting your existing bike and purchasing a new e-bike reveals why thousands choose conversion kits.
Complete kit pricing — approximately £366–$500 USD with battery included; significant savings versus pre-built e-bikes
A complete Yose Power conversion kit with battery typically costs between $450 and $500 USD. This price tag includes everything necessary to transform your bike into a functional e-bike.
New e-bike market prices — entry-level models start around $1,000–$1,500; premium options exceed $3,000
Factory-built e-bikes command significantly higher prices. Entry-level models begin around $1,000, mid-range options fall between $1,500 and $2,500, and premium e-bikes easily exceed $3,000. You're purchasing an entirely new frame, components, and integrated electrical system—a substantial investment.
Conversion kit advantage — you're reusing an existing bike frame and components, maximizing value
By converting your existing bike, you preserve the frame and components you already own. Your investment goes exclusively toward electrification, not redundant parts. This approach makes e-biking accessible to budget-conscious cyclists who would otherwise remain priced out of the market.
Battery-only purchases — $200–$400 for standalone packs if you already own a kit or want to upgrade capacity
If you decide to expand your range later, additional batteries cost $200–$400 depending on capacity. This modular approach allows gradual investment rather than one massive upfront expense.
Real-World Performance: How the Yose Power Kit Handles Hills, Distance, and Daily Commutes
Understanding how conversion kits perform in actual riding conditions separates expectations from reality.
Hill-climbing capability — motor assistance transforms steep grades from exhausting to manageable; 350W and 500W excel on challenging terrain
Hills that would normally require walking your bike become manageable climbs with motor assistance. Lower wattage motors (250W) handle gentle slopes competently, while 350W and 500W configurations make steep grades feel almost trivial. The transformation for riders with hill-heavy commutes is profound.
Commute reliability — consistent performance over weeks and months of regular use; quiet operation doesn't disturb surroundings
Thousands of daily commuters rely on Yose Power kits for consistent transportation. Motor reliability remains high across extended use periods, and the quiet operation means you won't announce your presence to neighbors or disturb pedestrians.
Range on different terrains — flat urban routes yield maximum distance; hilly areas require more battery power per mile
Flat terrain allows your battery to deliver its maximum range. Each mile of flat road requires less energy than climbing hills. If your commute includes significant elevation change, expect your practical range to be 20–30% less than flat-terrain estimates.
Throttle vs. pedal assist — throttle provides instant on-demand power for quick acceleration; PAS creates natural, energy-efficient riding
The throttle offers immediate power delivery, useful for quick acceleration or cruising without pedaling. Pedal assist mode creates a more natural riding experience where motor power supplements your pedaling effort, typically providing superior battery efficiency and a more connected feel to the ride.
Compatibility Considerations: Will the Kit Fit Your Existing Bicycle?
Before purchasing a conversion kit, confirming compatibility with your existing bike prevents expensive mistakes.
Wheel size compatibility — confirming your rim and spoke configuration works with available hub motor sizes
Motor hubs must fit your existing wheel rim and accommodate your spoke count. Most conversion kits support standard wheel sizes (26", 27.5", 29"), but some older or specialized wheels may not be compatible without replacement.
Frame geometry and motor clearance — ensuring the motor doesn't interfere with frame tubes, kickstands, or fenders
The motor hub must fit within your frame without contacting tubes, fenders, or kickstands. Bikes with unusual frame geometries or integrated fenders may require modifications or component removal.
Brake type requirements — compatibility with rim brakes, disc brakes, and integrated brake lever systems
Yose Power kits work with most brake types, but confirming compatibility prevents installation complications. Integrated brake lever systems may require special considerations for motor cut-off switch installation.
Bottom bracket and pedal crank — verifying PAS sensor placement won't conflict with your existing drivetrain
The pedal assist sensor mounts near your crank. Ensure your existing bottom bracket and crank configuration provides adequate space for sensor installation without interference.
Safety Features and Regulatory Compliance: Staying Legal and Protected
E-bikes exist within regulatory frameworks that vary by region. Understanding safety features and legal requirements matters for responsible ownership.
Brake lever motor cut-off switches — instantly disables power when braking; essential safety mechanism
Motor cut-off switches prevent dangerous situations where power would continue flowing while braking. These switches are non-negotiable safety features that Yose Power kits include as standard.
Speed limiters — built-in constraints prevent unsafe acceleration in certain modes
The controller can limit maximum speed, ensuring you maintain control in various conditions. Speed limiting becomes essential in jurisdictions with legal speed caps for e-bikes.
European road legality — 250W option meets EU regulations for pedal-assist e-bikes on public roads
The 250W Yose Power configuration satisfies European e-bike regulations, making it fully street-legal for public road use. This advantage makes the 250W option particularly attractive for European cyclists.
Regional power restrictions — understanding local laws before selecting 350W or 500W configurations
Many regions restrict e-bike motor wattage. Research your local regulations before selecting 350W or 500W motors—using higher wattage than legally permitted can result in fines or bike confiscation. The 250W option remains safest for public road riding if you're uncertain about your area's regulations.
Pros That Make the Yose Power Kit Stand Out
Conversion kits wouldn't be so popular without substantial advantages. These benefits explain why thousands choose Yose Power over factory-built alternatives.
Affordability breakthrough — transforming existing bikes for $450–$500 versus $1,500+ for new e-bikes
The cost difference is staggering. You're accessing e-bike capability at roughly one-third the price of entry-level new e-bikes. This democratization of e-biking makes electric assistance achievable for cyclists who would otherwise remain priced out.
Proven reliability — thousands of satisfied users report consistent, dependable performance
Yose Power has built reputation through consistent product quality and customer satisfaction. Numerous reviews document reliable performance over years of ownership.
Quiet, smooth motor operation — refined riding experience without mechanical harshness
Unlike some conversion kits that operate roughly or noisily, Yose Power motors deliver smooth, quiet assistance. The refined riding experience rivals factory-built systems costing three times more.
Responsive customer support — Yose Power's team actively helps troubleshoot and resolve issues
The company supports customer success through responsive technical support. This commitment to post-purchase service differentiates Yose Power from competitors offering minimal support.
Empowering DIY experience — building your own e-bike creates pride and mechanical understanding
Installing your own conversion kit provides accomplishment and mechanical knowledge that factory-built bikes cannot deliver. You'll understand how every system works and possess the skills to troubleshoot problems independently.
Limitations and Challenges: Being Honest About the Drawbacks
Conversion kits aren't perfect solutions. Acknowledging limitations prevents frustration and disappointment.
Installation complexity — not truly 'plug-and-play'; requires mechanical aptitude, patience, and troubleshooting
Don't expect installation to resemble assembling furniture. You'll encounter technical challenges, require mechanical aptitude, and need patience through multiple problem-solving sessions. This reality disqualifies the kit for anyone uncomfortable with DIY projects.
Pedal assist sensor fettling — the most common pain point; calibration takes time and multiple adjustments
Getting pedal assist to engage smoothly remains the most frequently problematic installation aspect. Expect multiple test rides and calibration adjustments before achieving seamless engagement.
Wheel and hub compatibility issues — some existing wheels won't work without modification or replacement
Your current wheel may not accommodate the motor hub. Wheel replacement represents an unexpected additional expense beyond the kit cost.
Battery holder durability concerns — plastic components may need replacement after extended use
Some users report that plastic battery holders degrade over time. You may eventually need to replace the holder despite the battery remaining functional.
Optimistic capacity claims — marketed range sometimes exceeds real-world performance by 10–15%
Manufacturer range estimates assume ideal conditions: flat terrain, light rider weight, moderate assistance levels, and perfect charging conditions. Real-world range typically falls 10–15% short of claims, though still providing impressive distance.
Who Should Choose the Yose Power E-Bike Conversion Kit?
Conversion kits serve specific cyclist profiles. Recognizing whether you fit these categories prevents purchasing something that won't satisfy your needs.
Budget-conscious cyclists — riders who want e-bike capability without premium price tags
If your primary motivation is accessing e-bike benefits at minimal expense, conversion kits deliver. You'll sacrifice convenience and get a DIY project instead, but you'll gain e-biking capability at a fraction of typical costs.
DIY enthusiasts — people who enjoy hands-on projects and learning mechanical skills
Conversion installation appeals to mechanics and tinkerers who view assembly as part of the attraction rather than an obstacle. These riders find satisfaction in building their own systems and understanding components intimately.
Existing bike owners — anyone with a quality frame they want to upgrade rather than replace
If you own a sturdy, well-maintained bike you're attached to, conversion kits allow you to electrify it rather than abandon it. This approach preserves your investment while adding electric capability.
Commuters tackling hills — professionals facing steep terrain on their daily routes
Motor assistance transforms hill climbs from exhausting battles into manageable climbs. If your commute includes significant elevation change, conversion kits deliver transformative benefits.
Leisure riders seeking extended range — casual cyclists wanting to explore further without exhaustion
Adding range to your weekend rides without exhaustion appeals to casual cyclists. Motor assistance allows exploration of routes previously beyond your endurance limits.
Installation Tips and Troubleshooting: Setting Yourself Up for Success
Anticipating common challenges and preparing appropriately smooths the installation process considerably.
Pre-installation checklist — inspecting your bike's condition and gathering necessary tools before starting
Before touching anything, thoroughly inspect your bike. Check that frame geometry accommodates the motor hub, wheels are in good condition, and brakes function properly. Gather all necessary tools before starting—stopping mid-installation to hunt for tools frustrates progress.
Wheel removal techniques — safely detaching your rear wheel without damaging brake systems or drivetrain
Practice removing and reinstalling your rear wheel several times before installation. Familiarity prevents brake damage and drivetrain mishaps during the actual motor hub installation.
Motor hub positioning — ensuring proper alignment within the wheel rim for balanced, smooth operation
The motor hub must sit perfectly centered within your rim. Improper alignment causes vibration, uneven wear, and potential safety issues. Take time achieving perfect centering before final assembly.
Cable routing best practices — running wires through frame tubes to protect from weather and damage
Rather than leaving cables exposed, route them through frame tubes and under bottom brackets whenever possible. This protection shields wiring from weather damage and creates a cleaner appearance.
Pedal assist sensor placement — the critical adjustment point; multiple test rides and tweaks often needed
Accept that you'll take multiple test rides adjusting the pedal assist sensor. Bring adjustment tools on initial rides and tweak placement based on how the sensor engages. This iterative approach typically yields perfect PAS engagement within 2–3 rides.
Battery Maintenance and Longevity: Maximizing Your Investment
Proper battery care extends lifespan considerably and maintains performance throughout ownership.
Proper charging habits — avoiding deep discharge cycles and overcharging to extend lithium-ion lifespan
Lithium-ion batteries last longest when charged between 20% and 80% capacity. Avoid fully depleting your battery or leaving it fully charged for extended periods. Frequent shallow charge cycles stress batteries less than occasional deep cycles.
Storage best practices — keeping batteries at moderate temperatures and partial charge during off-season
If you're storing your e-bike during winter, keep the battery in a cool location at roughly 50% charge. Extreme heat and cold stress lithium-ion cells, and full charge accelerates degradation during storage.
Weather protection — shielding batteries from extreme heat, cold, and moisture exposure
Your battery's plastic holder protects internal cells, but extreme conditions still degrade performance. Avoid leaving batteries in direct summer heat or freezing winter temperatures when possible. Protect batteries from moisture even though they're water-resistant.
Connector care — keeping electrical connections clean and dry to prevent corrosion
Periodically inspect all electrical connectors. Clean any corrosion with a dry cloth and ensure connections remain tight. Corroded connections create intermittent electrical issues and power loss.
Your Path to Affordable E-Biking Starts Here
The Yose Power E-Bike Conversion Kit represents a genuine breakthrough for cyclists caught between wanting electric assistance and refusing to spend $2,000 or more on a new bike. This guide has covered everything from motor wattage options and battery capacity to the genuine installation experience and honest limitations you'll face.
If you're mechanically inclined, own a sturdy bike frame you're attached to, and value affordability over convenience, the Yose Power kit opens genuine possibilities. You'll transform your commute, conquer hills that previously exhausted you, and gain authentic understanding of how e-bikes function. The satisfaction of riding a system you installed yourself creates a connection to your bike that factory-built alternatives rarely deliver.
However, if you're seeking a turnkey solution requiring zero mechanical knowledge, or if your existing bike isn't compatible with conversion kits, a factory-built e-bike might serve you better despite the substantially higher cost. Zero-frustration assembly and seamless integration matter when mechanical projects stress you.
Begin by honestly assessing your mechanical comfort level—can you handle problem-solving and multiple adjustment sessions without frustration? Confirm your bike's compatibility with Yose Power kit specifications by reviewing frame geometry, wheel size, and brake compatibility. Choose the motor wattage matching your terrain and checking whether it satisfies your regional regulations. This deliberate assessment process ensures your conversion kit investment delivers the affordable e-biking breakthrough you're seeking.
Leave a Reply